
Plugin System
EnterpriseInstall, enable, disable and remove NetStacks Controller plugins from the admin console, and see where plugin screens appear in the admin console and the Terminal.
Overview
Plugins add features to the NetStacks Controller. Each plugin is a small service packaged as a .nspkg file. When you upload it, the Controller builds the plugin's Docker image, creates a database schema for it, and lists it on the Plugins page. When you enable it, the Controller starts the plugin's container and routes requests to it under /api/plugins/<name>/.
NetStacks provides two plugins for network operations:
| Plugin | Name | What it does |
|---|---|---|
| Alert Ingestion & Pipeline | alerts | Receives alerts over HTTP, de-duplicates them, routes them with pipeline rules, hands them to AI agents for triage, and escalates through notification channels. See Alerts. |
| Incidents & ITSM | incidents | Tracks incidents with linked alerts and comments, can create incidents automatically after AI triage, and syncs with ServiceNow, Jira or a generic webhook. See Incidents & ITSM. |
You can also build your own plugin. See Building Plugins.
Requirements
- Docker on the Controller host. The Controller runs each plugin as a Docker container named
netstacks-plugin-<name>on the Controller's Docker network. If Docker isn't available, the plugin pages show “Plugin system requires Docker — ensure Docker is running and restart the controller”. - Permissions. You need access to Administration to open the Plugins page, and the
system.managepermission to upload, enable, disable, configure or uninstall plugins. See Roles & Permissions. - The plugin package. A
.nspkgfile of up to 100 MB.
The Plugins Page
In the admin console, open Administration and, under System, click Plugins (route /admin/plugins). The page lists every installed plugin for your organization and refreshes itself every 15 seconds.
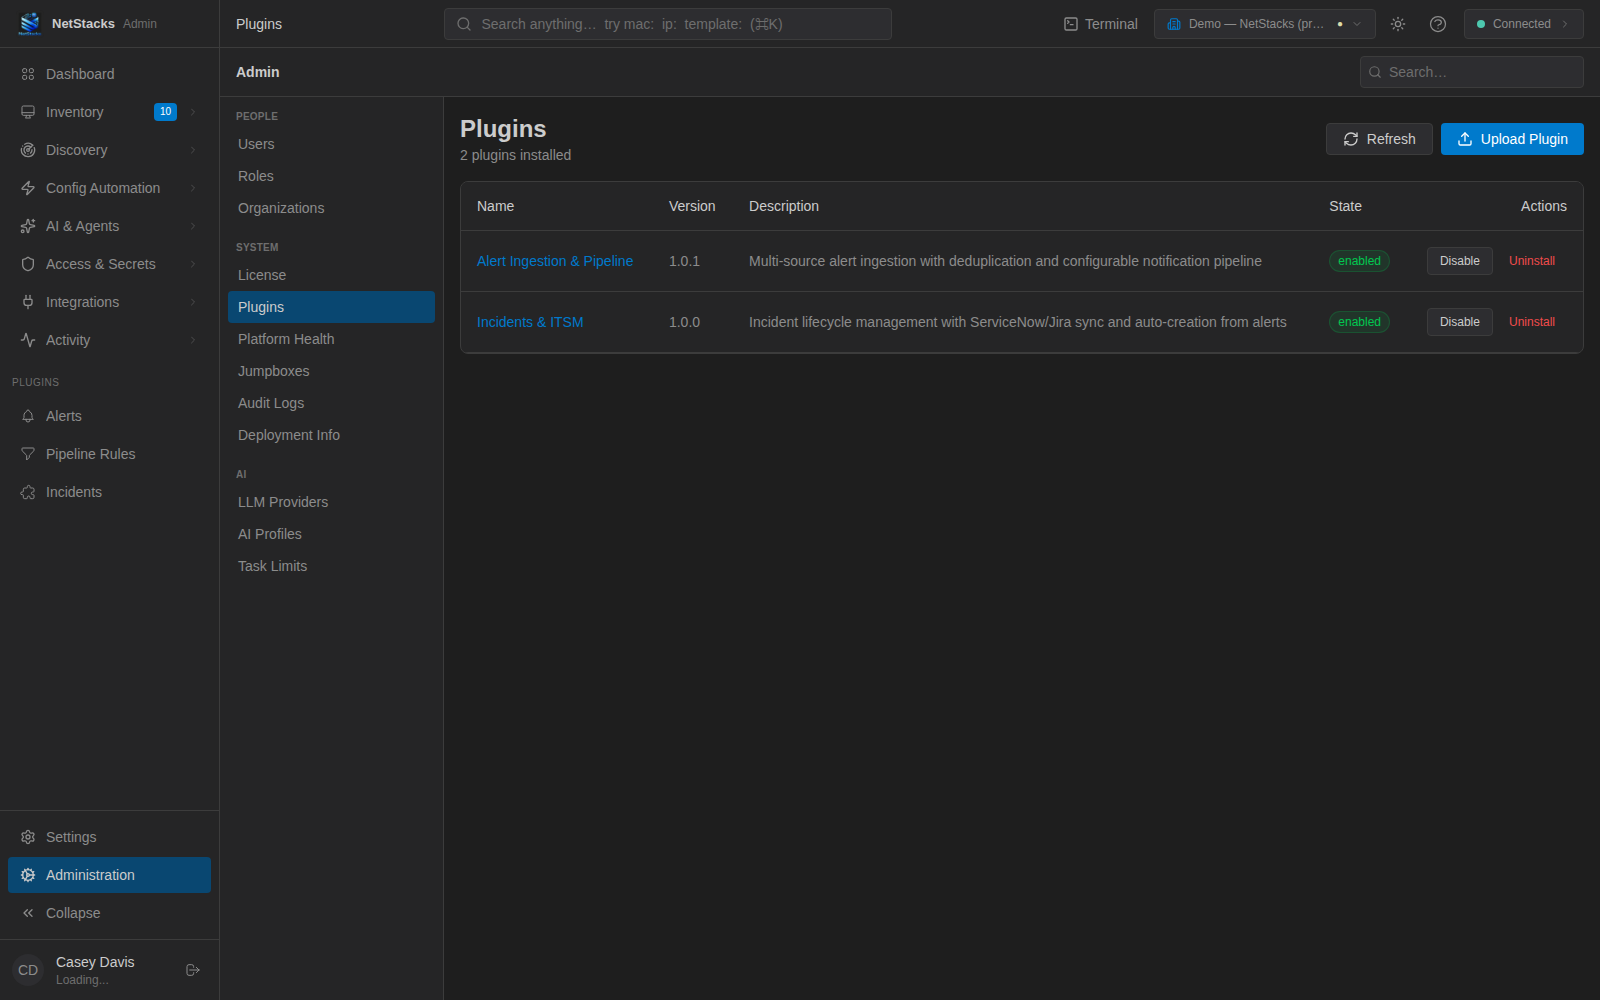
The table has these columns:
| Column | Description |
|---|---|
| Name | The plugin's display name. Click it to open the plugin detail page. |
| Version | The version from the plugin's manifest. |
| Description | A short description from the manifest. |
| State | enabled, disabled or error. |
| Actions | Enable or Disable, and Uninstall. |
Install a Plugin
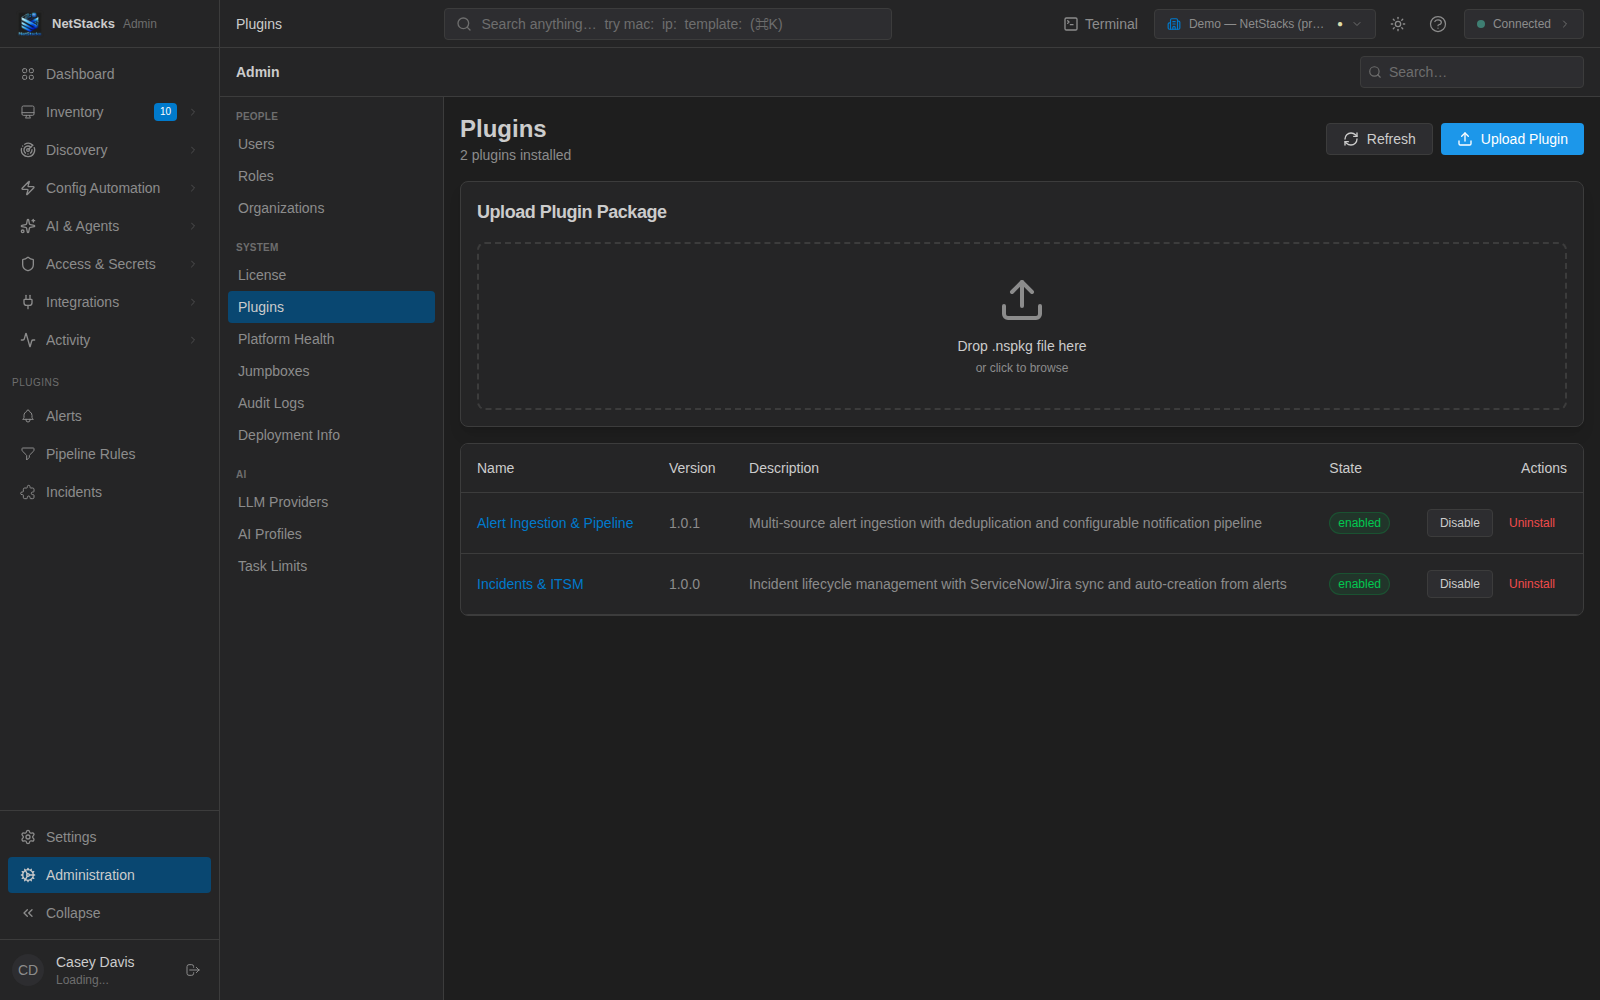
- On the Plugins page, click Upload Plugin. The Upload Plugin Package card opens.
- Drag your
.nspkgfile onto Drop .nspkg file here, or click the area to browse for it. - Wait while “Uploading plugin...” is shown. The Controller checks the package and its manifest, builds the plugin's Docker image, creates the plugin's database schema and runs its migrations.
- The plugin appears in the table in the
disabledstate. It isn't running yet — enable it to start it.
- “Invalid file type. Please upload a .nspkg file.” — only files ending in
.nspkgare accepted. - A conflict error means a plugin with the same name is already installed in your organization. To replace it, follow Update a Plugin.
- Manifest errors list the field that failed validation (for example a missing
portor an invalidversion). See the manifest reference.
Enable or Disable a Plugin
Enable
Click Enable in the plugin's row (or on its detail page). The Controller applies any pending migrations, starts the plugin container and, once it is running, sets the state to enabled. The plugin's panels then appear in the admin console sidebar and in the Terminal.
If the container can't start, the state changes to error and the detail page shows the reason (“Failed to start: …”).
Disable
Click Disable. The Controller stops the plugin's container and sets the state to disabled. The plugin's data stays in its database schema, and its panels disappear from the sidebar and the Terminal. Enable it again to resume.
When the Controller starts, it restarts the containers of all plugins that are in the enabled state. If a container is missing (for example after restoring the Controller database on a new host), the Controller rebuilds it from the stored package.
Plugin Details and Health
Click a plugin's name to open its detail page (/admin/plugins/<name>). It has Enable/Disable and Uninstall buttons and these cards:
- Plugin Information — Name, Version, Docker Image, Port, Description, Required Capabilities, Created and Updated.
- Health Status (enabled plugins only) — Container Status, Health Status, Running and Container ID. If the container's health check is failing you see “Warning: Plugin container is not healthy”.
- Settings — a form generated from the plugin's settings schema, if it has one. Plugins without a schema show “This plugin has no configurable settings.”
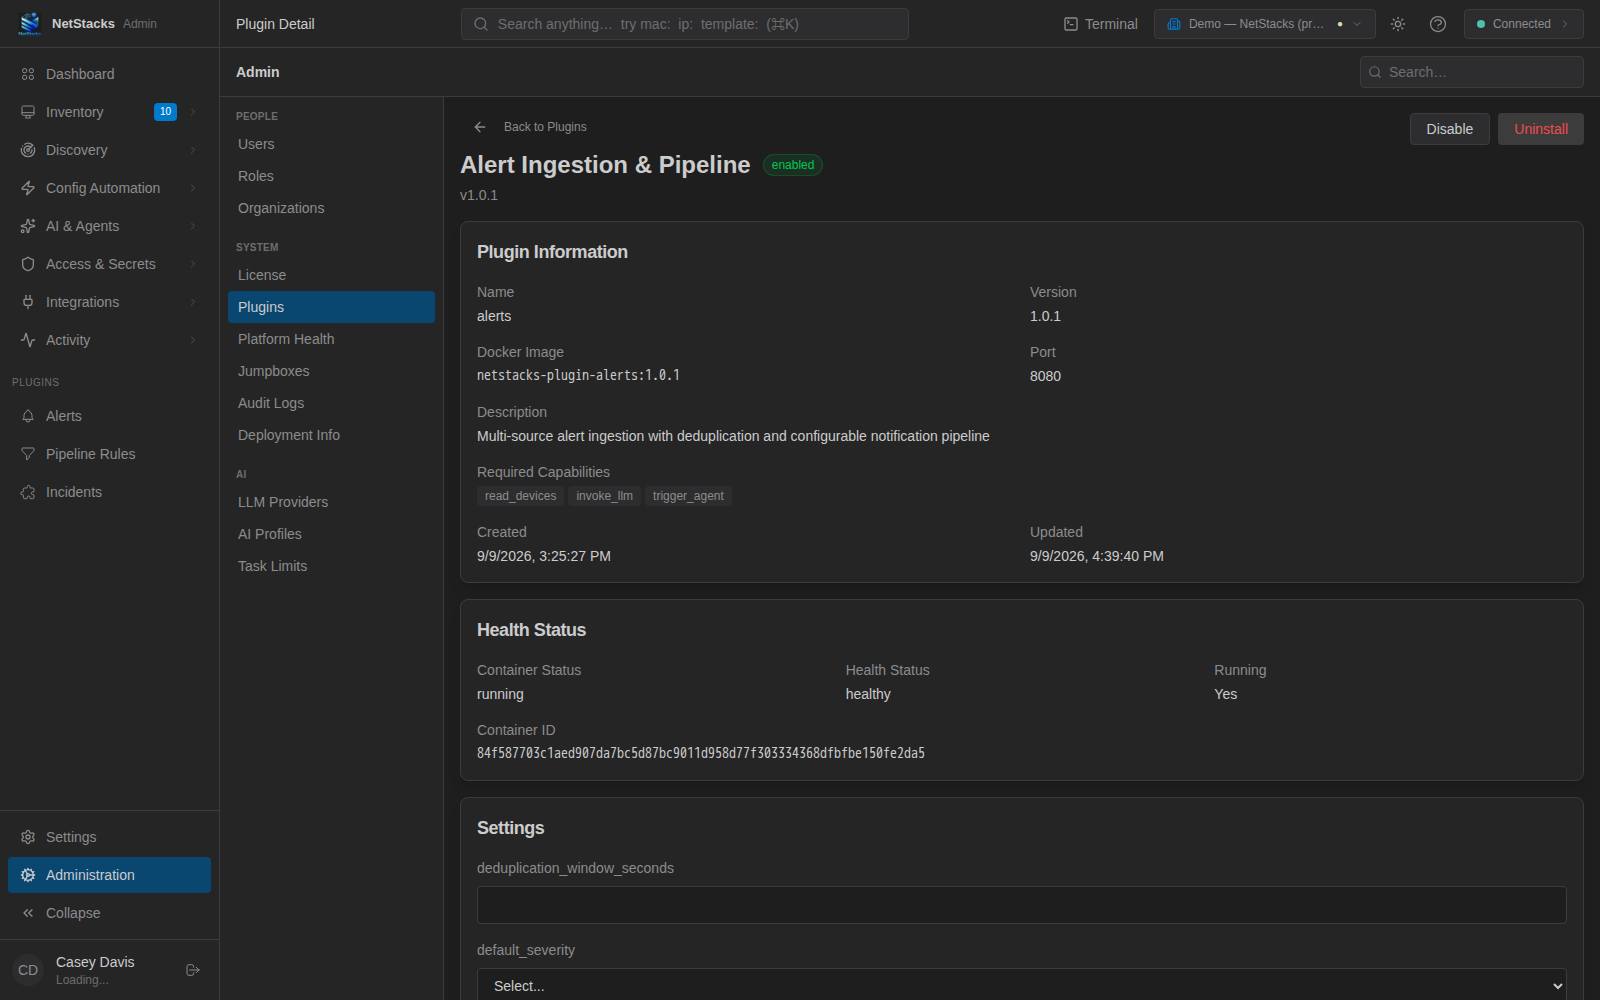
The health status is read from Docker each time you open the page.
Update a Plugin
To move to a new version of a plugin, replace it while keeping its data:
- Open the plugin's row on the Plugins page and click Uninstall. From the list page, uninstall always keeps the plugin's data.
- Click Upload Plugin and upload the new
.nspkg. - Click Enable.
The Controller tracks which migrations have already run for each plugin, so only the new version's new migration files are applied. Plugin settings are stored with the installed plugin record; re-enter them after the update if the plugin has any.
Uninstall a Plugin
- From the Plugins list: click Uninstall, then confirm in the Uninstall Plugin dialog. The container is removed and the plugin is unregistered, but its database schema and data are kept.
- From the plugin detail page: click Uninstall. The dialog has an extra checkbox, Also purge all plugin data. Select it to also delete the plugin's database schema and everything in it (for example all alerts or incidents). This can't be undone.
Where Plugin Screens Appear
A plugin declares panels in its manifest. Each enabled plugin's panels show up in two places:
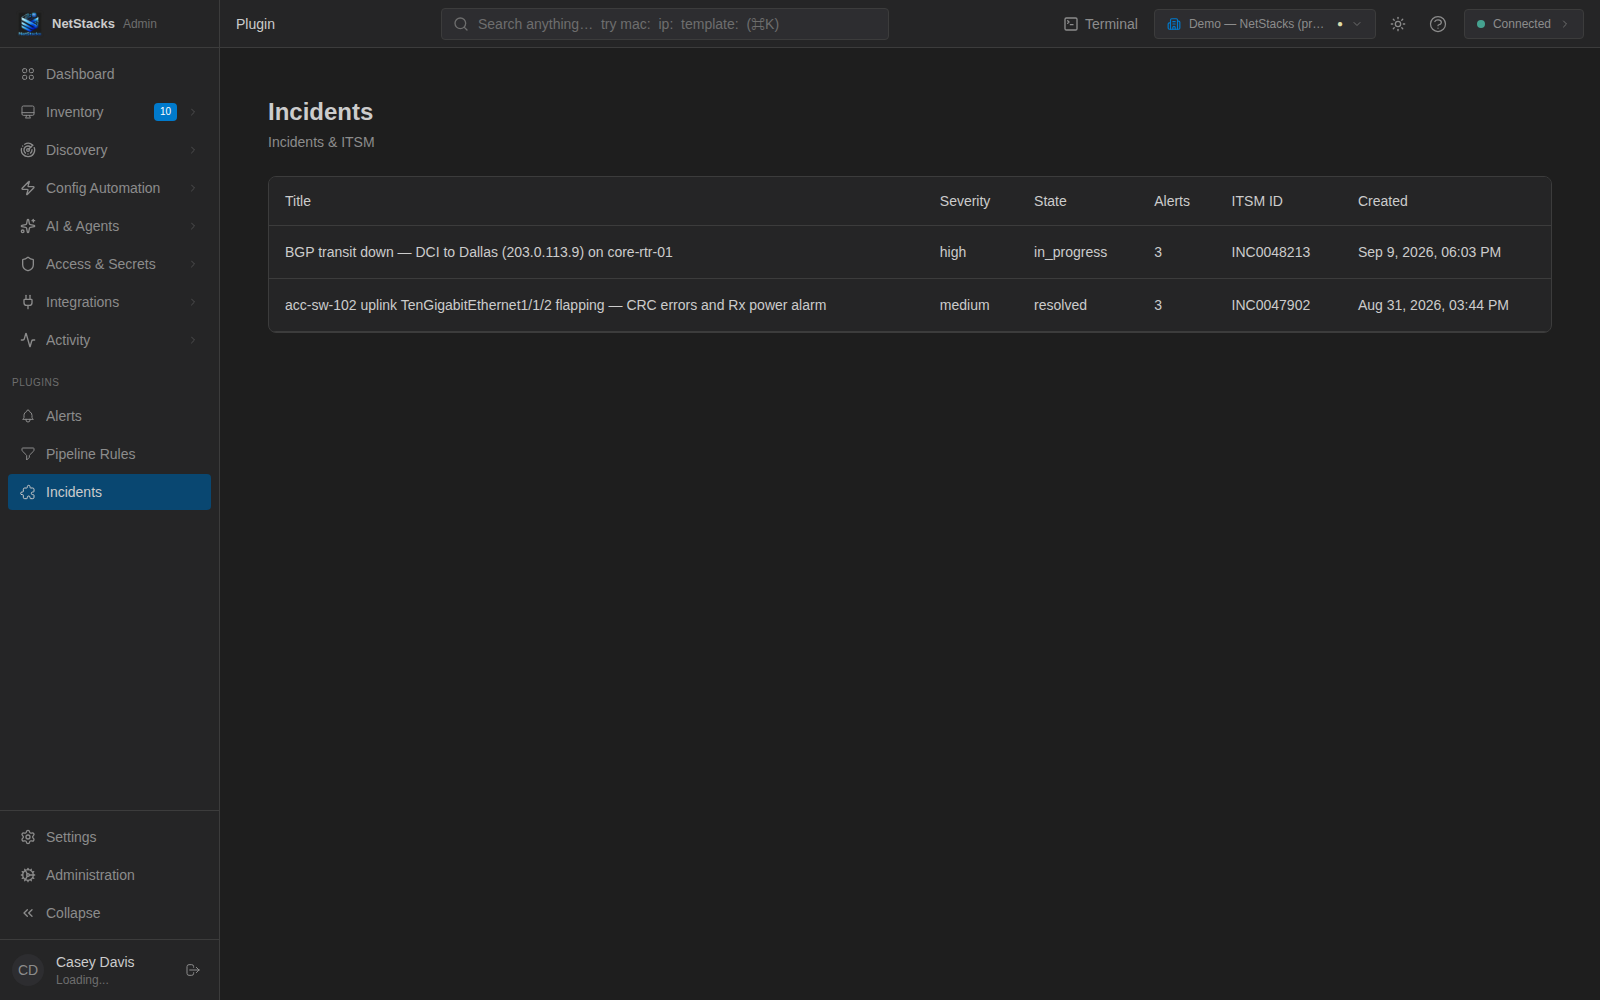
Admin console: the Plugins sidebar section
The left sidebar gets a Plugins section with one entry per panel — for the NetStacks plugins: Alerts, Pipeline Rules and Incidents. Each entry opens /plugin/<plugin>/<panel>, a read-only table of the plugin's data that refreshes automatically.
Terminal: the activity bar
In the Terminal (desktop app or the web terminal at /terminal/) connected to the Controller, each panel gets an icon in the left activity bar. The alerts plugin adds the bell icon (Alerts) and the incidents plugin adds the warning-triangle icon (Incidents). These are the full working views: you can open alert and incident details, change states, link alerts and add comments.
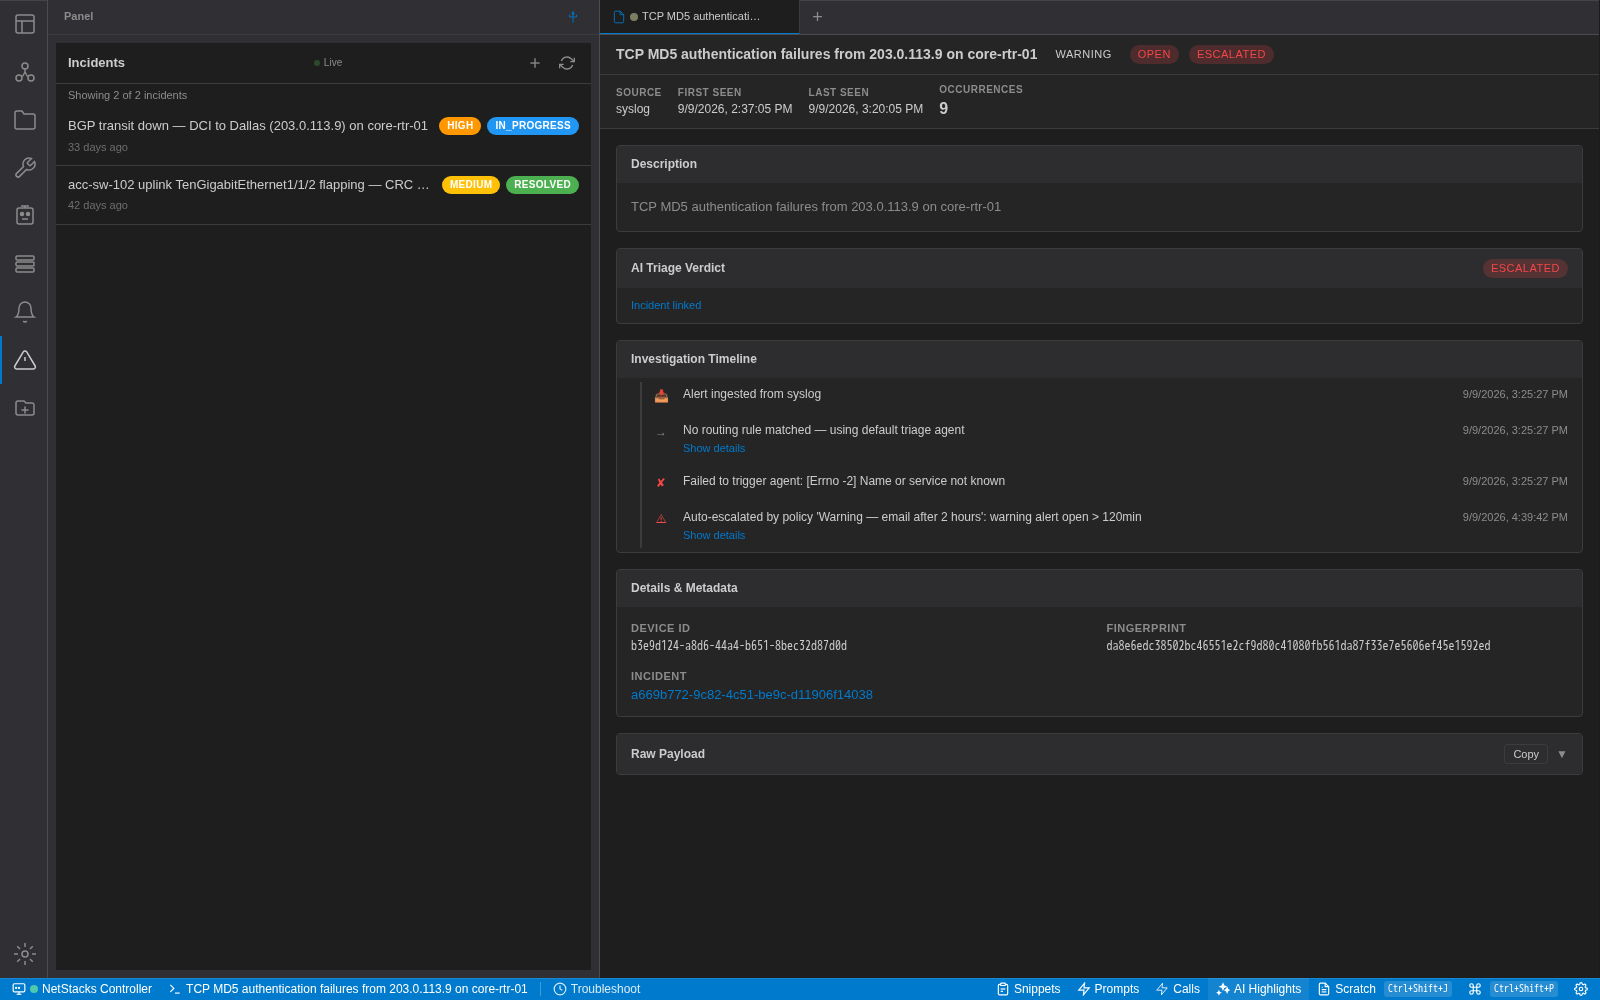
Panels from other plugins appear in the Terminal as a table, with any buttons the plugin defines.
Troubleshooting
“Plugin system requires Docker”
Docker isn't reachable from the Controller. Start Docker on the host and restart the Controller.
A plugin is in the error state
Open the plugin's detail page to read the error. Common causes are an image that failed to build or a container that exits on start. Check the container's logs on the Controller host with docker logs netstacks-plugin-<name>, fix the cause, then click Enable again.
“Plugin '<name>' not found or not enabled”
The plugin's API answered this because the plugin is disabled, or isn't installed in your current organization. Switch to the right organization or enable the plugin.
Plugin panels don't show in the Terminal
Make sure the Terminal is connected to the Controller and you are in the organization where the plugin is enabled. Panels appear only for enabled plugins.
Related Pages
- Alerts — alert ingestion, pipeline rules, AI triage and escalation.
- Incidents & ITSM — incident tracking and ServiceNow/Jira sync.
- Building Plugins — package format, manifest and the internal API.
- Roles & Permissions