
Methods of Procedure (MOPs)
Plan network changes as MOPs in the NetStacks Terminal: pre-checks, change steps, post-checks and rollback, expected-output checks, variables, target devices and AI drafting help.
Video Walkthroughs
A walkthrough of NetStacks MOPs, from building the steps to running them.
A closer look at change control: pre-checks that gate the change, changes with expected output, post-checks that prove the result, and a rollback written before anything runs.
Overview
A Method of Procedure (MOP) is a written-down network change: the commands you will run, the checks that prove the network is ready, the checks that prove the change worked, and the commands that undo it. In NetStacks a MOP is a plan you build once in the Terminal and then run against one or many devices, step by step or phase by phase, with every command's output recorded.
A MOP has four sections of steps:
- Pre-Checks — read-only commands that confirm the starting state (for example
show vlan briefbefore adding a VLAN). - Changes — the configuration commands that make the change.
- Post-Checks — read-only commands that confirm the change worked.
- Rollback — the commands that put things back. They only run when you ask for a rollback.
This page covers building a MOP. Running it is covered in Running a MOP, and the optional sign-off workflow on a Controller in MOP Review & Approval.
Where MOPs Live
MOPs are built and run in the NetStacks Terminal. Both modes support them:
| Mode | Where the MOP is stored | What it runs against |
|---|---|---|
| Standalone Terminal | The local NetStacks agent on your computer | Your saved sessions |
Connected to a Controller (desktop app or the web terminal at /terminal/) | The Controller, shared with your organization | Devices in the Controller inventory |
When the Terminal is connected to a Controller, you need the mops.manage permission to see the Changes view. The Controller's admin console also lists MOPs under Config Automation → MOPs(/automation/mops), but that page is for reviewing and approving them; it does not have a step editor. See MOP Review & Approval.
The Changes Panel
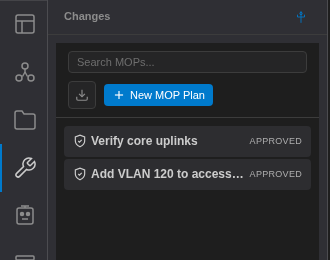
Click the wrench icon (Changes) in the Terminal's activity bar. The panel lists your MOPs with a search box (Search MOPs...), an import button, and New MOP Plan.
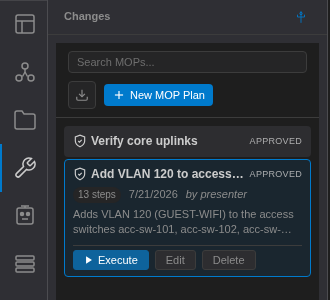
Click a MOP to expand it. The card shows the step count, date, author and description, and the buttons Execute, Edit and Delete. Double-click a MOP to open it in a tab.
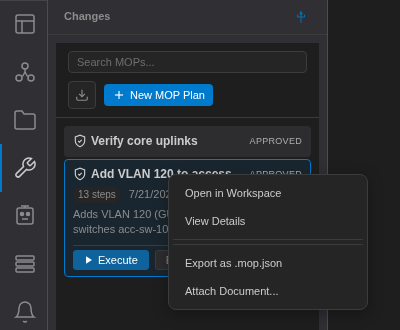
Right-click a MOP for more options: Open in Workspace, View Details, Export as .mop.json and Attach Document....
Create a MOP
- Open Changes and click New MOP Plan (or run New MOP from the command palette). A new tab called New MOP opens.
- Double-click the title to rename the MOP. Fill in the header fields: Risk (None, Low, Medium, High, Critical), Change Ticket (for example
CHG-12345) and Tags (comma-separated). - On the Plan tab, add a Description and your steps (see below).
- On the Devices tab, pick the devices the MOP will run on.
Changes save automatically about three seconds after your last edit; the header shows Saved when everything is stored. You can also press Ctrl+S (Cmd+S on macOS).
Every MOP tab has the same sub-tabs: Devices, Plan, Execute, Review and, when connected to a Controller, History.
The Plan Tab
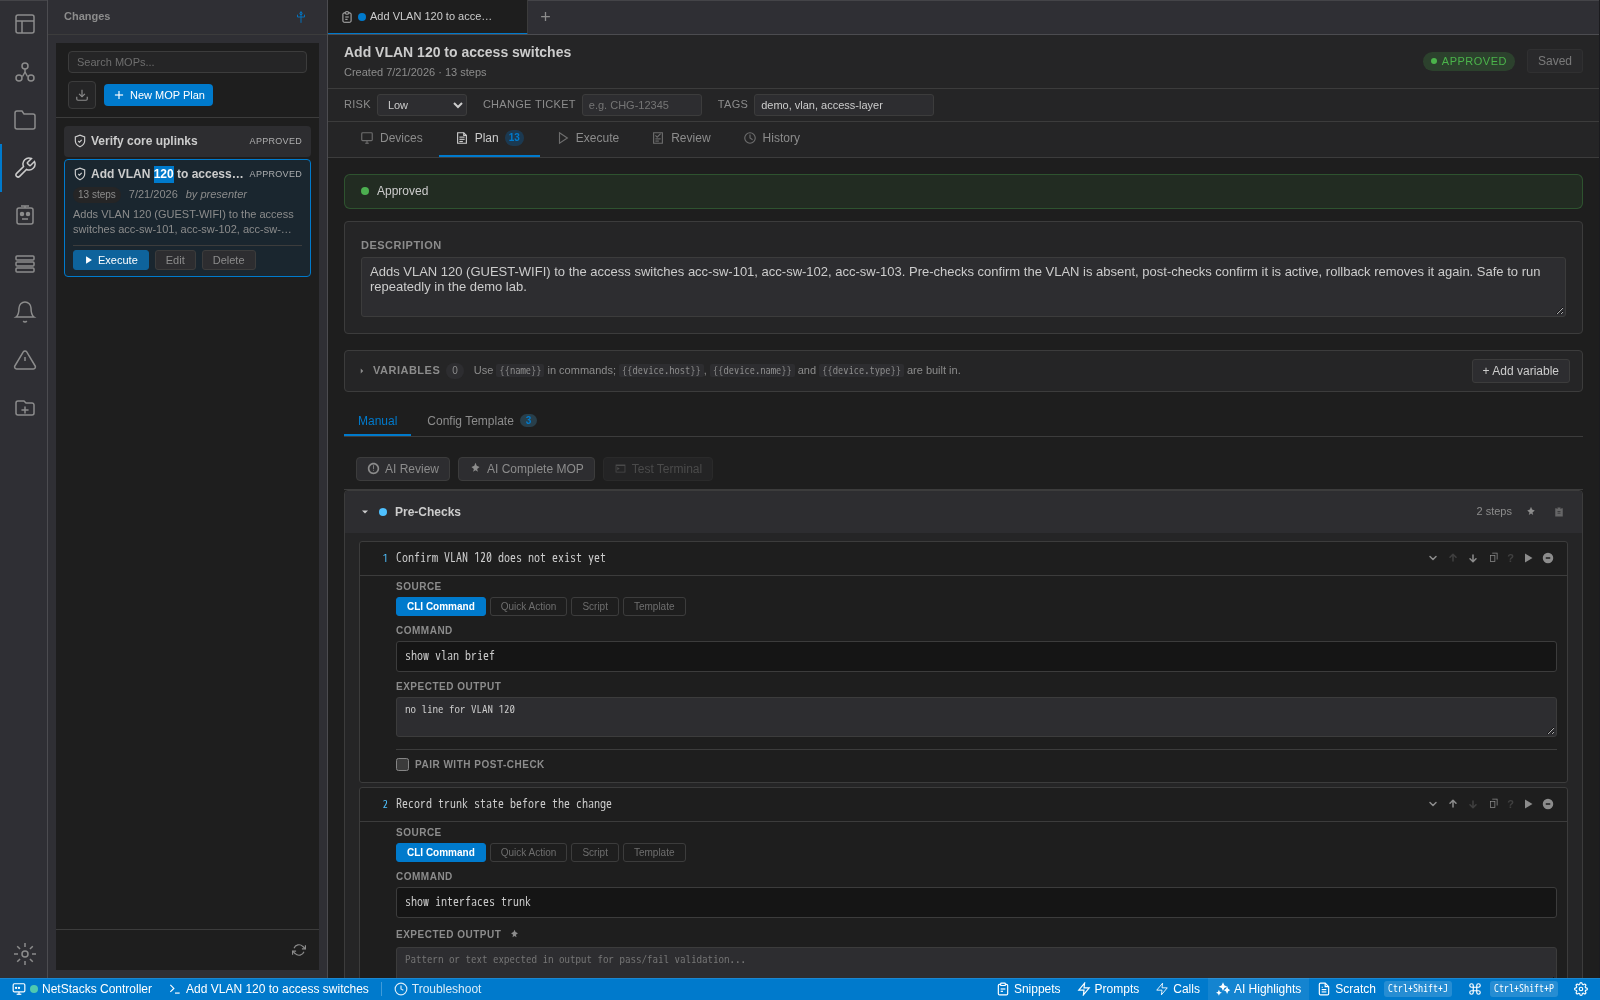
The Plan tab is where you write the procedure. From top to bottom it has the description, the Variables card, a toolbar (AI Review, AI Complete MOP, Test Terminal) and the four step sections. When the Terminal is connected to a Controller, a status bar at the top shows the MOP's review status (Draft, Pending Review, Approved or Rejected).
Pre-Checks, Changes, Post-Checks, Rollback
Each section header shows its step count. Click a header to collapse or expand it. Use Add Step at the bottom of a section to add a step to it.
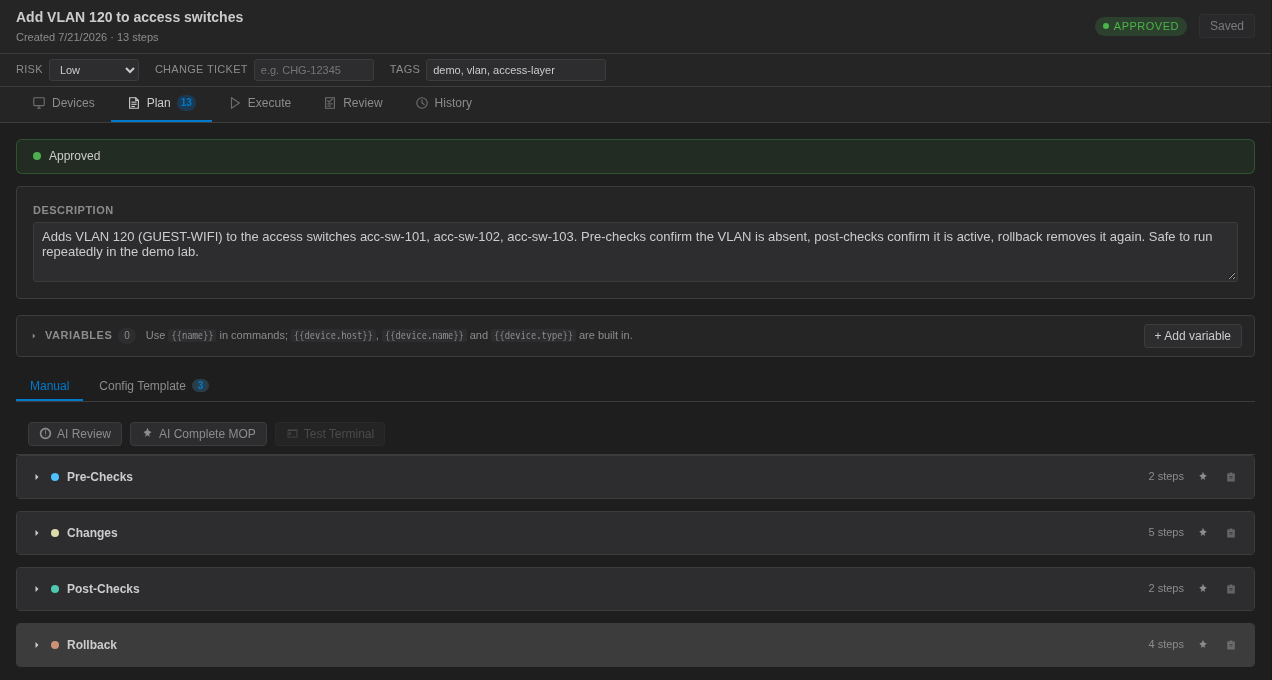
When you run the MOP, the sections run in this order:
- Pre-Checks
- Changes
- Post-Checks
Rollback steps are kept aside and run only when you choose to roll back (see Rollback).
Step Fields
Each step has a one-line description (shown in the step header) and an expandable body.
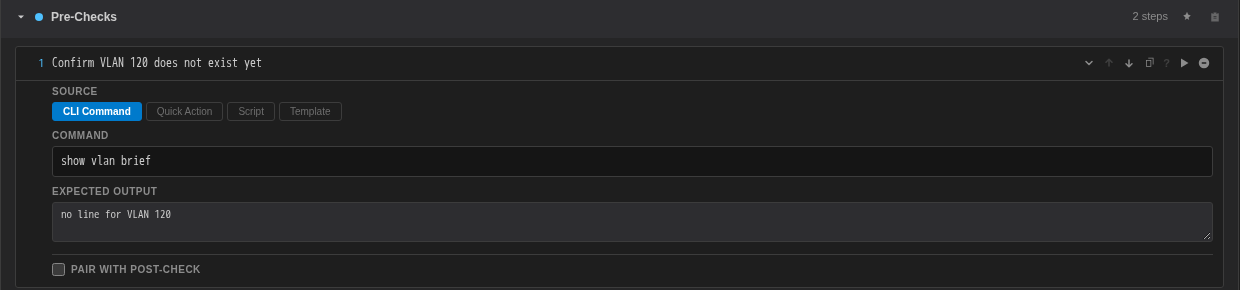
| Field | What it does |
|---|---|
| Source | What the step runs. CLI Command sends a command to the device. In standalone mode you can also pick a Quick Action (a saved API call, see Quick Calls) or a Script (see Scripts). |
| Command | The command to send, for example show vlan brief. |
| Expected Output | What the output should (or should not) contain. See the next section. |
| Pair With Post-Check / Pair With Pre-Check | Links a pre-check to the post-check that repeats it, so the Review tab can show the before and after output side by side. |
The icons on the right of each step header:
- Expand details / Collapse
- Move up and Move down
- Duplicate
- Explain this command (
?) — asks the AI what the command does - Run in test terminal (▶)
- Remove step
Expected Output Checks
Write one check per line in Expected Output. These prefixes are evaluated against the step's output:
| Line | The step passes when… |
|---|---|
CONTAINS: text | the output contains text |
NOT_CONTAINS: text | the output does not contain text |
REGEX: pattern | the regular expression matches somewhere in the output |
Any other line is treated as a note: it is shown next to the result but never fails the step. For example:
CONTAINS: line protocol is up
NOT_CONTAINS: % Invalid input
REGEX: BGP state = (Established|Idle)
Checks are evaluated when the MOP runs in standalone mode. Failed checks show up on the step in the Execute tab.
Variables
Variables let one plan target many devices with different values. Use {{name}} in a command and declare name in the Variables card with + Add variable. Each variable has a Name, a Default, a Description and a Required flag. Per-device values are set on the Devices tab.
Three variables are built in: {{device.host}}, {{device.name}} and {{device.type}}.

If a step uses a placeholder you have not declared, the card lists it under Used but not declared. A MOP with unresolved required variables cannot be started until you fix them.
interface {{uplink}}
 description Uplink to {{device.name}}
Pasting Config as Steps
To turn a block of config into steps, click Paste config lines as steps in a section header. Paste the commands, one per line, then click Add as Steps. Parse with AI does the same but also writes a description for each step.
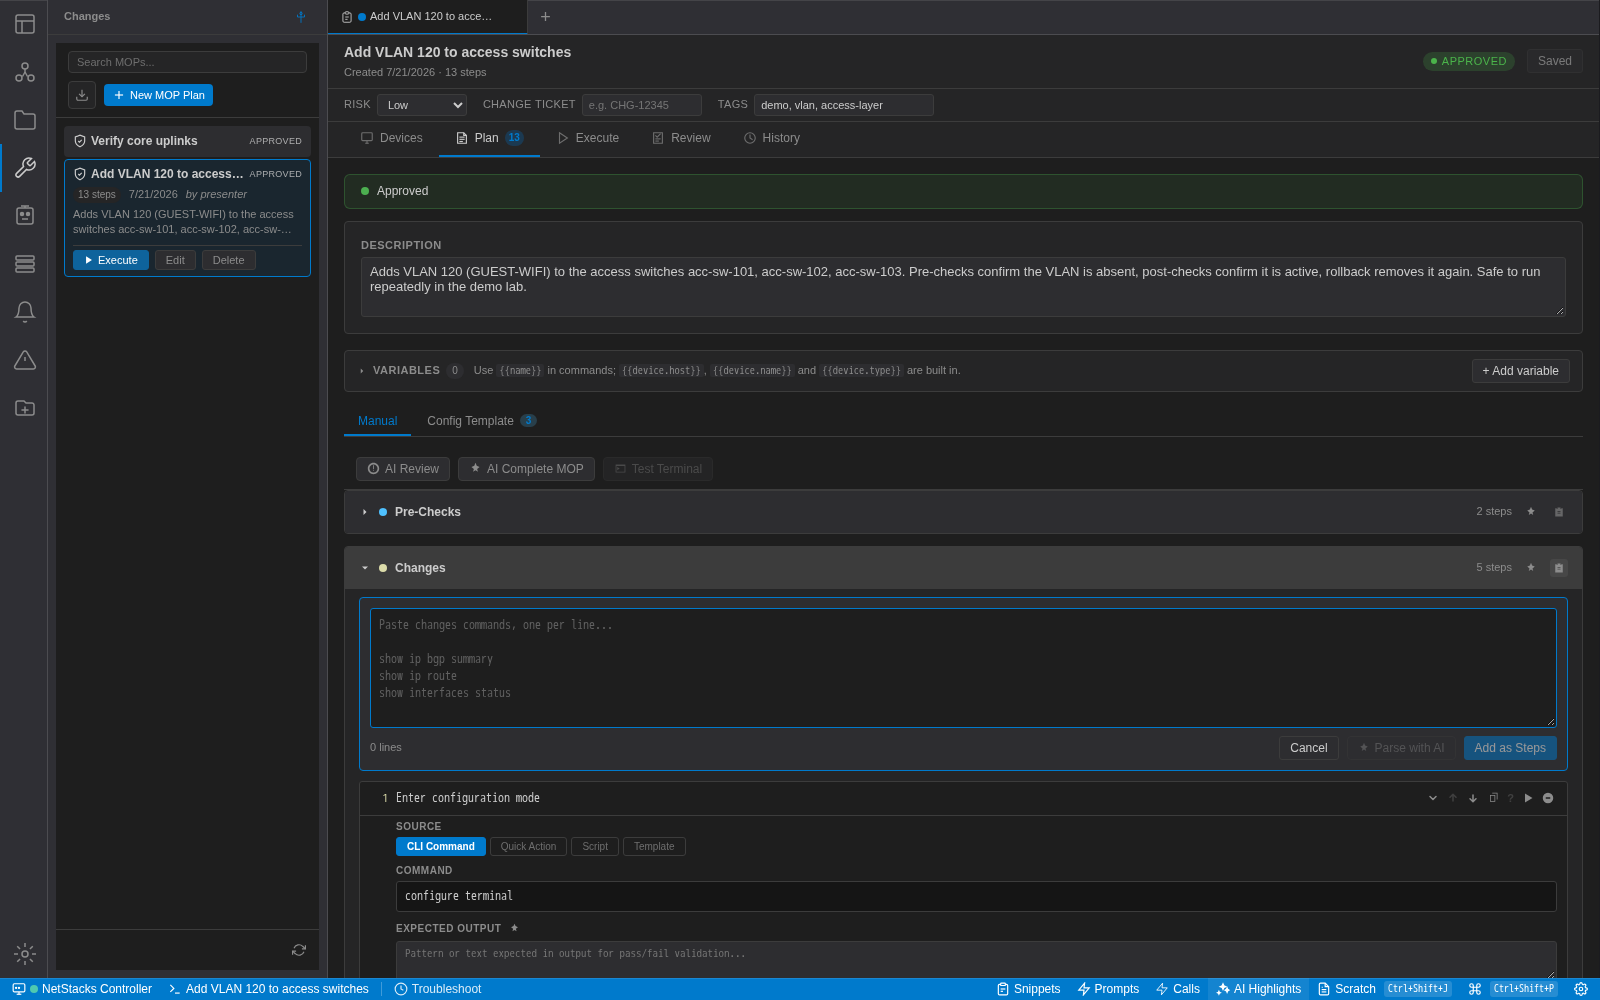
Test Terminal
Test Terminal opens a panel where you can run a command on one of the MOP's devices while you write the plan. Select at least one device on the Devices tab first. Pick the device, type a command and press Enter(Shift+Enter adds a new line). You can copy the output into the selected step's expected output, or select part of it to add a check.
AI Help While Planning
If an AI provider is configured, the Plan tab can draft and check the procedure for you. Nothing the AI suggests runs on a device until you execute the MOP.
| Button | What it does |
|---|---|
| AI Review | Reviews the whole MOP for completeness and potential issues. |
| AI Complete MOP | Writes pre-checks, post-checks and rollback steps from your change steps. |
| ★ on a section header (AI suggest steps for this section) | Suggests steps for that section. |
| Fill All Descriptions | Writes descriptions for every step that is missing one. |
| ★ next to Expected Output | Writes checks for the step, such as CONTAINS: Established or NOT_CONTAINS: % Invalid input. |
Explain this command (?) | Explains a single command. |
You can also ask the AI assistant in the side panel to create a MOP for you. It can create, list, open and export MOPs. See AI Chat.
The Devices Tab
Pick the devices the MOP will run on. When connected to a Controller the list shows Controller inventory devices with their type and site. In standalone mode it shows your saved sessions. Use the search box (Search devices by name, host, site...) and Select All to pick devices quickly.
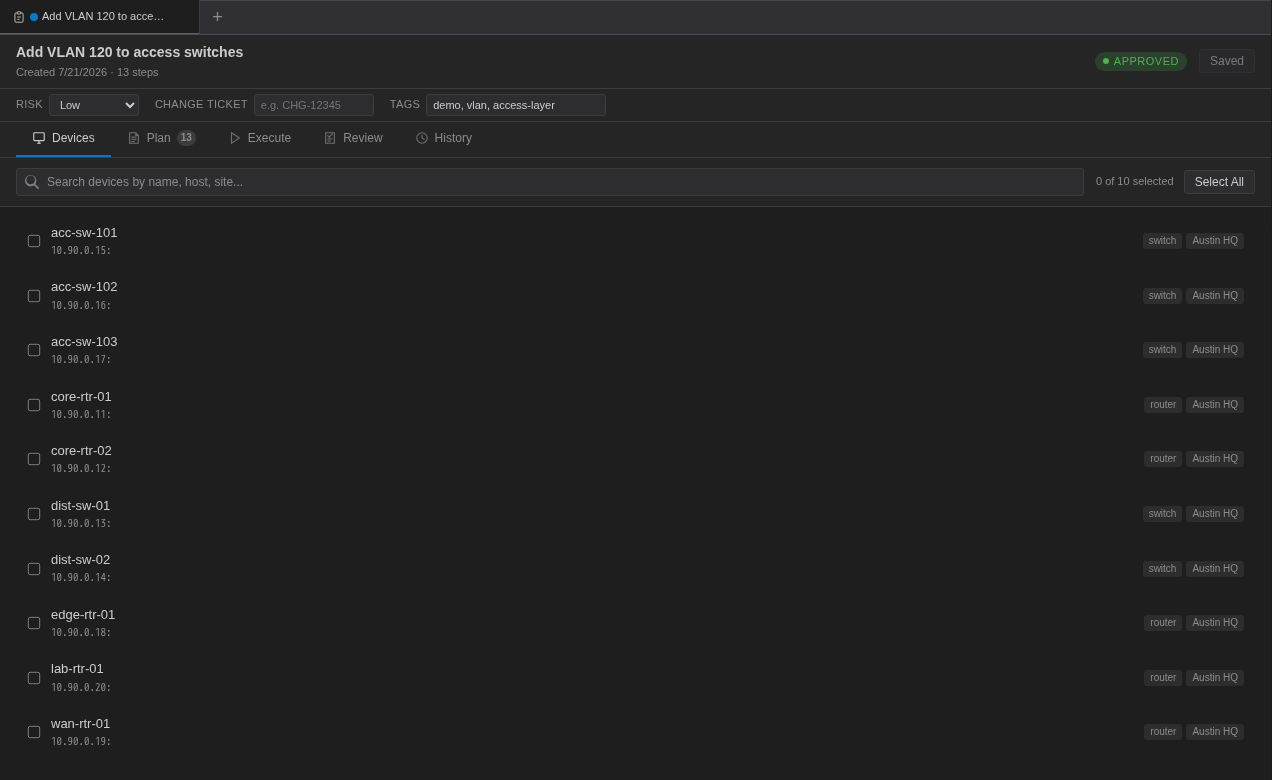
Once devices are selected, the tab also shows:
- Step Assignment — a grid of devices against steps. Click a cell to choose which steps run on which device.
- Per-device variable values, if the plan declares variables.
- With a Controller, a credential override for each device (default: Default Profile).
Import, Export and Documents
- Export as .mop.json (right-click a MOP) saves the whole plan as a file you can share.
- The import button in the Changes panel (Import MOP from .mop.json) loads one back. The panel's menu also has Import from Docs... to load a MOP saved in Documents.
- Attach Document... links a document (for example a design note) to the MOP.
- The Review tab can generate a MOP document from the plan and its results. See Review tab.
Tips
- Write the rollback before you run anything. Rollback steps are ordinary steps, so you can test them in the Test Terminal too.
- Pair each important pre-check with a post-check (for example
show vlan briefbefore and after) so the Review tab can show the difference. - Use
NOT_CONTAINS: % Invalid input(or your platform's error marker) on change steps so a rejected command fails the step instead of passing silently. - Keep change tickets and tags filled in; they appear on the MOP everywhere it is listed.