
AI Assistant Panel
Open and use the NetStacks AI assistant: the docked panel, full chat tab and pop-out window, the input bar selectors, tool-call results, approvals and chat history.
Video Walkthrough
A walkthrough of the assistant working from live terminal context — diagnosing a down interface from the output on screen and the provider settings behind it.
Overview
The AI assistant is a chat panel built into NetStacks Terminal. It is an agent: besides answering questions it can call tools — list and open your saved sessions, read terminal scrollback, run show commands in an open terminal tab, search your documents, look up OUI/DNS/WHOIS/ASN data, work with topologies and MOPs, and more. What it is allowed to do is controlled by the mode and permission selectors and by the safety layers described on their own pages.
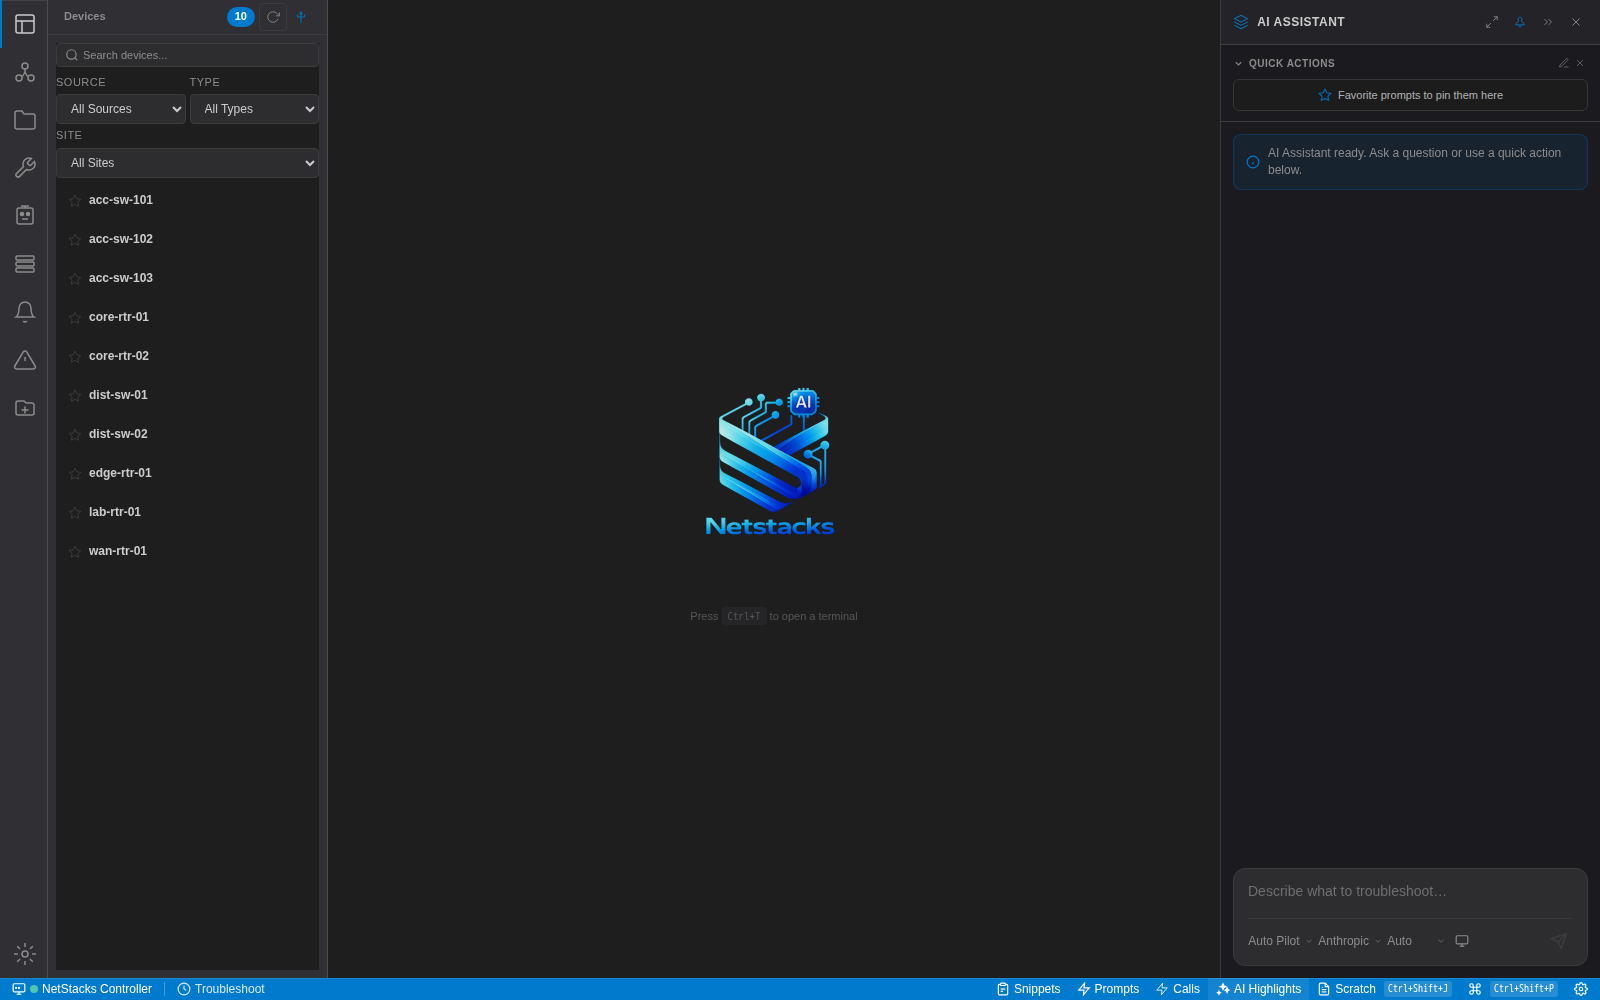
The panel is docked on the right of the window by default. The same assistant can also be opened as a full-width chat tab or popped out into its own window.
Requirements
- Standalone Terminal: add an AI provider and model in Settings → AI (or in the first-run Setup Wizard). Requests go from your computer directly to that provider. See AI Providers & Models.
- Enterprise (connected to a Controller, or the web terminal): nothing to configure locally. Your Controller administrator sets up the LLM providers and the Controller relays AI requests.
If no provider is configured, the panel shows: "No AI provider is configured yet. Open Settings → AI (Ctrl+,) to add a provider and model, then come back here."
Opening the Assistant
- Press Cmd+I (macOS) / Ctrl+I (Windows/Linux) — action AI Assistant. If a terminal tab is active, that terminal becomes the assistant's focus session.
- Press Cmd/Ctrl+J — Toggle AI Chat Panel.
- Press Cmd/Ctrl+Shift+A — AI: Open Chat Tab opens the assistant as a full editor tab.
- From the command palette (Cmd/Ctrl+Shift+P): AI: Open Chat or AI: Open Chat Tab.
The panel title is the name of your AI Engineer profile, or AI Assistant if none is set (see AI Engineer Profile). While it works, a status chip next to the title reads Analyzing..., Running..., Needs Approval or Error.
Panel Layout
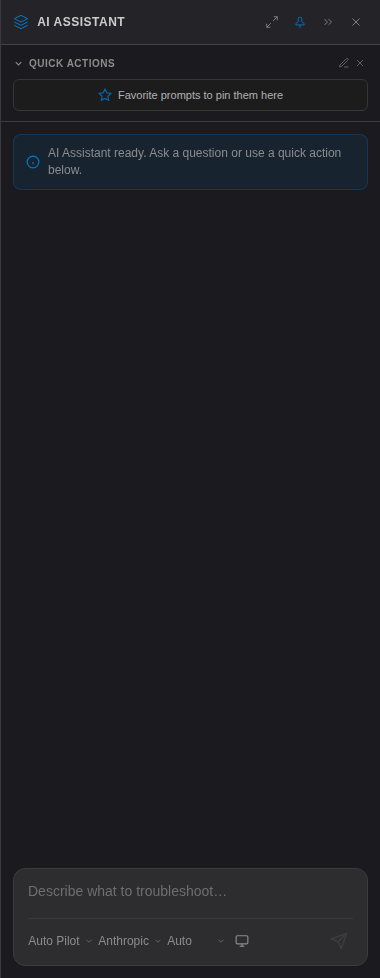
From top to bottom: the header, the Quick Actions section (your favourite prompts, see Quick Prompts), the message area, and the input bar. The docked panel is 380 px wide by default and can be resized by dragging its edge.
Header Buttons
| Button (tooltip) | What it does |
|---|---|
| Token counter (clock icon) | Appears after the first request. Hover for In / Out / Requests; Reset token counter clears it. |
| Promote to background task | Opens Promote to Background Task to hand the conversation to a background agent. See AI Agents. |
| Chat history | Lists saved conversations; each has a Delete conversation button. |
| New chat | Starts an empty conversation. |
| Open as a full chat tab / Dock to side panel | Switches between the docked panel and a full editor tab. |
| Pop out into its own window | Shown in the chat tab. Opens the chat in a separate window (desktop) or browser window (web terminal). |
| Pin (stay open) / Unpin (auto-collapse) | When unpinned, the panel collapses to a small "AI" tab when focus moves away. |
| Collapse (Esc), Close | Collapse or close the panel. |
Promote, Chat history and New chat appear once the conversation has more than one message.
Input Bar and Selectors
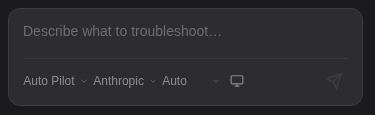
Type in the box (placeholder Describe what to troubleshoot…). Enter sends, Shift+Enter adds a new line. The expand icon (Expand to edit a large prompt) opens a larger Edit prompt editor. Below the text box are four selectors:
- Mode — Auto Pilot or Overlord (names can be changed in Settings). Changing the mode resets the permission to that mode's default.
- Provider — the configured providers (Anthropic, OpenAI, OpenRouter, Ollama, LiteLLM, Custom). Shows No AI if none is configured. In enterprise mode the list shows the Controller's providers, and the Controller decides which provider serves the request.
- Permission — Ask, Auto or Go Nuts. Go Nuts is highlighted as a warning.
- Session (monitor icon) — the terminal session the assistant focuses on. Shows "No sessions" when nothing is connected.
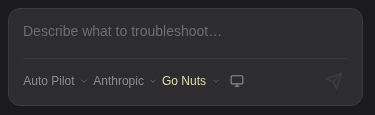
The send button becomes Stop generating while the assistant works. There is no model picker in the panel: the model comes from Settings (standalone) or from the Controller (enterprise). Mode and permission behaviour is explained in Modes & Permissions.
Messages, Tool Calls and Approvals
- Tool calls appear as collapsible rows. A successful call shows a green check and stays collapsed ("Click to show the result"); a failed call shows a red ✕ and opens automatically ("Tool call failed — click for details").
- Approvals (in Ask permission): an Approval Required box lists the pending commands with their session. Click Approve (or Approve All) or Reject. Rejecting skips every pending action from that turn.
- Right-click a message for Copy Message, Copy as Markdown, Copy Command and Copy Output.
Commands the assistant runs with run_command are typed into your open terminal tab, so you see them execute exactly as if you had typed them.
Asking Your First Question
- Connect to a device in a terminal tab.
- Press Cmd/Ctrl+I. The panel opens with that terminal selected in the Session selector.
- Leave the permission on Ask if you want to approve each command before it is typed into your session.
- Type a request such as "Check why Gi0/1 is down and summarise what you find" and press Enter.
- Approve or reject the proposed commands. The assistant reads the output from the terminal and continues until it can answer.
show, display, ping, traceroute…) unless you temporarily turn on AI Configuration Mode.What the Assistant Can Do
The tools offered to the assistant are grouped by category in Settings → AI → AI TOOLS, where you can switch any of them off per mode. The main groups are:
| Category | Examples |
|---|---|
| Core Session Tools | List and open saved sessions, read terminal scrollback, run commands in an open tab, run commands over a background SSH connection |
| Document Tools | List, read, search and save documents |
| Network Lookups | OUI, DNS, WHOIS and ASN lookups |
| Neighbor Discovery, Topology Enrichment | Discover CDP/LLDP neighbours and add them to the active topology; write device details onto topology devices |
| Change Control, MOP Management | Analyse a change diff, suggest pre-checks, validate results; create, list and export MOPs |
| NetBox / LibreNMS / NetStacks-Crawler Integration | Query configured sources and import topology (LibreNMS and Crawler sources: standalone) |
| AI Memory, Background Agents, Integrations | Save and recall memories, start background agent tasks, call your API Resources |
| Bash / Shell, Remote File Operations, OOB Console | Local shell commands (Auto Pilot only), editing files on hosts (when AI Terminal Mode is on), console tabs (off by default) |
When a topology tab is active the assistant also gets topology tools (query, path, analyse, annotate, highlight, export). In enterprise mode the Controller adds its own tools, such as knowledge-base search and the network knowledge graph (see Knowledge Base). In standalone mode, tools from your MCP servers are added too.
Other Ways to Reach the AI
- Terminal right-click → Ask AI, AI: Explain, AI: Fix/Debug, AI: Suggest — small floating chats seeded with your selection, each with Continue in panel. See Inline AI.
- Prompts in the status bar — send a saved prompt in one click (Quick Prompts).
- AI Highlights — click a flagged line in the terminal to discuss it (AI Highlights).
- Topology right-click items such as Discuss this topology with AI, AI: Analyze Device and Ask AI about this link open the panel with a prepared prompt.
These floating chats and popups run tool calls without the approval box, so use the docked panel with Ask permission when you want to review every command first.
Chat History
Conversations are saved automatically (titled from the first message) and the last one reopens when you open the panel again. In standalone mode they are stored by the local agent on your computer; in enterprise mode they are stored per user on the Controller. Use Chat history to reopen or delete a conversation and New chat to start fresh.
Only the most recent messages are sent to the model on each turn — see Max Conversation Messages in Context & Memory.
Keyboard Shortcuts
| Action | macOS | Windows / Linux |
|---|---|---|
| AI Assistant | Cmd+I | Ctrl+I |
| Toggle AI Chat Panel | Cmd+J | Ctrl+J |
| AI: Open Chat Tab | Cmd+Shift+A | Ctrl+Shift+A |
| Send / new line | Enter / Shift+Enter | |
Shortcuts can be changed in Settings → Keyboard (category "AI"). Inside a code editor, Cmd/Ctrl+I triggers the inline AI edit instead.
Troubleshooting
- "No AI provider is configured yet" — add a provider and model in Settings → AI (standalone) or ask your Controller administrator (enterprise).
- "Vault is locked" (standalone) — API keys live in the local vault; unlock it and retry.
- "Command rejected by read-only filter" — the assistant tried a command that is not read-only. See Safety & AI Configuration Mode.
- The assistant can't see my terminal — pick the session in the Session selector, and make sure Live Workspace Context is on.
- "Rate limited by AI provider" — the provider returned HTTP 429; wait or use a different provider/model.