
Quick Calls (Saved API Requests)
Quick Calls are saved HTTP requests against your API Resources (NetBox, LibreNMS, any REST API) that you can run from the status bar in one click.
Overview
A Quick Call is a method and path (for example GET /dcim/devices/) sent to an API Resource — a saved base URL plus authentication. A request can include headers, a body, {{variable}} placeholders and a JSON extract path that pulls one value out of the response.
Quick Calls are available in the standalone Terminal and when connected to a NetStacks Controller. Where you create them differs by mode (see below); running them works the same way.
Run a Quick Call
- Click Calls in the status bar.
- Type in Search quick calls... to filter the list.
- Click the call you want to run.
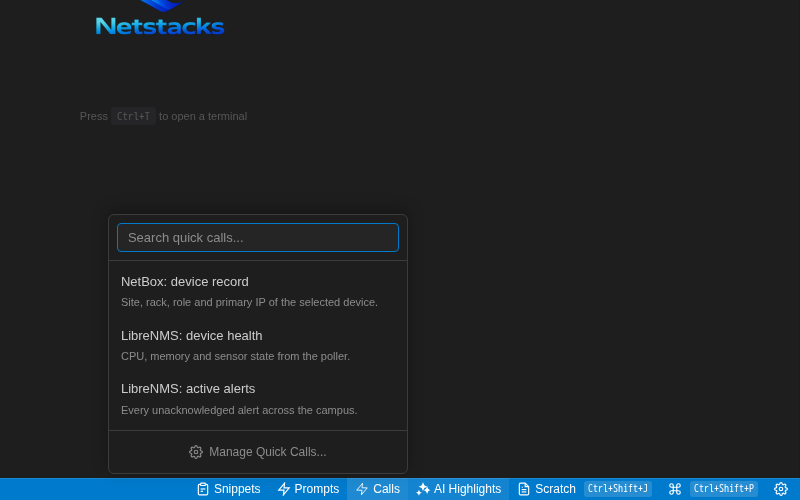
The Calls menu lists each saved request with its description.
Requests with Variables
If the request contains {{name}} placeholders (for example /dcim/devices/?name={{hostname}}), a dialog asks for each value first. Each field is labelled "Value for <name>"; click Run to send the request or Cancel to stop.
Results
When the call finishes, a notification shows the extracted value (or the response). It can offer two actions:
- Open in tab — opens the full response in an
API: <name>tab. - Connect to <name> — shown when the extracted value matches the name or host of one of your saved sessions, so you can jump straight to that device.
Create Quick Calls (Standalone)
In the standalone Terminal, API Resources and saved requests live in the API section of the Workspaces sidebar. (Screenshots are not shown here because this section is part of the standalone app.)
- Open the Workspaces sidebar and find the API section. With nothing set up it reads "No API resources yet." Click + Add API resource and enter the base URL and authentication for your system (NetBox, LibreNMS, an IPAM, and so on).
- On the resource, click New request (or choose it from the resource's More menu). A request tab opens.
- Choose the method and enter the path, for example
/api/v1/endpoint?limit={{limit}}. Add headers (as JSON) and a body if needed. - Optionally set a JSON extract path such as
results[0].nameto pull one value out of the response. - Click send (⌘/Ctrl+Enter) to test it and inspect the response.
- Click save (⌘/Ctrl+S). In the Save request dialog, enter a Name (for example "Get device by name"), an optional Description, and an optional Category ("groups requests in Quick Calls").
The saved request now appears in the status-bar Calls menu.
Share & Import Requests
You can export saved requests to a JSON file and import them on another machine. Use Share all requests… or Import requests… from a resource's menu, Share… / Copy as JSON on a single request, or select several requests and choose Share N selected….
Create Quick Calls (Controller) Enterprise
When the Terminal is connected to a NetStacks Controller, saved requests are managed in the admin console under Config Automation → API Actions. The page is headed Quick Actions ("Configure reusable API calls that can be executed with a single click").
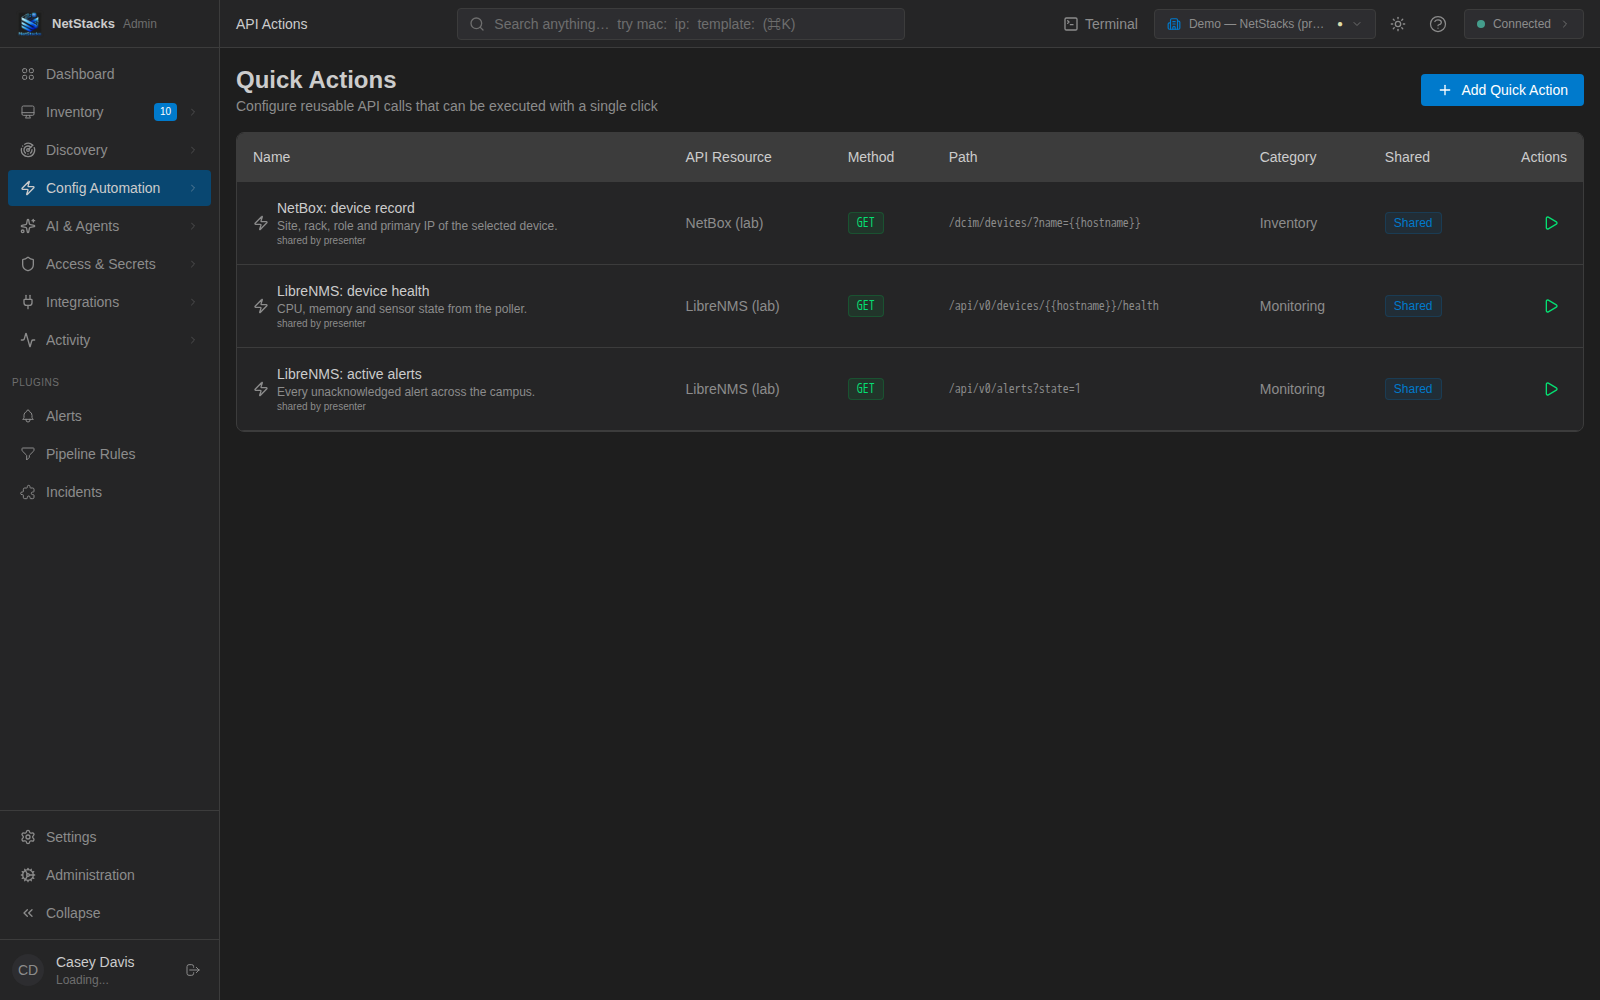
The API Actions page. Each row shows its API Resource, Method, Path, Category and whether it is Shared with your organization; the ▷ button runs it.
- Make sure the API Resource exists under Integrations → API Resources.
- On API Actions, click Add Quick Action, pick the resource, method and path, and save.
- The action appears in the Calls menu of the Terminal (desktop and web) for you, and for everyone in your organization if it is shared.
How This Relates to the AI
Quick Calls themselves never use the AI. Separately, the AI assistant has its own tools to list your API Resources and call them while answering a question, using the same credentials you configured. See Modes & Permissions for the tools the assistant can use.