
SSH Certificates (Controller)
EnterpriseLog in to devices with short-lived SSH certificates issued by the NetStacks Controller's SSH Certificate Authority, plus the X.509 Client CA for gNMI mutual TLS.
Overview
A NetStacks Controller can act as an SSH Certificate Authority. Instead of storing a password or private key, a profile holds a certificate secret. Each time a user connects, the Controller generates a fresh key pair, signs a short-lived OpenSSH user certificate for it, and logs in to the device. Devices only need to trust the CA's public key. No passwords or keys are stored for those devices.
Certificate login is a Controller feature, used from the web terminal and from the desktop Terminal in enterprise mode. The standalone Terminal supports password and key login only.
The CA pages are in the admin console under Access & Secrets → SSH CA (/access/ssh-ca) and Access & Secrets → X.509 Client CA (/access/x509-ca).
How Certificate Login Works
- A user opens a session to a device whose profile's chosen secret is a
certificate. - The Controller loads the organization's default SSH CA and generates a one-off Ed25519 key pair for this connection.
- It signs a user certificate with:
- principal = the secret's Principal (username), which is the login name on the device;
- key ID =
<user id>@<organization id>, so device logs show which NetStacks user connected; - for interactive sessions, the
permit-ptyandpermit-agent-forwardingextensions.
- The Controller connects to the device with the certificate. The device checks it against the trusted CA key.
- The issued certificate is recorded, and the signing is written to the audit log with the device it was issued for.
Neither the private key nor the certificate ever reaches the user's computer.
Setting It Up
Managing CAs requires an administrator. Adding the certificate secret to a profile requires credentials.manage. You also need access to your devices to change their SSH configuration.
1. Create the SSH CA
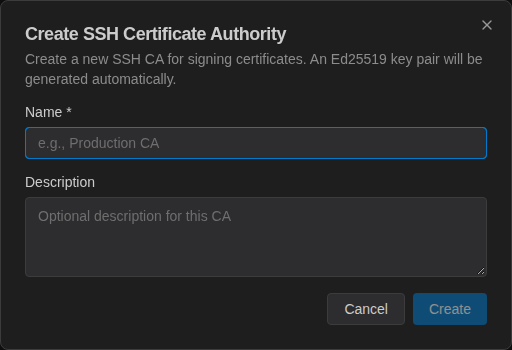
- Open Access & Secrets → SSH CA and click Add SSH CA.
- In Create SSH Certificate Authority, enter a Name * (for example Production CA) and an optional Description, then click Create. An Ed25519 key pair is generated, and the private key is stored encrypted in the Controller vault.
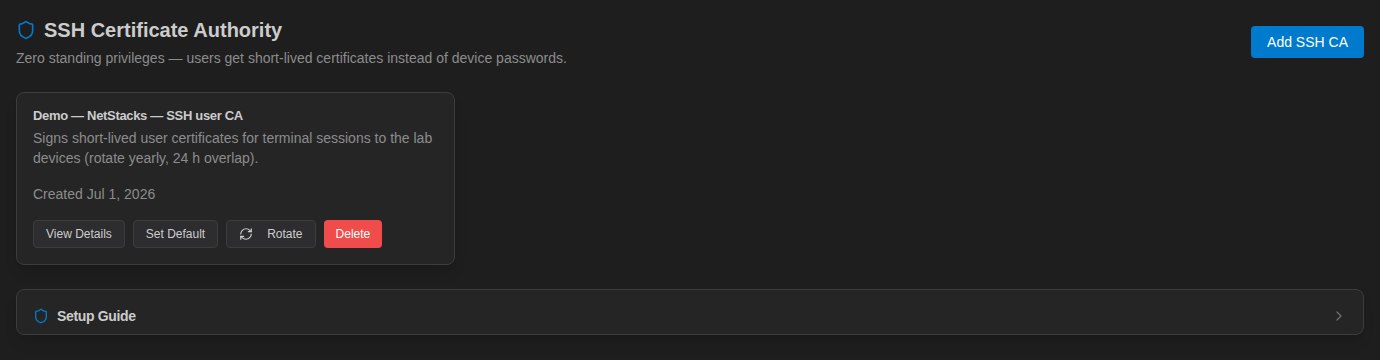
Each CA appears as a card with View Details, Set Default, Rotate, and Delete. Each organization has one Default CA. That is the CA used to sign certificates, and it cannot be deleted.
2. Trust the CA on Devices
Click View Details on the CA and use Copy Public Key. The details page also shows the CA ID and organization ID.
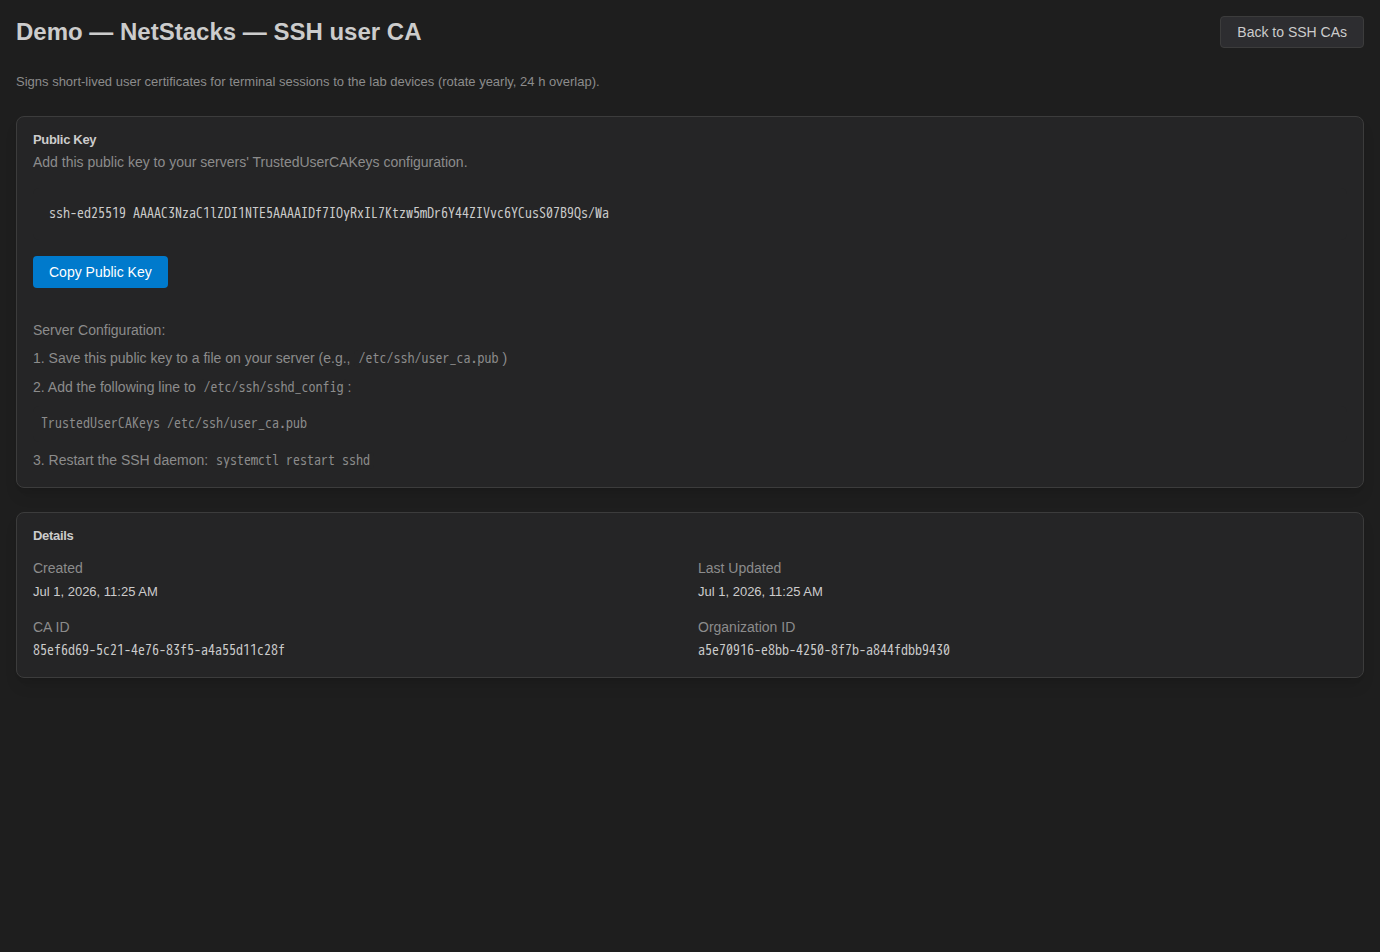
On each OpenSSH-based device, save the key and point sshd at it. This is a one-time change per device:
# 1. Save the CA public key
echo "ssh-ed25519 AAAA...your CA key..." | sudo tee /etc/ssh/user_ca.pub

# 2. Add this line to /etc/ssh/sshd_config
TrustedUserCAKeys /etc/ssh/user_ca.pub

# 3. Restart SSH
sudo systemctl restart sshd
The user named in the certificate's principal must exist on the device. Network operating systems that support OpenSSH user CAs have their own syntax for trusting a CA key; check your vendor's documentation.
3. Add a Certificate Secret to a Profile
- Open Access & Secrets → Profiles, click Configure on the profile, and go to Secrets.
- Click Add secret and set Auth mode * to
certificate. - Enter the Principal (username) *: the account name the certificate logs in as on the device.
- Set Validity (minutes) (default 60), then click Create secret.
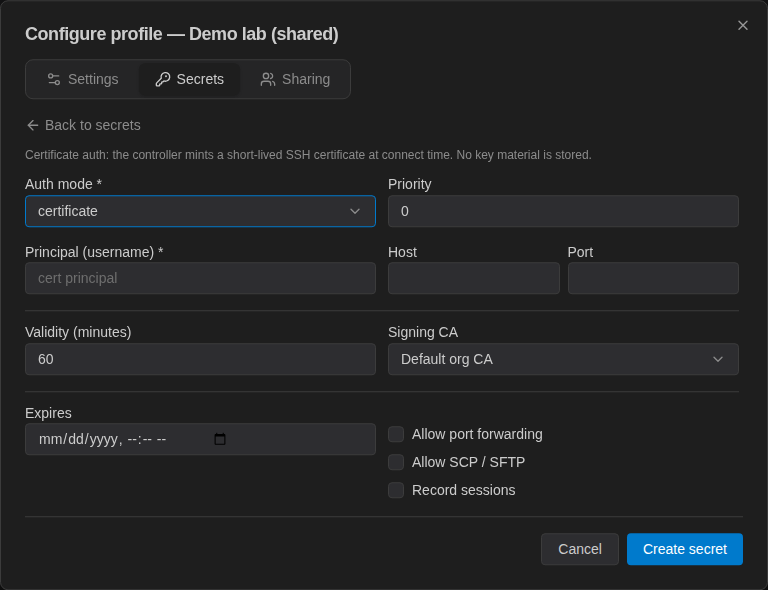
Certificates are always signed by the organization's default SSH CA. To make the certificate the preferred method, give it the lowest priority number on the profile. On equal priority, a certificate wins over keys and passwords.
4. Connect
Users with a use grant on the profile click the device in the Terminal and connect as usual. They are never asked for a password or key.
Certificate Lifetime
Each certificate is valid for the Validity (minutes) set on the certificate secret. The default is 60 minutes. A new certificate is issued for every connection, so there is nothing to renew. A session that is already open is not cut off when its certificate expires; the lifetime only limits how long the certificate could be used to start new logins.
The SSH CA page's built-in Setup Guide refers to roughly 8-hour certificates. The lifetime actually used is the secret's Validity (minutes) value described above.
Managing CAs
- Set Default makes another CA the one that signs new certificates. Make sure devices trust it first.
- Delete removes a CA that is not the default.
- Setup Guide (collapsible, at the bottom of the page) repeats the device configuration steps.
Rotating a CA
Rotate gives the CA a fresh signing key. The previous public key stays published as a trust anchor for an overlap window (24 hours by default), so certificates already issued keep working until they expire. After the window, only the new key is trusted.
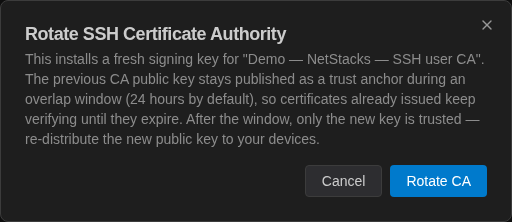
- Click Rotate on the CA card, then Rotate CA.
- Open View Details and copy the new public key.
- Add the new key to
/etc/ssh/user_ca.pubon every device (the file can hold several keys, one per line) before the overlap window ends.
Where Certificates Can Be Used
| Connection | Certificate login |
|---|---|
| Interactive SSH sessions from the web or desktop Terminal | Yes |
| NETCONF over SSH started by a user | Yes |
| gNMI | Yes, with an X.509 client certificate (see below) |
| Background jobs that run without a signed-in user | No. Use a password or key secret on profiles for those devices |
| Controller SSH tunnels | No |
| Standalone Terminal | No |
X.509 Client CA (gNMI mTLS)
The Controller has a second, separate CA for mutual TLS. It is used when a profile with the gnmi automation transport has a certificate secret. At connect time the Controller issues a short-lived client certificate (same Validity setting, default 60 minutes) with the identity <user id>@<organization id>. The root CA is ECDSA P-256 and is valid for 10 years.
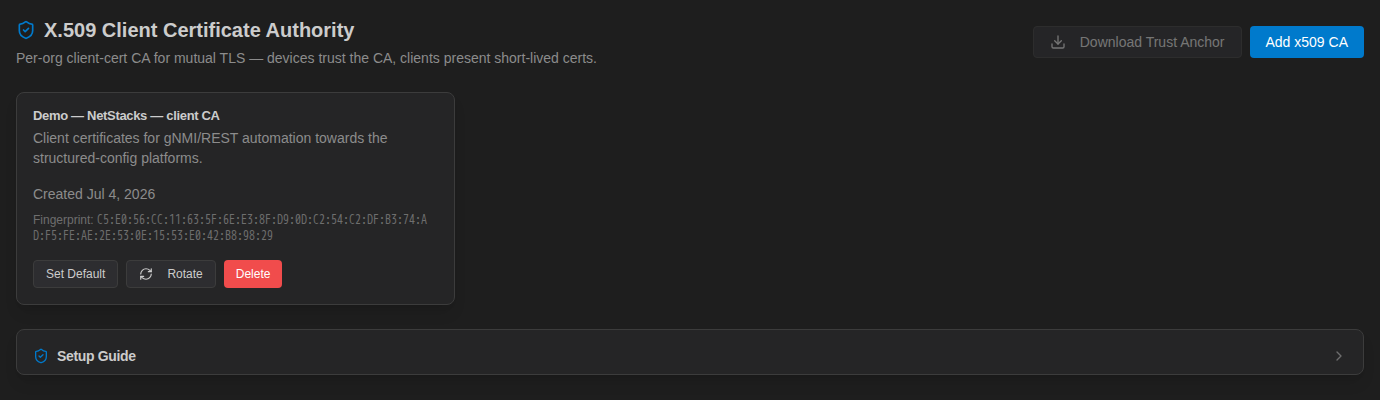
- Open Access & Secrets → X.509 Client CA and click Add x509 CA. Enter a Name * and optional Description.
- Click Download Trust Anchor to get the default CA certificate.
- Install it on each device as a trusted CA for gNMI. The page's Setup Guide has examples for Arista EOS, Juniper Junos, and a generic OpenSSL trust store.
- Add a
certificatesecret to the device's gNMI profile.
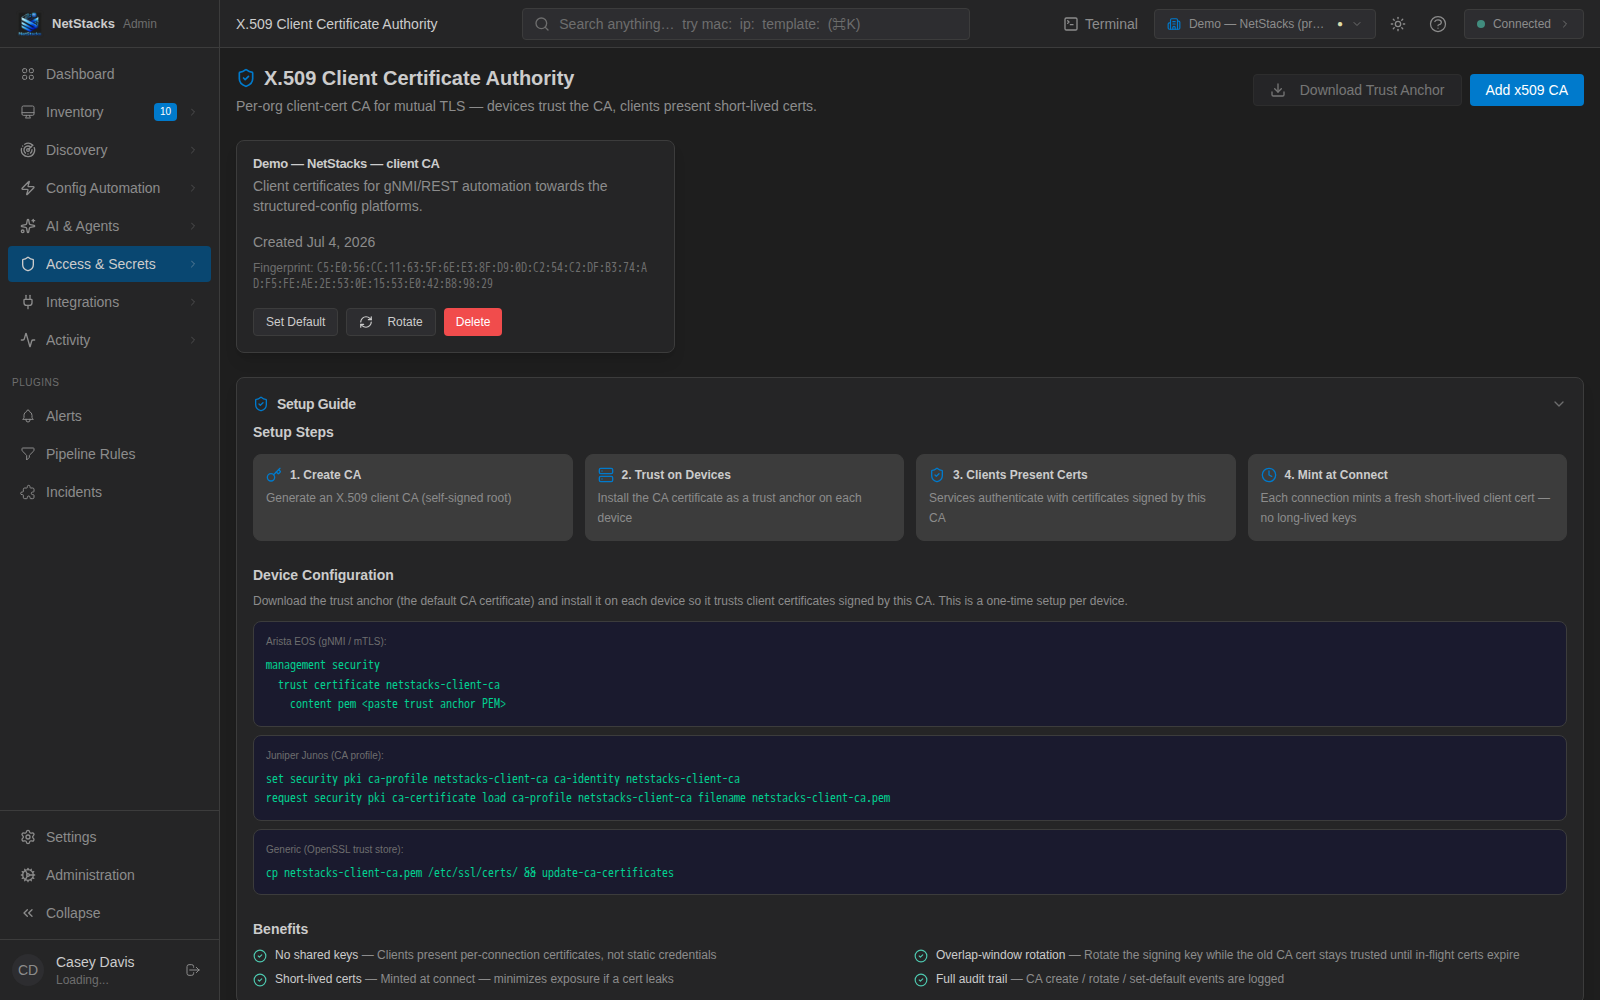
Set Default, Rotate, and Delete work the same way as for the SSH CA.
Troubleshooting
Device rejects the certificate
- Check that
TrustedUserCAKeyspoints to a file containing the current default CA key, and thatsshdwas restarted. - Check that the secret's Principal matches an existing account on the device.
- After a rotation, make sure devices have the new key.
- Check that the device clock is accurate. Certificates are short-lived, so clock drift can make them look expired or not yet valid.
Scheduled backups fail on certificate-only profiles
Jobs that run without a signed-in user cannot get a certificate. Add a password or key secret, and remember that only one secret is tried per connection. The selection rules are on Connection Profiles.
Terminal Settings → Account shows SSH Certificate Authentication "Not available"
That section does not affect certificate login to devices. The Controller issues and uses certificates on its side when you connect.