
Connection Profiles (Controller)
EnterpriseController Connection Profiles: personal, shared and service profiles, their secrets, use/reveal grants, audited reveal, default profiles and login-password seeding.
Overview
On a NetStacks Controller, a Connection Profile is the only object that holds device credentials. A profile combines:
- Connection defaults: SSH port, CLI flavor, automation transport and port, timeouts, and backup commands.
- One or more secrets (auth methods) in priority order: passwords, SSH keys, certificates, SNMP communities, API tokens, and generic secrets.
- Grants that control who may connect with the profile, and who may also reveal its secrets.
You assign one profile to many devices instead of entering credentials on each device. Profiles are managed in the admin console under Access & Secrets → Profiles (/access/profiles).
The standalone Terminal has its own, simpler credential profiles (Settings → Profiles) with no sharing. See SSH Passwords & Keys.
Personal, Shared and Service Profiles
| Type | Owner | Who can use it | Typical use |
|---|---|---|---|
| Personal | One user | Only the owner. Personal profiles cannot be shared. | Your own device login |
| Shared | Org-wide | Users and roles given a grant | A team login such as a NOC account |
| Service account | Org-wide | Users and roles given a grant | Non-interactive automation identities |
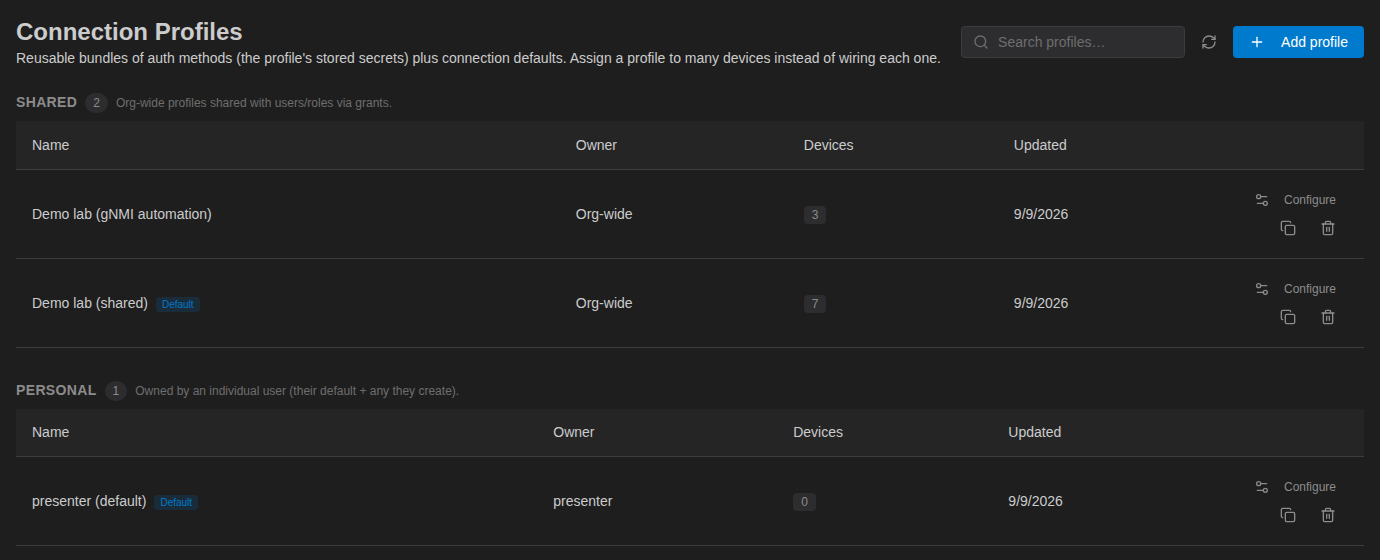
Every user automatically gets a personal default profile, named for example presenter (default). The list page groups profiles under Shared, Service accounts, and Personal. The Owner column shows Org-wide for shared and service profiles, and Devices shows how many devices use each profile.
Creating a Profile
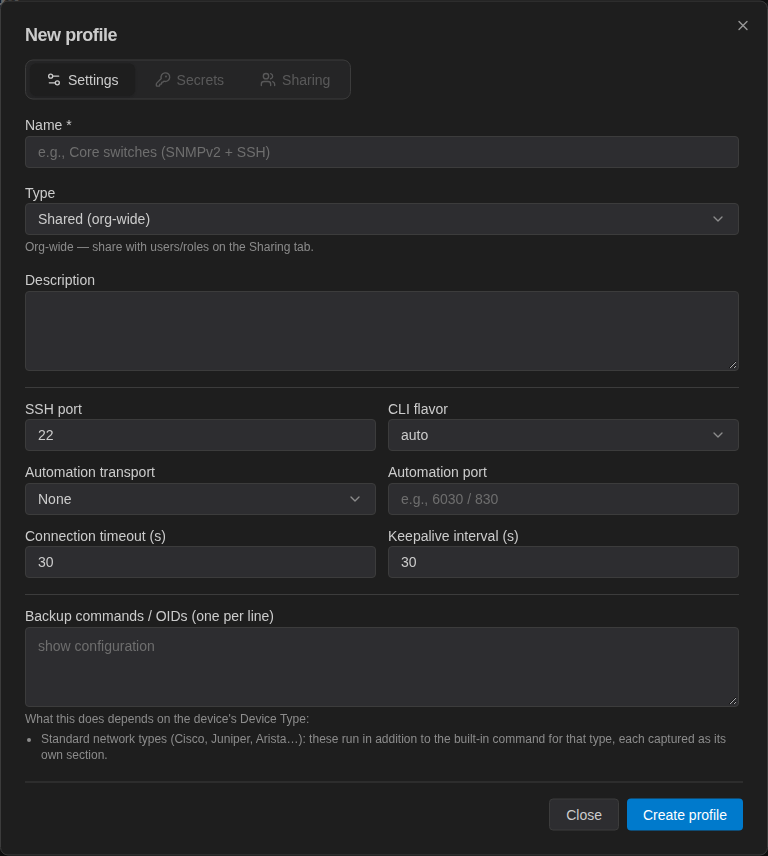
- On Access & Secrets → Profiles, click Add profile.
- In New profile, enter a Name * and choose a Type: Personal (owned by you), Shared (org-wide), or Service account (org-wide, non-interactive).
- Fill in the connection defaults (see the reference below).
- Click Create profile. The Secrets and Sharing tabs become available once the profile is saved.
To change a profile later, click Configure on its row. The dialog is titled Configure profile — <name> and has the tabs Settings, Secrets, and Sharing. Clone copies a profile, and Delete removes it after confirmation.
Settings Tab Reference
| Field | Meaning |
|---|---|
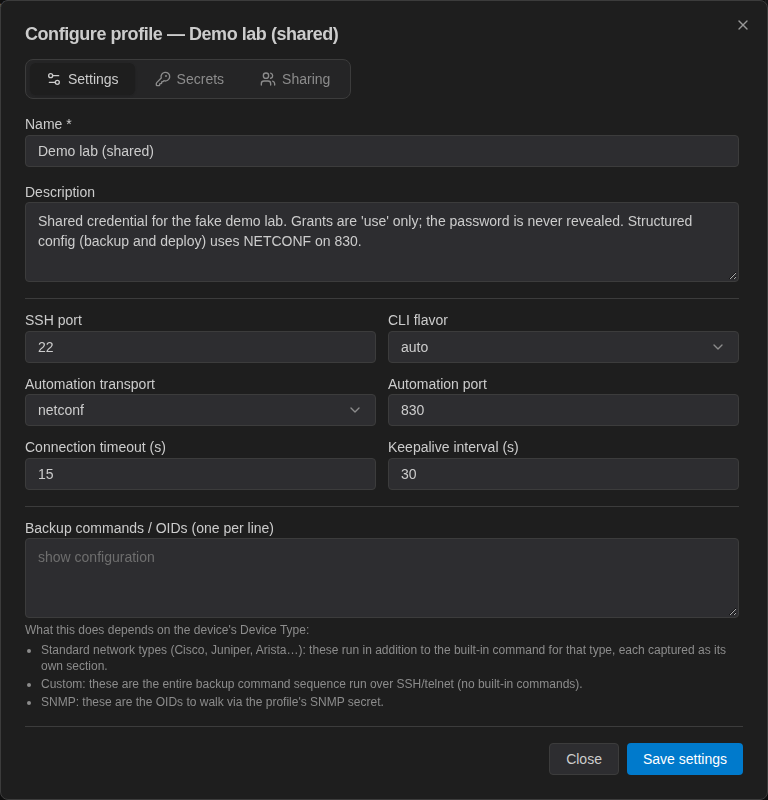
| Name *, Description | Name must be unique for its owner within the organization. |
| SSH port | Default 22. |
| CLI flavor | auto, cisco_ios, cisco_xe, cisco_xr, cisco_nxos, juniper, arista, paloalto, fortinet, linux |
| Automation transport, Automation port | None, gnmi, netconf, or rest, with its port (for example 6030 or 830). Used for structured config automation. |
| Connection timeout (s), Keepalive interval (s) | Both default to 30. |
| Backup commands / OIDs (one per line) | Depends on the device type. For standard network types, the commands run in addition to the built-in backup command. For Custom devices they are the whole backup sequence. For SNMP devices they are the OIDs to walk. |
Adding Secrets
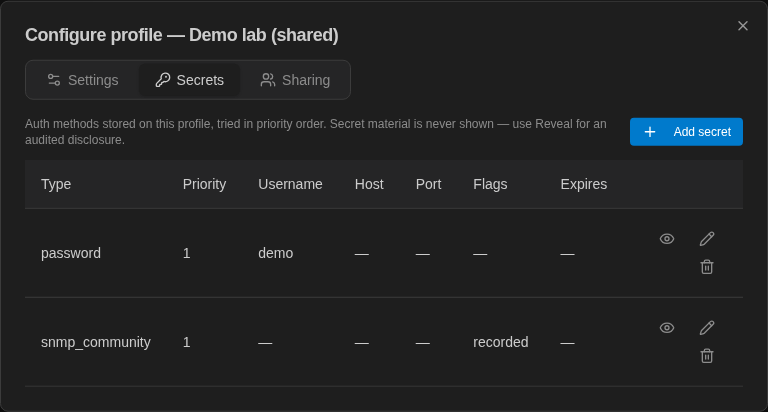
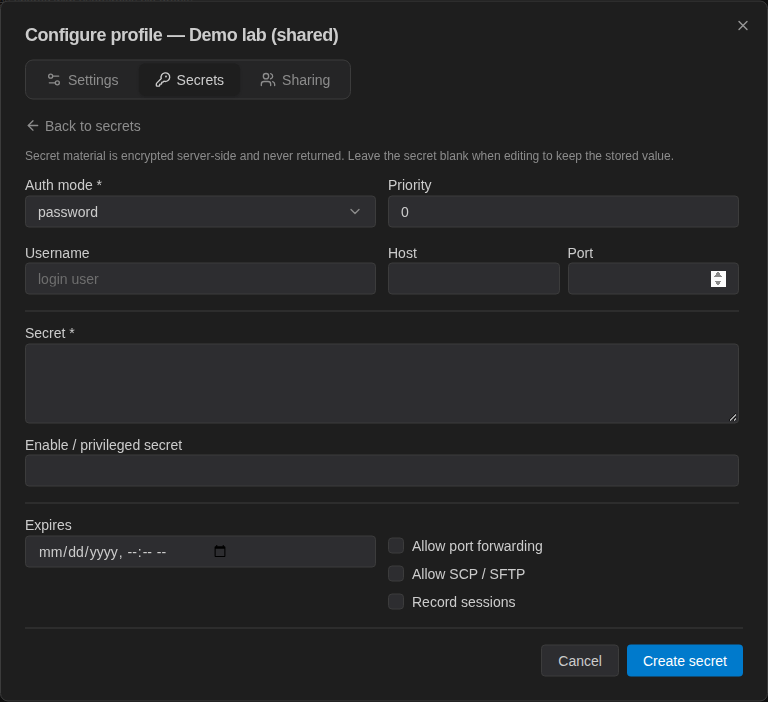
The Secrets tab lists the profile's auth methods in priority order, with the columns Type, Priority, Username, Host, Port, Flags, and Expires. Secret values are never shown. Each row has Reveal secret, Edit secret, and Delete secret icons.
- Click Add secret.
- Choose the Auth mode * and a Priority.
- Fill in the fields for that type. The form changes with the type (examples below).
- Optionally set Expires, then click Create secret. Back to secrets or Cancel discards the form.
Secret Types
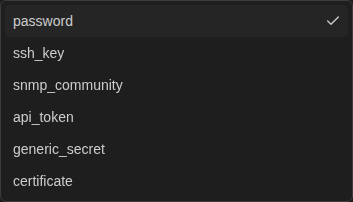
| Auth mode | What you enter | Used for |
|---|---|---|
password | Username, password, optional enable secret | SSH and Telnet logins; NETCONF/gNMI/REST basic auth |
ssh_key | Username, OpenSSH private key, optional key passphrase and enable secret | SSH key login |
certificate | Principal (username) *, Validity (minutes) (default 60). No key material is stored. | Short-lived SSH certificates (and X.509 client certificates for gNMI), see SSH Certificates |
snmp_community | SNMP community (v2c) * | Discovery, SNMP polling, SNMP config backup, and the crawler, see SNMP Communities |
api_token | The device or platform API token | Devices that use the rest automation transport |
generic_secret | Any other secret value | Generic integrations |
There are no separate secret types for TACACS+ or RADIUS keys, uploaded client certificates, or SNMPv3.
Priority and Selection
When the Controller needs a credential, it looks at the secrets that fit the kind of connection and picks the one with the lowest priority number. On a tie, this order decides:
| Connection | Tie-break order |
|---|---|
| SSH / Telnet | certificate > ssh_key > password |
| SNMP | snmp_community |
| gNMI / NETCONF | certificate > password > ssh_key |
| REST | api_token > password |
| Generic | generic_secret > password |
Exactly one secret is chosen per connection. If it fails, the next one is not tried.
Sharing a Profile (Grants)
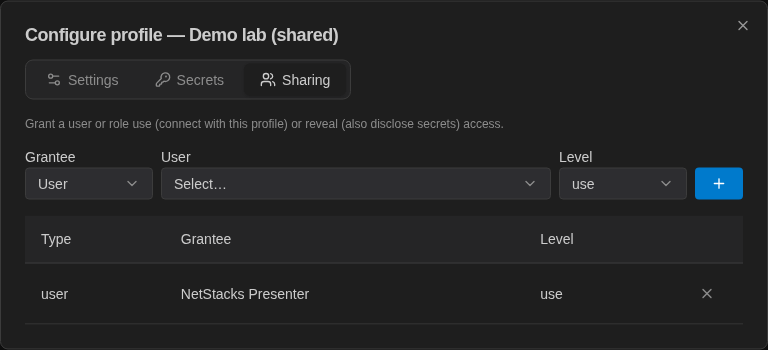
Shared and service profiles are made available through grants on the Sharing tab. There are two levels:
- use: connect to devices with this profile without ever seeing its secrets.
- reveal: everything in use, plus revealing secret values (audited).
- Open the profile's Sharing tab.
- Choose the Grantee type (User or Role), pick the user or role, and choose the Level.
- Click +. The grant appears in the table (Type, Grantee, Level). Use the Revoke icon to remove it.
Managing a profile (editing settings, secrets, and grants) is separate from using it. A user with credentials.manage, including an administrator, still needs a use grant to connect with a shared profile, and a reveal grant to see its secrets. A profile's owner always has reveal access to it.
Revealing a Secret
Revealing is the only way to see a secret's value. It works from the Secrets tab, from Access & Secrets → Vault, and from the Terminal's My Profiles.
- Click the eye icon (Reveal secret).
- Enter an Audit reason * and click Reveal secret.
- The secret, passphrase, and enable secret are shown with copy buttons and hidden again automatically after 30 seconds.
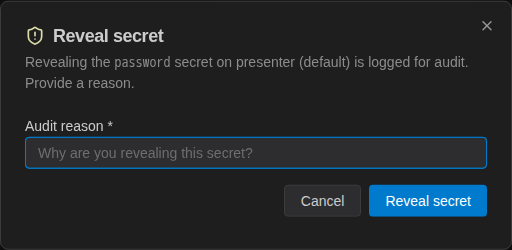
You must own the profile or hold a reveal grant. Every reveal is written to the audit log as profile.secret_revealed, with the reason.
How Devices Get a Profile
Each inventory device can have an assigned profile. When a user opens a terminal session, the Controller picks the profile in this order:
- The profile the user picked in the Terminal's Connect dialog, if any.
- The device's assigned profile.
- The user's default connection profile.
The chosen profile is always checked against the user's grants. Connections must target a device in the inventory; you cannot connect to an arbitrary host.
Login-Password Seeding
When login-password profile seeding is on, the password a user signs in with is stored (encrypted) as a priority-0 password secret on their personal default profile. Their first device connection then works without typing credentials. This applies to local and LDAP sign-ins only, never to OIDC/SSO. A password set by an administrator reset is not copied. When the user changes their password, the stored copy is updated.
The controls are under Settings → Authentication, section Login-password profile seeding:
- Enable for this organization: the org-wide switch (admin only).
- Seed my login password: each user's own setting.
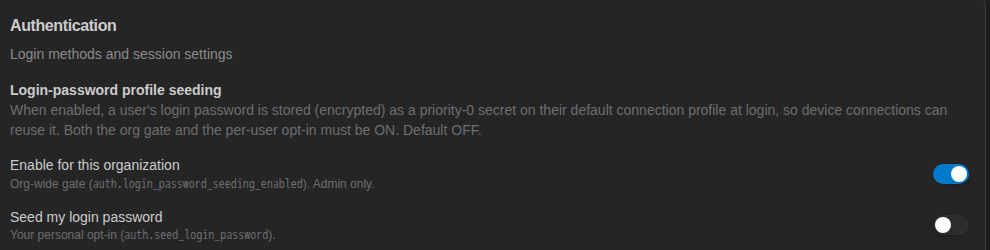
Check both settings on your Controller rather than assuming a default. Seeded secrets appear on the Vault page with a seeded from login badge. If your device passwords differ from your NetStacks login, turn seeding off.
Profiles in the Terminal
In the web terminal and in the desktop Terminal in enterprise mode, open Settings → Account. The tab appears only in enterprise mode and has three sections: Your Account, My Profiles, and SSH Certificate Authentication.
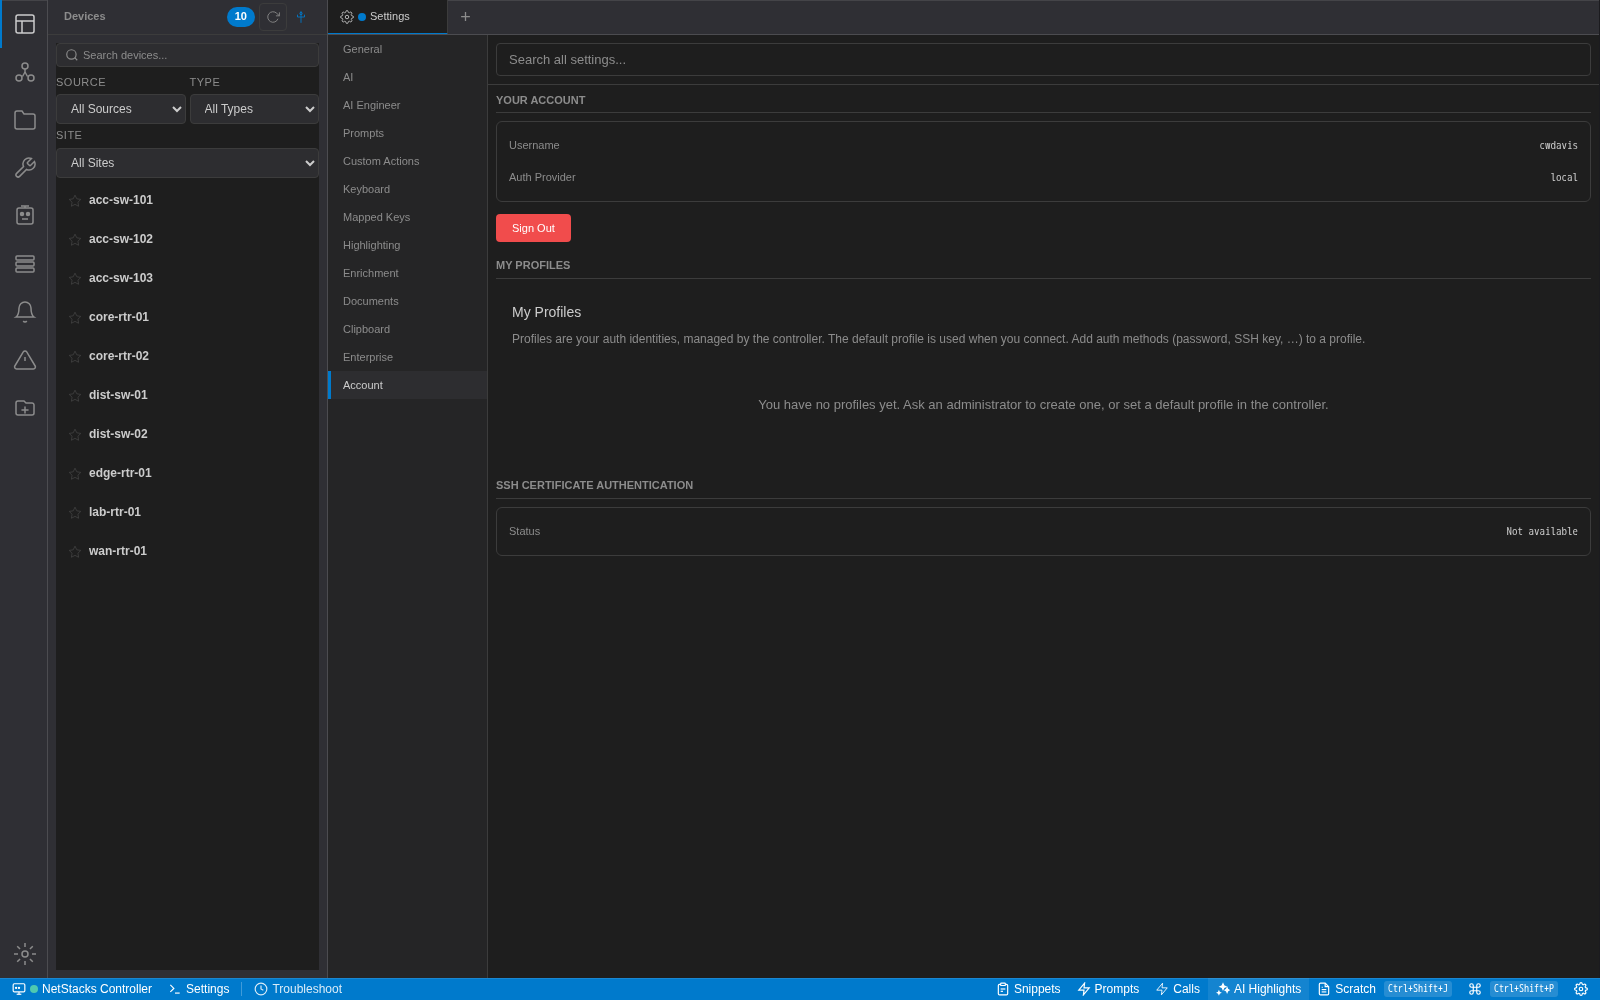
- Default connection profile: choose any profile you can use, or Auto (controller decides). It applies when you connect to a device that has no profile of its own.
- Profiles you can manage are listed with Manage buttons. Under Auth methods — <profile> you can Add auth method (Type, Username, Secret *, optional Host and Port), Reveal one (with an Audit Reason *), or Delete one.
When connecting, the Connect dialog lets you pick a different profile for one session. See Connecting from the Terminal.
Who Can Do What
| Action | Requires |
|---|---|
| Create, edit, delete profiles; add or edit secrets; manage grants | credentials.manage permission (Admin and Operator roles have it by default) |
| Connect with a profile | Profile owner, or a use or reveal grant (user or role) |
| Reveal a secret value | Profile owner, or a reveal grant, plus an audit reason |
Troubleshooting
"Access denied to device profile"
Add a use grant for the user, or for one of their roles, on the profile's Sharing tab.
"Device has no profile assigned and you have no default connection profile set"
Assign a profile to the device, or set a default in the Terminal under Settings → Account → My Profiles.
"No device matches host"
Connections are tied to inventory devices. Add the device to the inventory first.
The Sharing tab is greyed out
Personal profiles cannot be shared, and new profiles must be saved first.