
Instances & Deploying
EnterpriseCreate a stack instance in the NetStacks Controller: assign devices to each service, fill in shared and per-device values, preview the rendered config, and deploy.
Overview
An instance is a stack filled in for one job: which devices each service targets and the values for every variable. You save it, preview exactly what each device will receive, and deploy it. Because the instance is saved, you can deploy the same values again later (for example to a replacement switch) or keep it as a record of what was pushed.
Instances live under Config Automation → Instances. The page title is Undeployed Instances, "Pre-filled variable sets ready for deployment".
The Instances List
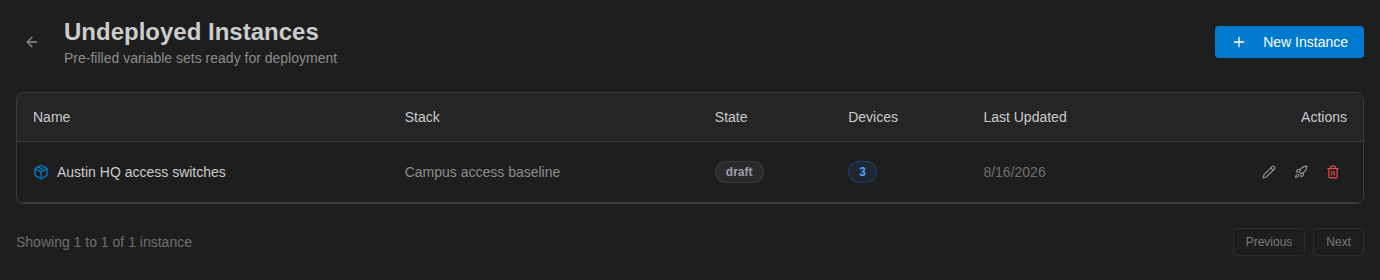
Each row shows the instance Name, its Stack, its State, how many Devices it targets, and when it was Last Updated. The actions are Edit (pencil), Deploy (rocket), and Delete.
Create an Instance
- Click New Instance.
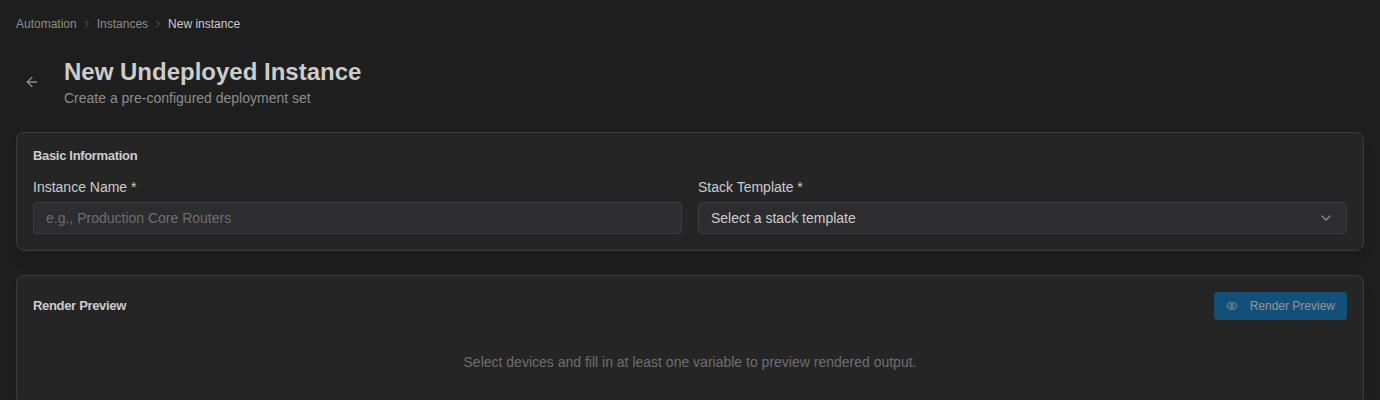
- Enter an Instance Name (for example "Austin HQ access switches") and pick the Stack Template. The stack cannot be changed after the instance is created.
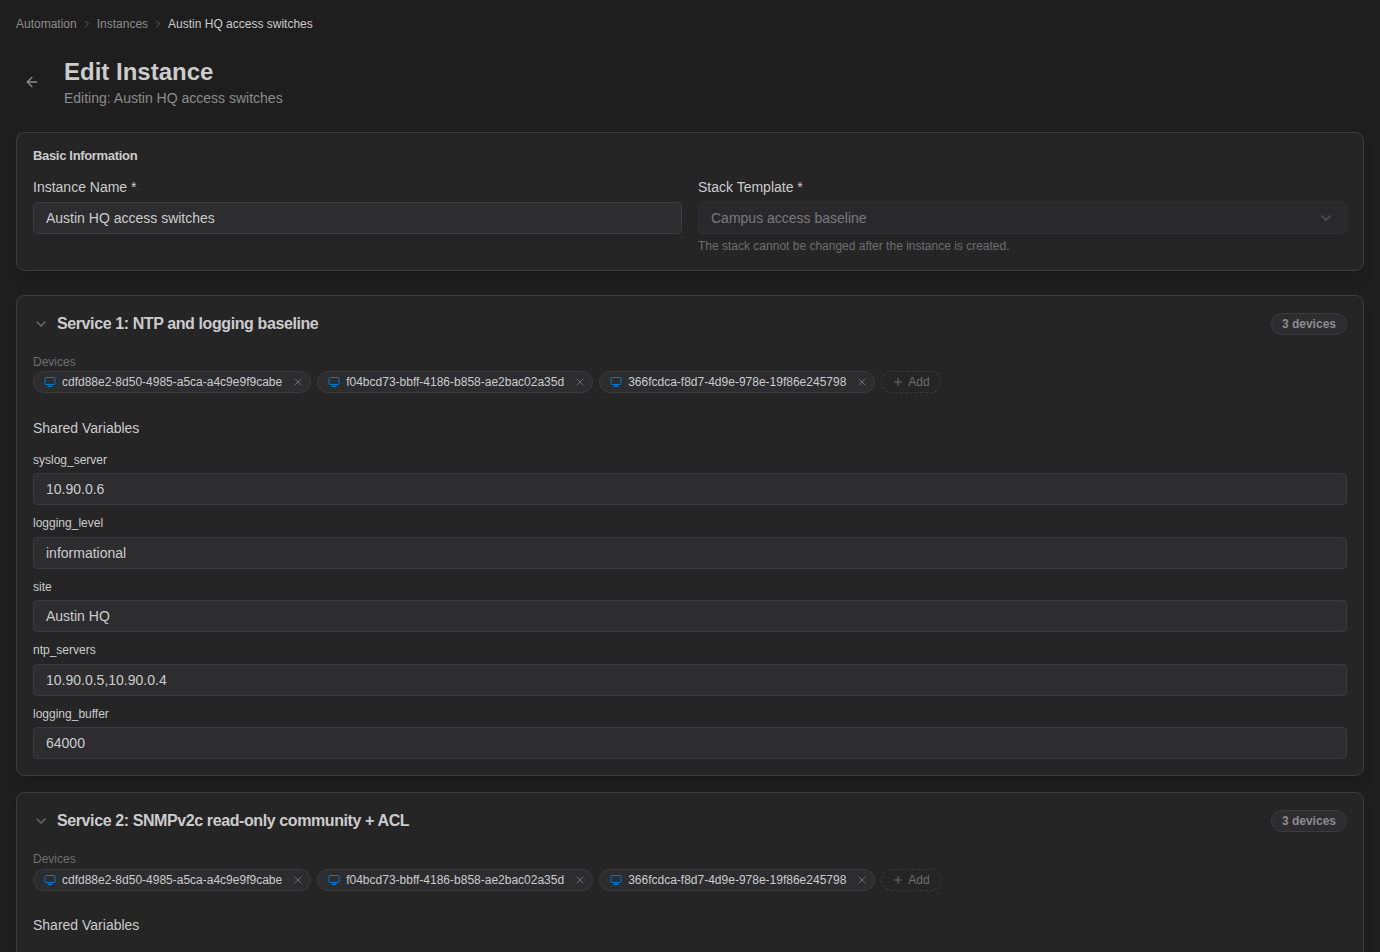
- A card appears for each service in the stack ("Service 1: NTP and logging baseline", and so on). Assign devices and fill in values in each card, as described below.
- Click Save Instance.
Assign Devices
Each service has its own Devices list, so a stack can apply some services to all devices and others to only a few. Click Add and choose devices from your inventory (shown with their name and address). Remove a device with the × on its chip. The badge on the card header shows how many devices the service targets.
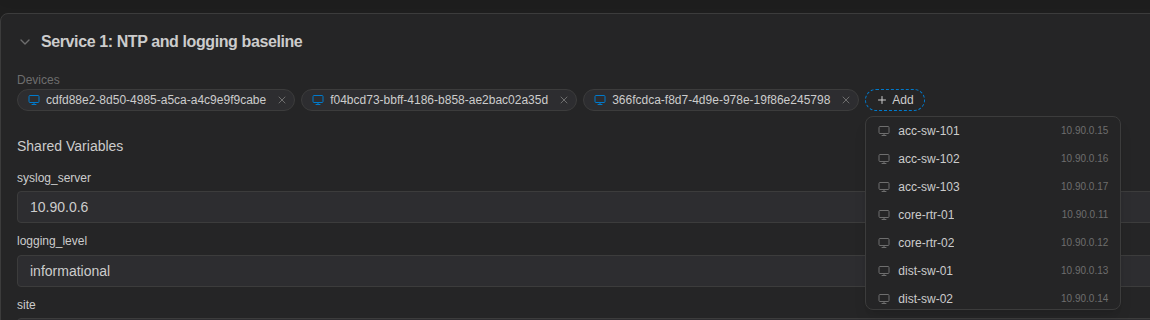
A service with no devices is skipped when you deploy.
Fill In Values
Each service card shows its variables, split by the scope set on the stack:
- Shared Variables: one value for every device in this service.
- Per-Device Variables: one row per device. Expand a device to enter its values; the row shows how many values are set ("2 override(s)").
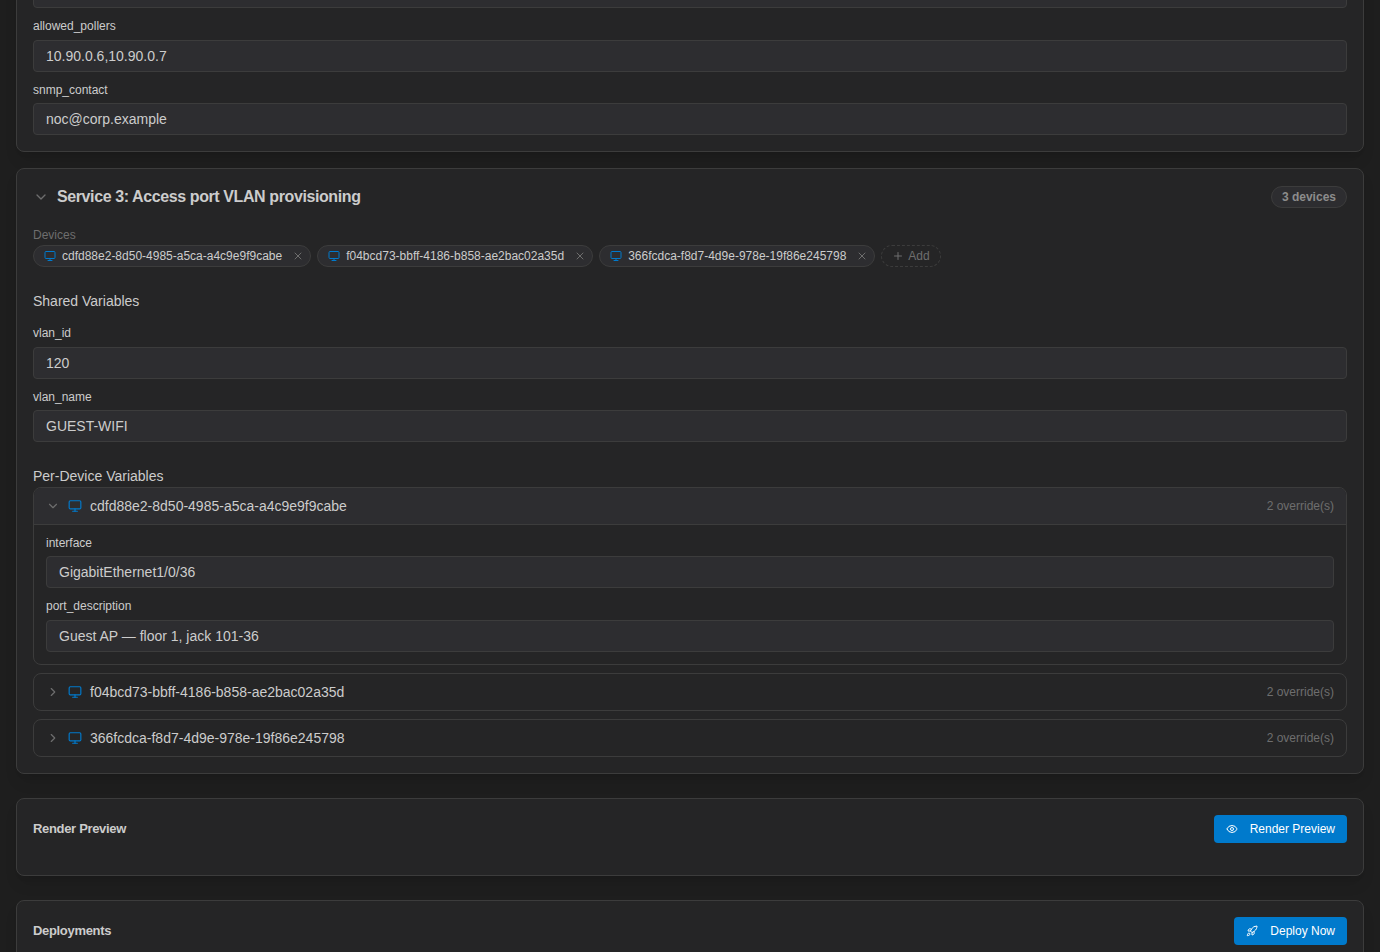
Enter lists as JSON arrays, for example ["10.90.0.5", "10.90.0.4"] (see Entering values and types). If the stack maps any variables to an API, click Resolve from API in the service card to fetch their values for the selected devices (see Filling variables from an API).
Preview the Rendered Config
Click Render Preview in the Render Preview card. The result lists each device with the config every service will send to it, in stack order. Read it carefully: this is the text that will be pushed.
The preview uses the values on screen, so you can check edits before saving. It only renders text; it does not contact devices (see Preview a stack instance).
Deploy
- Click Save Instance. A deployment uses the saved instance, not unsaved edits on the screen.
- Click Deploy (bottom of the page), Deploy Now (in the Deployments card), or the rocket icon on the Instances list.
- Confirm in the Deploy Instance dialog ("This will create a new deployment").
The deployment starts immediately and there is no approval step. It backs up each device first, then pushes the config over gNMI or NETCONF. Make sure the change has been reviewed and, for anything risky, turn on atomic deployment on the stack.
Each deploy creates a new deployment record. You can deploy the same instance again at any time; it re-renders the templates with their current source.
Follow the Deployment
The instance's Deployments card lists every deployment of this instance's stack, newest first, with a status badge and device count. Expand one to see its Deployment Progress (Render, Backup, Push, Validate, Confirm, Sync), its Deployment Logs, and Roll Back.
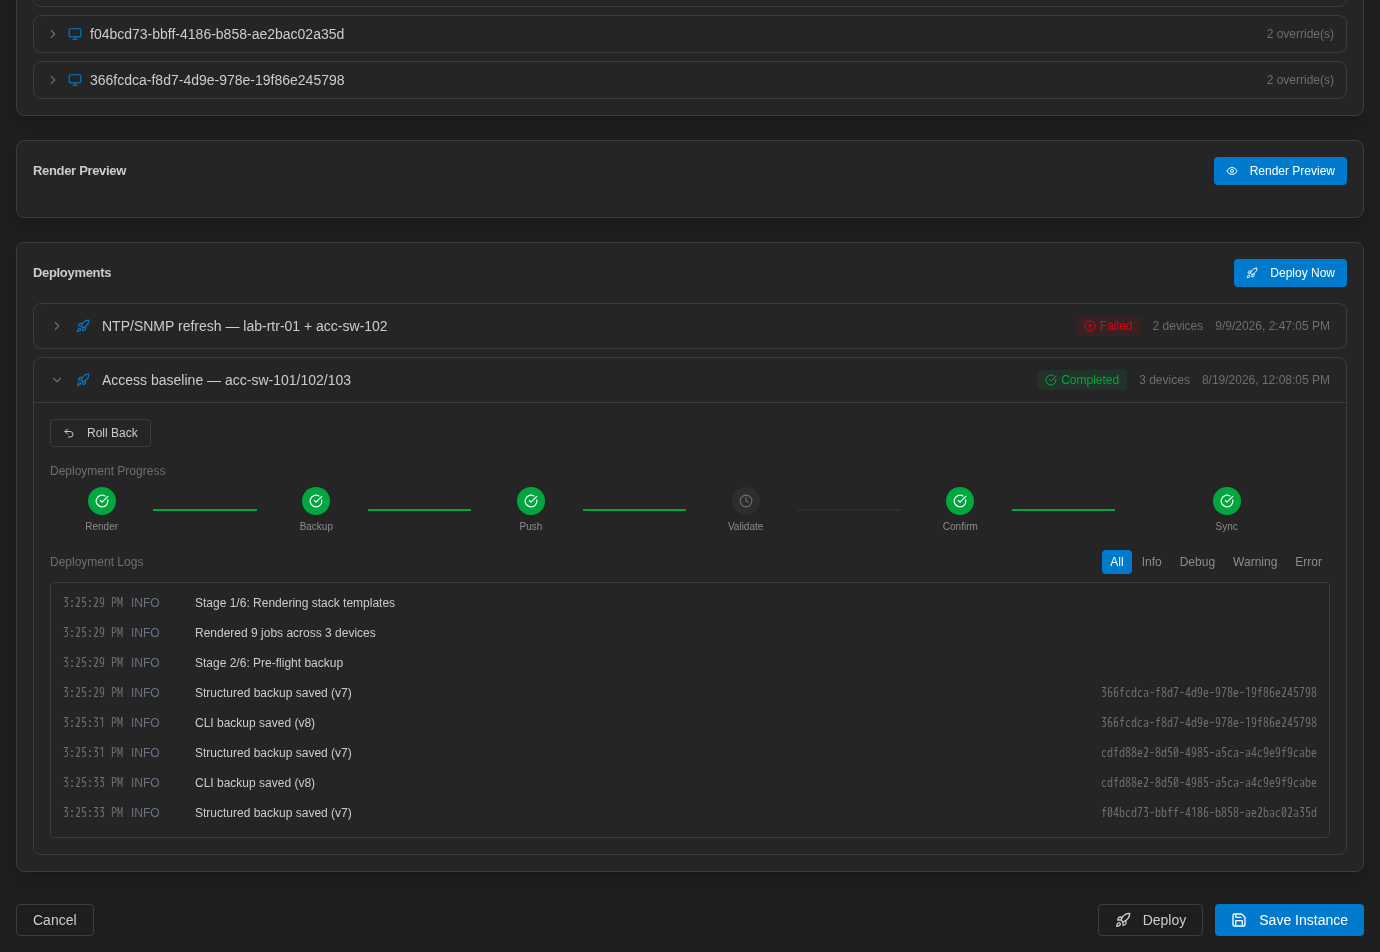
Filter the logs with All, Info, Debug, Warning, and Error. The Error filter is the quickest way to see why a device failed:
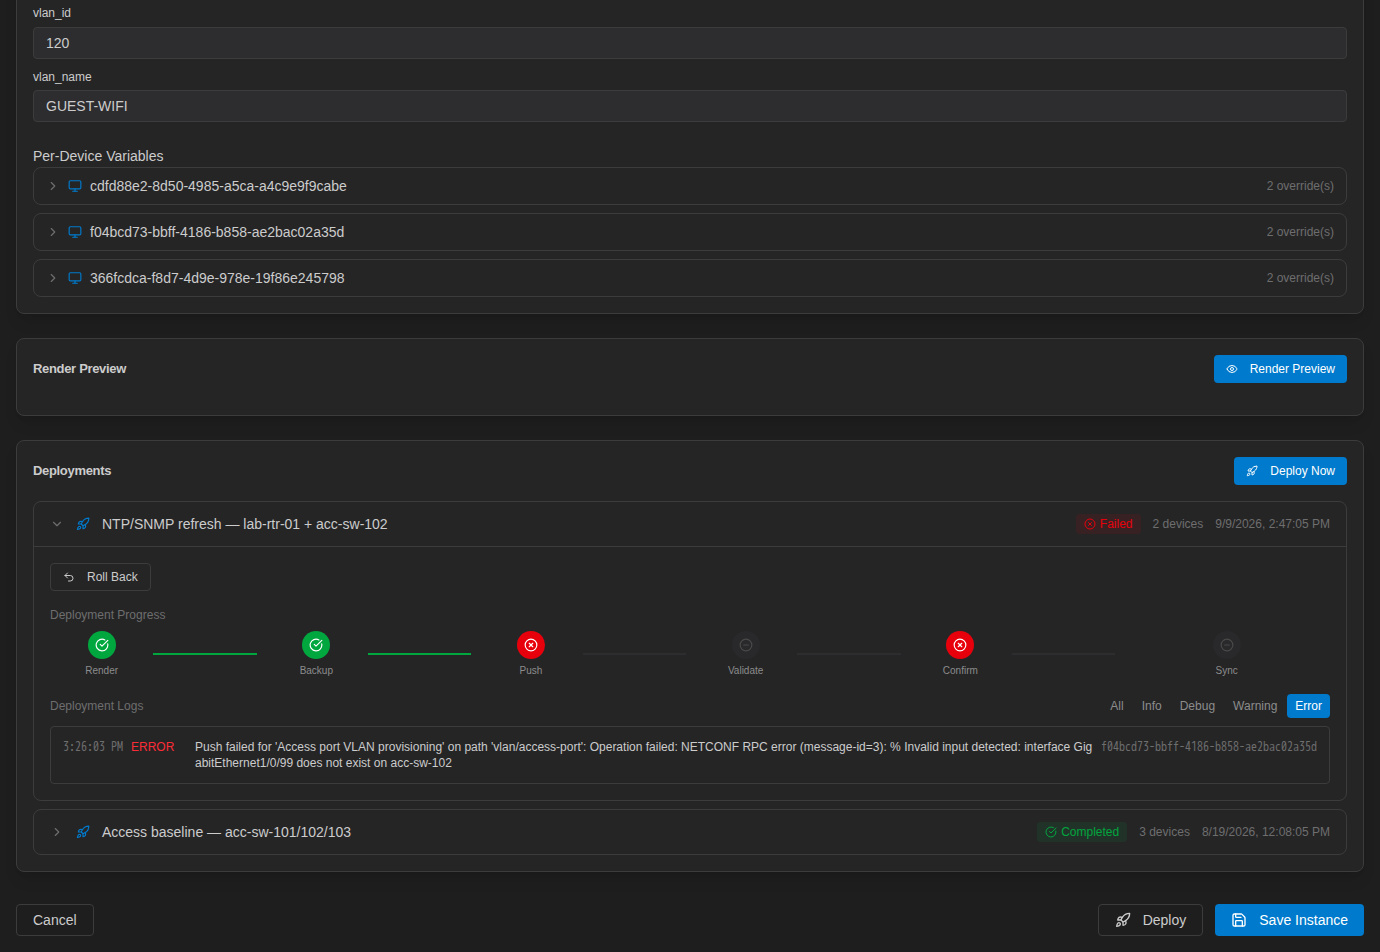
Here the per-device interface value was wrong, so IOS-XE rejected the access-port service on acc-sw-102. All deployments are also listed under Config Automation → Deployments (see Deployments & Rollback).
Troubleshooting
| Symptom | What to check |
|---|---|
| Deployment completes immediately with "No render jobs produced — nothing to deploy" | No service has any devices assigned. Add devices to the service cards and save. |
| Fails in Backup with "No structured platform mapping … CLI backup only" | The Controller could not work out gNMI or NETCONF for the device. Set the automation transport on the device's credential profile, or check its platform. |
| Fails in Backup for one device, nothing pushed anywhere | By design: if any device cannot be backed up, nothing is pushed. Check reachability and the automation credentials on that device's profile. |
| Push fails with a NETCONF RPC or gNMI error | The device rejected the config. The log line contains the device's message. Fix the value or template and deploy again. |
| A loop renders one line per character | A list value was entered as plain text. Re-enter it as a JSON array in square brackets. |