
User Management
EnterpriseCreate NetStacks Controller user accounts, assign roles, reset passwords, and remove users from the admin console.
Overview
Every person who signs in to the Controller — in the admin console, the web terminal or NetStacks Terminal in enterprise mode — has a user account. A user belongs to one organization and holds zero or more roles; the user's permissions are the combination of all their roles' permissions.
Managing users requires the Users & Roles permission. User pages are under Administration → Users (/admin/users) and show the users of the organization you are currently working in.
The Users Page
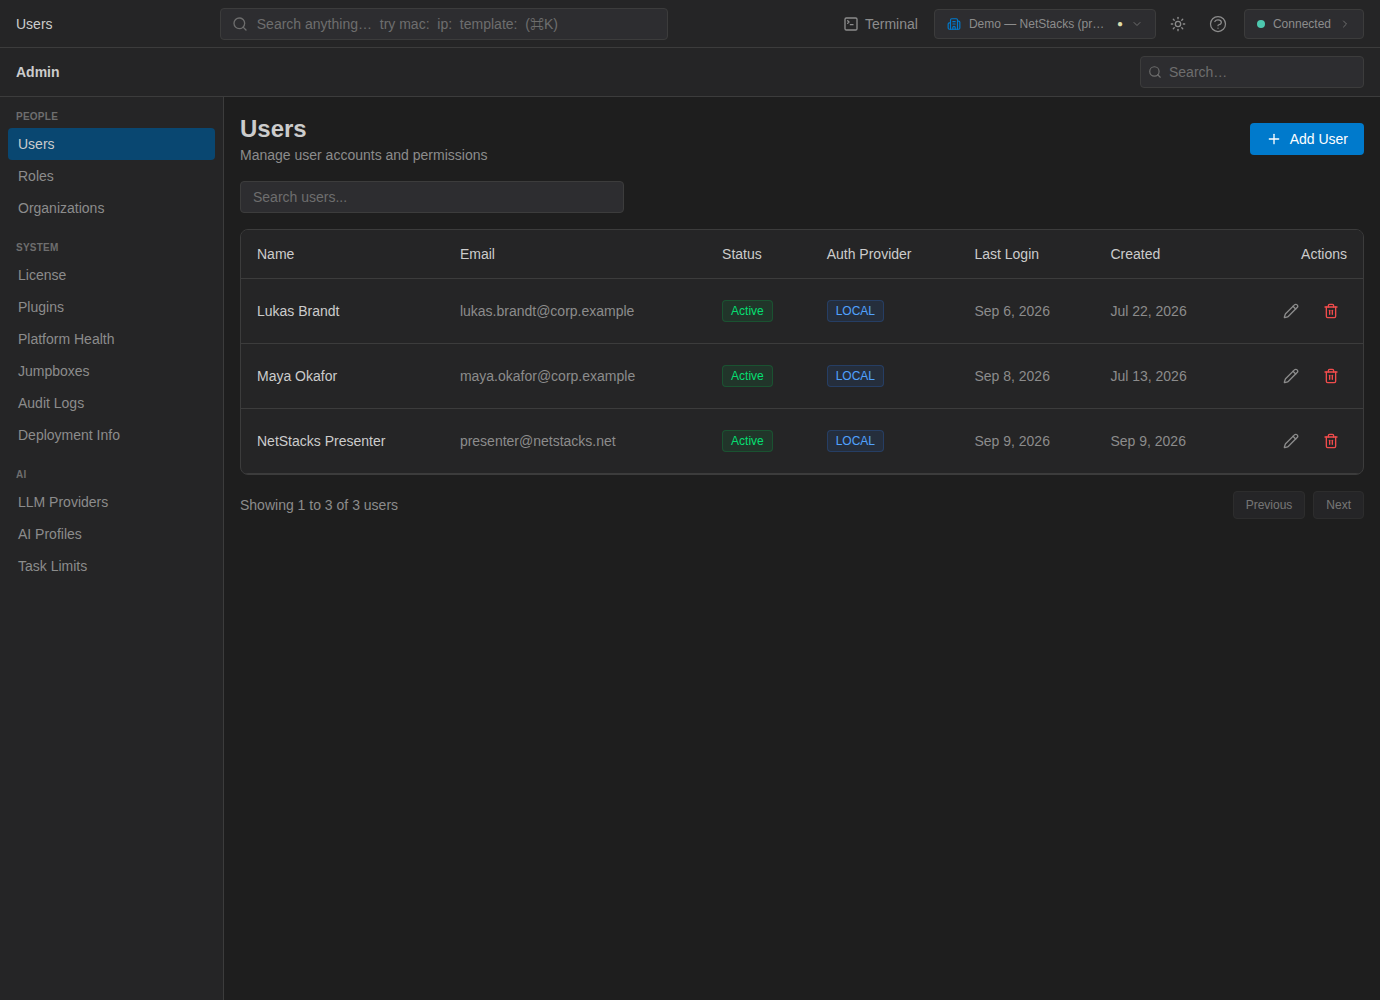
The table shows each user's Name, Email, Status, Auth Provider (LOCAL for accounts created here), Last Login and Created date. Use Search users... to filter, and the pencil and trash icons in Actions to edit or delete.
Create a User
- Click Add User.
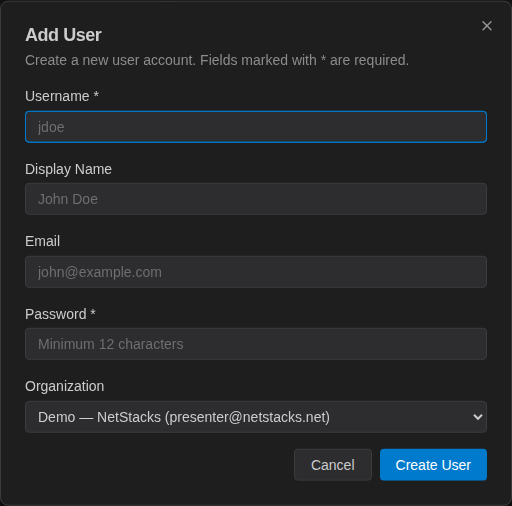
- Fill in the dialog:
- Username * — the sign-in name (for example
jdoe). - Display Name — shown in the UI and audit log.
- Password * — at least 12 characters (see the policy below).
- Organization — shown only to platform administrators; choose which organization the user belongs to.
- Username * — the sign-in name (for example
- Click Create User.
- Open the new user and assign roles (next section). A new user has no roles and can't use any features until you assign one.
Each new user automatically gets a personal default connection profile that they can use for device credentials. See Connection Profiles.
Edit a User and Assign Roles
- Click the user's pencil icon (or the row) to open Edit User.
- In User Details, change Display Name or Email as needed. Platform administrators can also change the user's Organization to move them to another tenant.
- Under Assigned Roles, tick every role the user should have. Protected roles are marked (protected).
- Click Save Changes.
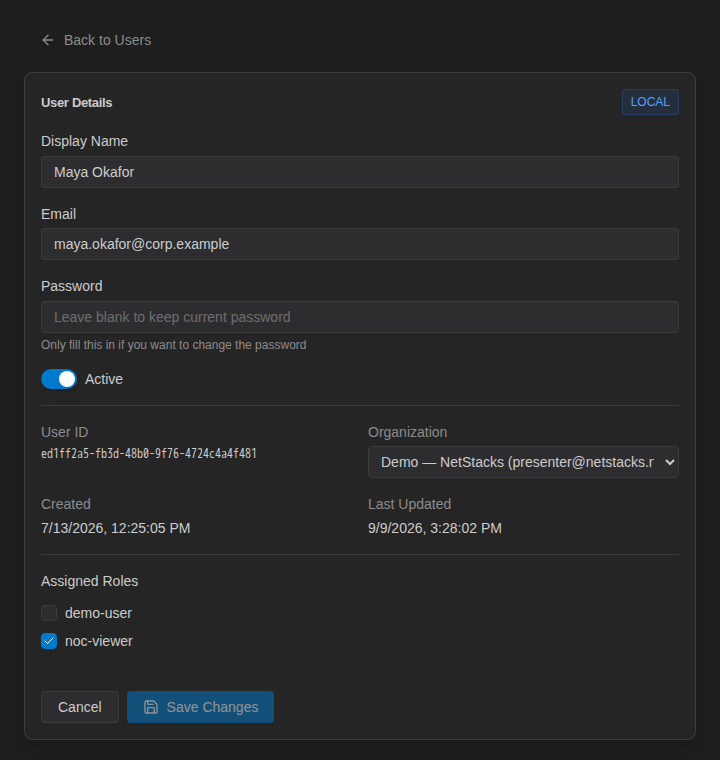
Role changes apply to the user's next request — permissions are looked up on the server for each action. Every change is recorded in the audit log (user.updated, user.roles_updated).
Reset a Password
- Open the user in Edit User.
- Type the new password in Password. Leave the field blank to keep the current password.
- Optionally tick Also set this password on the user's default connection profile if the user signs in to devices with the same password.
- Click Save Changes.
To recover the built-in admin account, see Resetting the Admin Password.
Remove a User
Click the trash icon and confirm Delete User. You can't delete your own account. Deletion is recorded as user.deleted in the audit log.
If the user has live device sessions you want to end right away, terminate them from Live Sessions.
Password Policy
- Minimum length is 12 characters.
- Common passwords (for example
password1234) are rejected, regardless of case. - The policy applies when creating a user, when an admin sets a password, and when users change their own.
- Passwords are stored as Argon2 hashes.
Use a passphrase of several words — it easily clears the 12-character minimum.