
Installing the Controller
EnterpriseInstall the NetStacks Controller with Docker Compose: prerequisites, the interactive installer, first login, trusting the HTTPS certificate, and post-install steps.
Overview
The NetStacks Controller is a self-hosted server that you run with Docker Compose. One install gives you the admin console, the browser-based web terminal at /terminal/, the REST API, and integrated network discovery — all served over HTTPS on a single port, 3000.
NetStacks provides a release package named netstacks-controller-<version>.tar.gz and access to the private container registry (ghcr.io/netstacks/netstacks-controller). The package contains an interactive installer that writes your configuration, pulls the images, starts the stack and prints the initial admin password.
What Gets Installed
The release package contains:
deploy/docker-compose.yml       # single-instance stack
deploy/docker-compose.ha.yml    # high-availability stack (multiple API instances)
deploy/.env.example             # configuration template
deploy/install.sh               # interactive installer
deploy/upgrade.sh               # upgrade helper (backup + version bump + health check)
deploy/crawler/deployment.yml   # discovery (crawler) configuration
The stack runs these containers on a Docker network named netstacks_net:
| Service | Purpose |
|---|---|
admin-ui | nginx serving the admin console and web terminal, and reverse-proxying the API. This is the only container with a published port: host 3000 → container 443. |
api | The Controller API (HTTPS, internal port 3000). Runs database migrations on start. |
db | Bundled PostgreSQL 16 with pgvector (optional — you can use your own PostgreSQL instead). |
valkey | Valkey 8 — live-session registry, session sharing and HA coordination. |
crawler-backend, crawler-worker | Integrated network discovery. Internal only; the API proxies it at /api/crawler/*. |
The API also starts containers on demand through the Docker socket: one jumpbox container per user (for the Local Terminal and device scripts), and one container per enabled plugin. For this reason the api container mounts /var/run/docker.sock.
Data lives in three Docker volumes:
pgdata— the PostgreSQL database (bundled DB only)valkey_data— Valkey persistencenetstacks_data— mounted at/data: the internal TLS CA and certificates, the cached license public key, and plugin storage
Prerequisites
- A Linux host with Docker Engine (daemon running, and your user allowed to use it) and the Docker Compose v2 plugin. These are the installer's only preflight checks.
- An x86-64 (amd64) host — the Controller images are published for amd64 only.
openssl(to generate secrets) andcurl(to wait for health checks).- A GitHub username and a personal access token with the
read:packagesscope that has been granted access to the NetStacks Controller images. - Outbound internet access from the host to
ghcr.io(image pulls) and towww.netstacks.net(license activation and periodic license validation).
NetStacks does not publish fixed CPU, memory or disk requirements. Size the host for PostgreSQL plus the number of concurrent users and jumpbox containers you expect, and keep room for database backups.
The Controller is not designed for fully air-gapped installs: images are pulled from GHCR and the license is activated and revalidated online.
Run the Installer
Copy the release package to the host, extract it and start the installer:
tar xzf netstacks-controller-<version>.tar.gz
cd deploy
./install.sh
Registry login. If the host is not already logged in to
ghcr.io, the installer runsdocker login ghcr.ioand asks for your GitHub username and token. For unattended installs, setGHCR_USERandGHCR_TOKENin the environment first.Answer the prompts (press Enter to accept the default shown in brackets):
Prompt What to enter Deployment mode 1Single instance (default) or2High Availability, which also asks for the number of API instances (default 2). See High Availability.Controller version latest, or pin a specific release such as0.0.20.External PostgreSQL Nuses the bundled database (a password is generated for you).yasks for host, port, user, password and database name and checks that the server is reachable.Vault master key Auto-generated 64-character hex key that encrypts stored credentials. Accept the generated value and keep a copy somewhere safe. Service token secret Auto-generated; used to sign plugin service tokens. TLS SANs The hostname(s)/IP(s) users will type to reach the Controller (default: the host's FQDN). Docker group GID Detected from /var/run/docker.sock; needed for jumpboxes and plugins.Custom jumpbox image Nusesghcr.io/netstacks/netstacks-controller/jumpbox:latest. You can change the image later under Settings → Jumpboxes.Log level info(default), ordebug/warn.The installer writes
.env(file mode 600), pulls the images, runsdocker compose up -d, and waits for PostgreSQL, Valkey andhttps://localhost:3000/healthto respond.When it finishes, it prints a summary like this:
       Installation Complete

  Admin UI:   https://controller.example.com:3000
  API:        https://controller.example.com:3000/api

  Username:   admin
  Password:   ****************

  Save these credentials — the password is only shown on first boot.
VAULT_MASTER_KEY in .env encrypts every stored secret. It cannot be changed after credentials are stored, and it is not part of database backups. If you lose it, stored credentials cannot be decrypted. Copy .env to a secure location now.
If you run install.sh again and choose to overwrite the existing .env while using the bundled database, the installer removes the old database volume and starts fresh. To change the version only, answer N to the overwrite question (the installer then updates just NETSTACKS_VERSION) or use upgrade.sh.
First Login
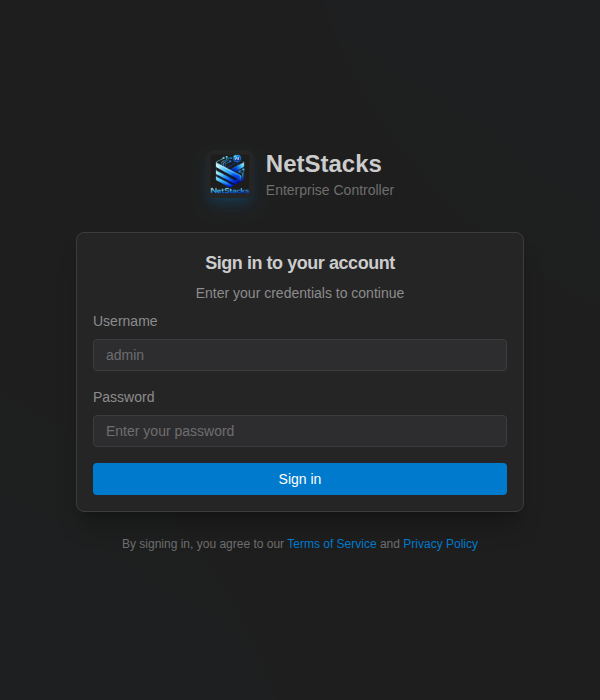
- Browse to
https://<your-host>:3000. Until you trust the Controller's certificate (next section) the browser shows a certificate warning. - Sign in with username
adminand the password the installer printed. If you missed it, read it from the API log:docker compose logs api | grep "Password:" - Change the password: open Administration → Users, edit
admin, enter a new password and click Save Changes. Passwords must be at least 12 characters and not a common password.
The built-in admin user holds two roles: admin (all permissions in the Default Organization) and platform-admin (manage organizations). See Roles & Permissions.
HTTPS Certificate
The Controller always serves HTTPS. On first start it creates an internal certificate authority named NetStacks (valid 10 years, stored in the netstacks_data volume) and uses it to sign the server certificate. The CA survives upgrades and restarts, so clients only need to trust it once.
Make sure the certificate covers your hostname
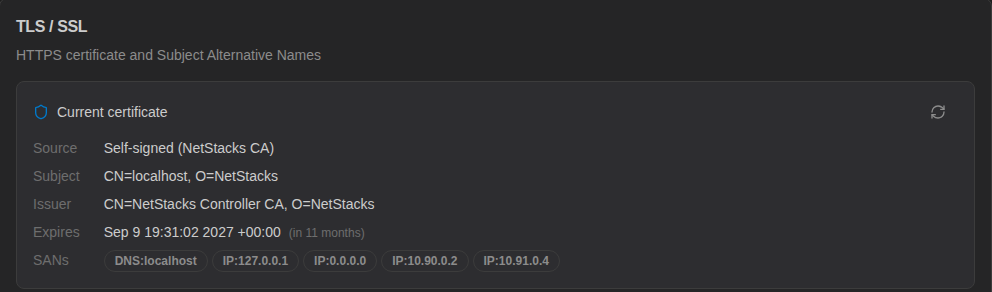
The server certificate always includes localhost, 127.0.0.1, the container's own IPs, and the names listed in the Subject Alternative Names setting. After installing:
- Open Settings → TLS / SSL. The Current certificate panel lists the SANs that are in use.
- Under Self-signed certificate options, edit Sans and enter every hostname and IP users connect with, comma-separated (for example
controller.example.com,10.0.0.50), then Save. - Restart the API and the web front end so a new certificate is issued and served:
docker compose restart api admin-ui
Trust the NetStacks CA
Download the CA certificate (no login required) and add it to your operating system or browser trust store, or distribute it with your device-management tooling:
curl -k -o netstacks-ca.pem https://controller.example.com:3000/api/tls/ca-certificateNetStacks Terminal desktop clients use the same CA when they connect to the Controller in enterprise mode.
Post-Install Checklist
- Change the
adminpassword (see above) and store.envsecurely. - Activate your license under Administration → License. NetStacks Terminal users cannot sign in to the Controller until a license is active. See Licensing.
- Generate a new JWT signing secret. In Settings → Authentication, edit JWT Secret, paste a long random value (for example the output of
openssl rand -base64 48) and confirm Rotate secret. Then restart the API (docker compose restart api). Everyone is signed out once. - Set the certificate SANs and distribute the CA (see above).
- Set Settings → General → Base Url and Settings → HA / Clustering → Advertise Address to the external URL, for example
https://controller.example.com:3000. The advertise address is used to build session-share links. - Create roles and users (Users, Roles & Permissions), and if you host several teams or customers, organizations.
- Check Administration → Platform Health: all containers should be up.
- Download a first backup (Upgrades & Backups).
Using an External PostgreSQL
To use your own PostgreSQL 16 server instead of the bundled container:
- The database must have the pgvector extension available.
- The database user needs superuser or
CREATEROLEso the API can create thecrawlerrole and schema used by discovery. Otherwise discovery stays disabled until a DBA creates them. - Set
DATABASE_URL(andCRAWLER_DATABASE_URLfor discovery) in.envand leaveCOMPOSE_PROFILESunset. The installer does this for you when you answeryto the external PostgreSQL question.
Without the bundled DB, start the services explicitly:
docker compose up -d valkey api admin-ui crawler-backend crawler-worker.env Reference
The installer writes these values. Edit .env and run docker compose up -d to apply changes.
| Variable | Purpose |
|---|---|
NETSTACKS_VERSION | Controller image tag (latest or a pinned version). |
COMPOSE_PROFILES=bundled-db | Starts the bundled PostgreSQL container. Omit for an external database. |
POSTGRES_PASSWORD | Bundled database password. Only used when the database volume is first created. |
DATABASE_URL | External PostgreSQL connection string. |
VAULT_MASTER_KEY | Required. 64 hex characters (openssl rand -hex 32). Encrypts stored secrets. |
SERVICE_TOKEN_SECRET | Signs plugin service tokens. |
DOCKER_GID | Group ID of /var/run/docker.sock (stat -c '%g' /var/run/docker.sock). |
JUMPBOX_IMAGE | First-boot default for the jumpbox image; afterwards managed in Settings → Jumpboxes. |
RUST_LOG | Log level (default info). |
CRAWLER_VERSION, CRAWLER_DB_PASSWORD, CRAWLER_DATABASE_URL | Discovery image tag, crawler DB role password (default crawler), and crawler connection string for external PostgreSQL. |
Valkey is preconfigured in the compose files (VALKEY_URL=redis://valkey:6379). To use Valkey Sentinel instead, set VALKEY_SENTINEL_URLS and VALKEY_SENTINEL_MASTER (default mymaster) on the api service.
Resetting the Admin Password
If you lose the admin password:
- In
docker-compose.yml, uncommentADMIN_PASSWORD_RESET: "true"in theapiservice environment. - Restart and read the new password:
docker compose up -d api docker compose logs api | grep "Password:" - Comment the variable out again and run
docker compose up -d api.
Troubleshooting
- Image pull denied — your GitHub token needs
read:packagesand access to the NetStacks images. Rundocker login ghcr.ioagain. - "API did not become healthy" — check
docker compose logs api. A missing or malformedVAULT_MASTER_KEYor an unreachable database stops the API from starting. - Discovery pages are empty or report the crawler unreachable — with an external database, confirm the DB user can create roles or that the
crawlerrole/schema exist, and thatCRAWLER_DATABASE_URLis set. - Jumpboxes or plugins fail to start — check that
DOCKER_GIDmatches the group of/var/run/docker.sock. - Browser warns the certificate name doesn't match — add the hostname to the TLS SANs and restart
apiandadmin-ui. - Liveness and readiness endpoints (no login):
GET /healthandGET /ready(reports database and Valkey status).