
Adding Devices
Add devices to the standalone Terminal as sessions, or to the NetStacks Controller's central inventory by hand, from CSV/JSON, from NetBox, or from discovery.
Which Method to Use
| Method | Mode | Best for |
|---|---|---|
| New Session / Quick Connect | Standalone | A handful of devices on your own machine |
| CSV / JSON / SecureCRT import | Standalone | Moving an existing session list into NetStacks |
| NetBox import | Standalone and Controller | Pulling devices from your source of truth (NetBox Integration) |
| Add Device | Controller | Adding a single device to the shared inventory |
| CSV / JSON import | Controller | Bulk-loading the shared inventory from a spreadsheet or script |
| Manage discovered devices | Controller | Promoting devices the NetStacks Crawler found (Network Discovery) |
Standalone Terminal
In standalone (personal) mode a device is a session saved in the Terminal's local database. Every session must use a credential profile — create one first under Settings → Profiles (see Connection Profiles). Sessions are not shared with anyone else.
The screenshots on this site come from the browser terminal, which always runs in enterprise mode. The standalone dialogs below are described by their exact labels.
New Session
- Open the Sessions sidebar and click New Session (or right-click a folder and choose New Session in Folder).
- On the General tab enter a Session Name, choose the Protocol (SSH or Telnet), and set Host, Port and Folder.
- On the SSH tab (labelled Auth for Telnet) pick the Credential Profile. Optionally choose a Jump (Bastion), add Port Forwarding rules, or enable Legacy SSH Algorithms for old devices.
- Optionally fill the Console tab to reach the device through a terminal server, and the Terminal tab for auto-reconnect, scrollback, auto commands, CLI Flavor and display settings.
- Click Save (or Save & Open Console).
The CLI Flavor tells the AI features what kind of device it is; see Device Types & Platforms.
Quick Connect
Press Cmd/Ctrl+Shift+Q (or Cmd/Ctrl+N) to open Quick Connect. Enter Host, Port and a Credential Profile, then click Connect for a one-off SSH session, or Connect & Save... to give it a Session Name and keep it (Save & Connect). Recent Connections lists hosts you used recently.
Import Sessions
| Format | Where | Notes |
|---|---|---|
| CSV | Sessions toolbar → Import CSV/JSON | Columns name, host, port, folder, profile, console_host, console_port, console_protocol, console_profile, console_legacy_ssh. name and host are required. Use the toolbar's example-template button to download a starter file. |
| NetStacks JSON | Sessions toolbar → Import CSV/JSON, folder menu → Import Sessions..., or Settings → Integrations | The file produced by Export Folder..., Export Session... or Export Sessions to File. |
| SecureCRT XML | Settings → Integrations → Import from SecureCRT | Choose the exported XML, a Credential Profile, and the Folders to Import. Host names, ports, protocol and the folder tree are kept. |
| NetBox | Settings → Integrations → NetBox Sources | See NetBox Integration. |
A minimal CSV:
name,host,port,folder,profile
core-rtr-01,10.0.0.1,22,Core,Network Admin
dist-sw-01,10.0.1.1,22,Distribution,Network Admin
Profiles are matched by name, so create them before importing; rows whose profile does not exist are skipped.
Controller Inventory Enterprise
Devices added on the Controller appear for everyone in the organization: in the admin console under Inventory → Managed Devices and in every connected Terminal's Devices panel.
A Controller device has no credentials of its own. Its profile supplies SSH, SNMP and gNMI/NETCONF credentials, the SSH port and the CLI flavor. Create at least one profile under Access & Secrets → Profiles before adding devices (see Connection Profiles).
Add a Device Manually Enterprise
- Go to Inventory → Managed Devices and click Add Device.
- Enter a Name (unique in your organization) and the Host / IP.
- Choose the Protocol (SSH or Telnet) and the Device Type. The device type decides which commands are used for config backups (see Device Types & Platforms).
- Optionally choose a Site.
- Choose the Profile (auth). Use Create / manage profiles if you need a new one.
- Click Create Device.
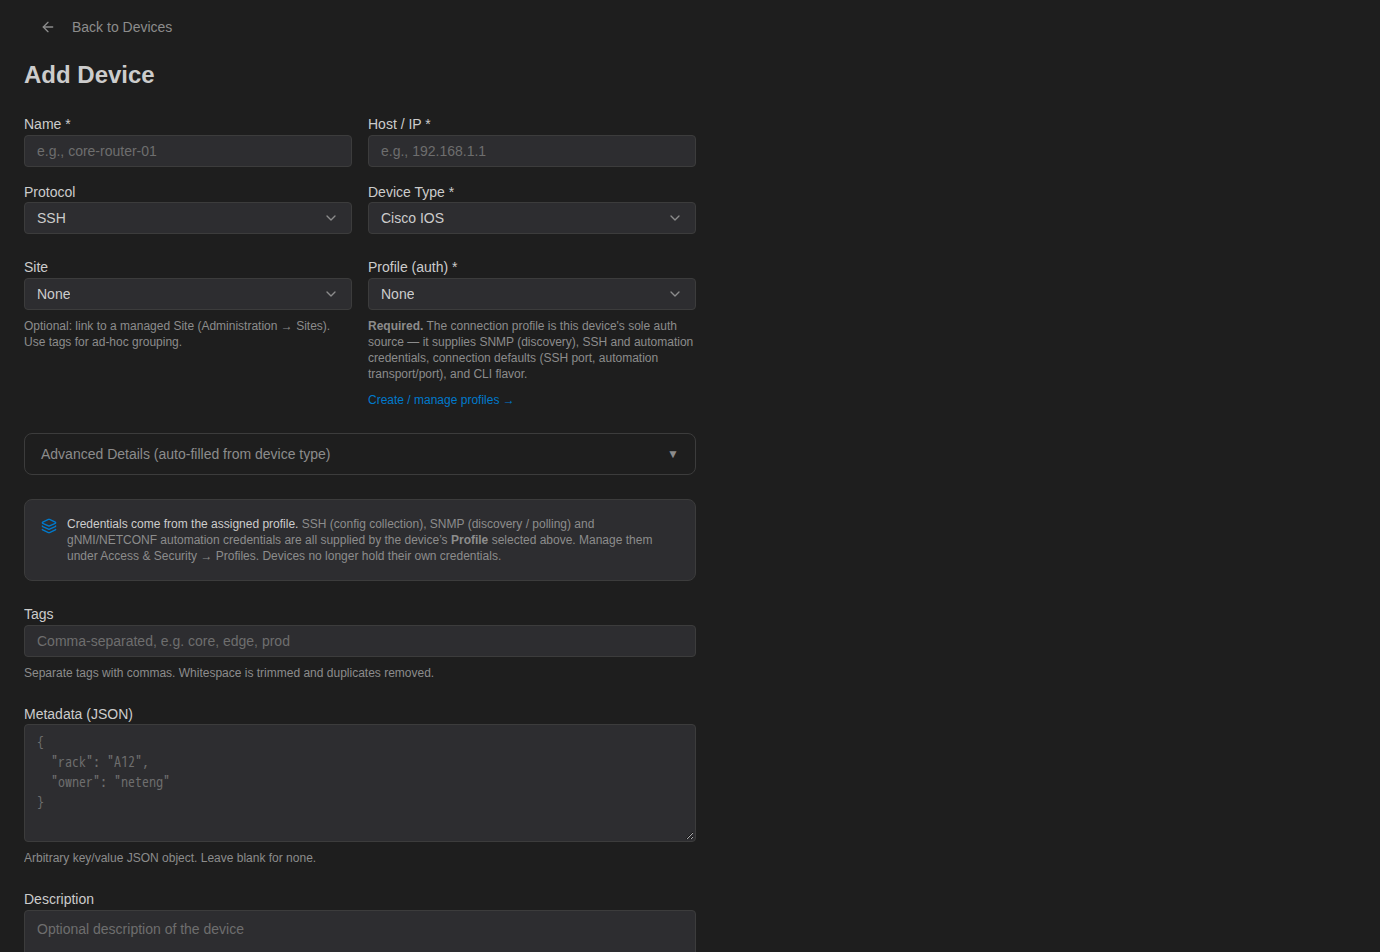
Expand Advanced Details (auto-filled from device type) to set Manufacturer (filled in from the device type when left blank), Model, Serial Number and Asset Tag. The structured transport for gNMI/NETCONF backups is set on the profile, not here. Further down you can add comma-separated Tags, a Metadata (JSON) object and a Description.
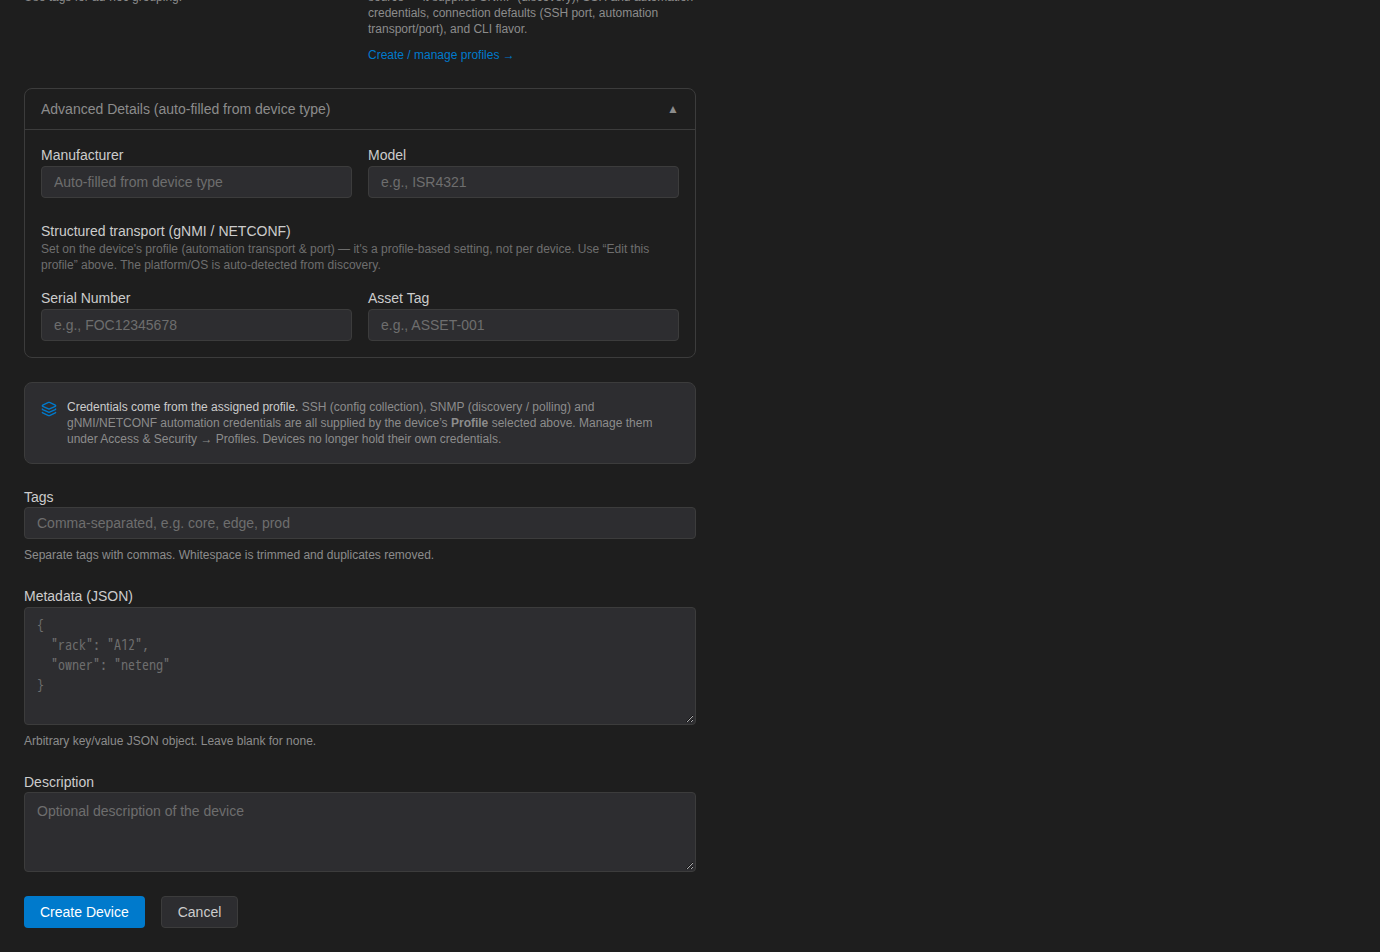
To edit a device later, click the pencil icon in the list or open the device's Manage tab, change the fields and click Save Changes. The Manage tab also shows which backup methods are available for the device (CLI, structured, or both) based on its profile.
Import from CSV or JSON Enterprise
- On Managed Devices click Import.
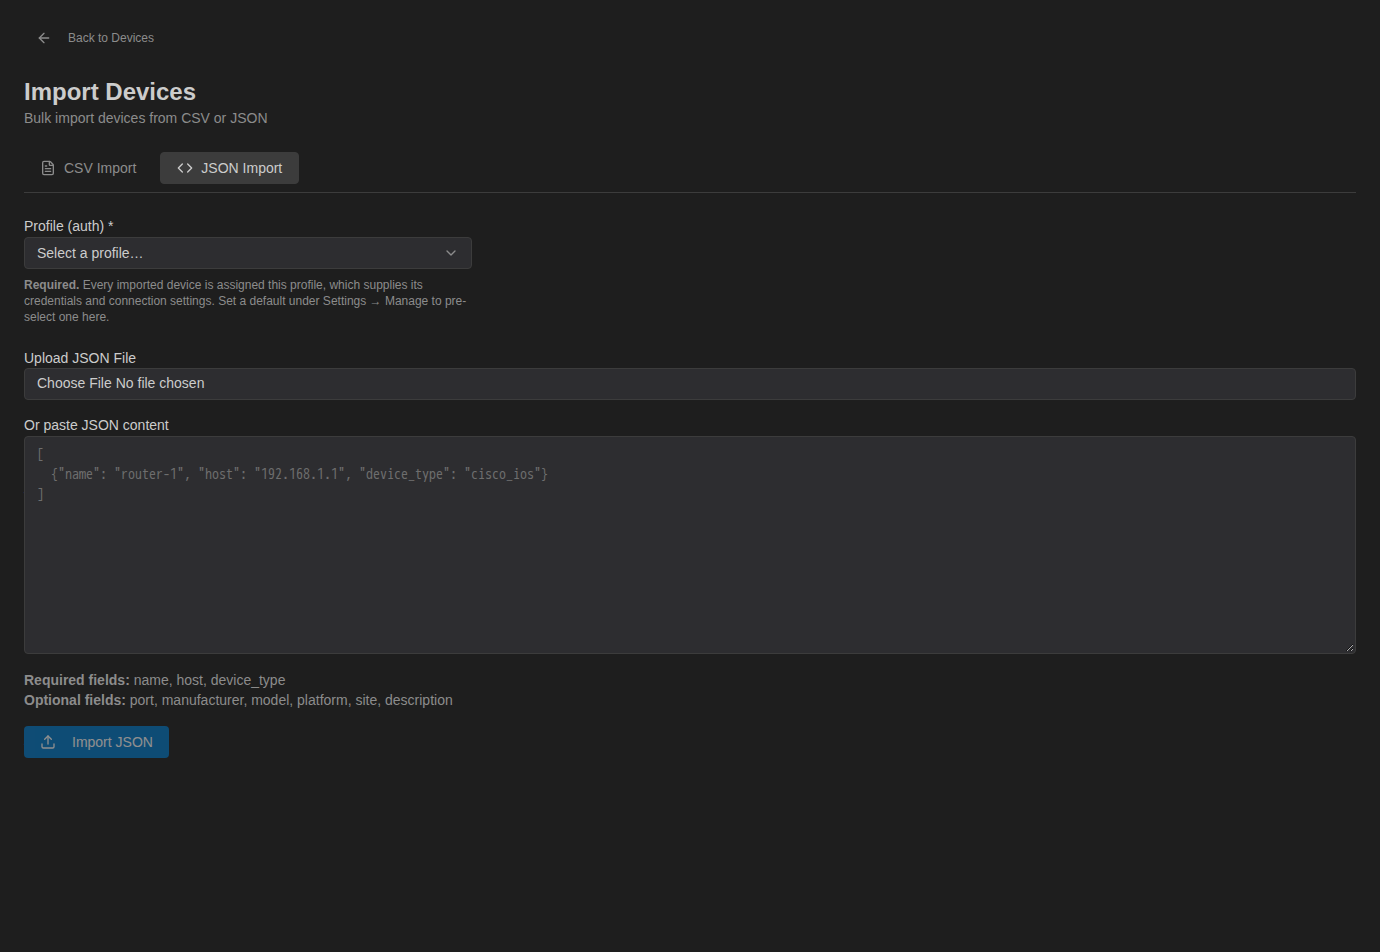
- Choose CSV Import or JSON Import.
- Pick the Profile (auth). Every imported device is assigned this profile.
- Upload a file or paste the content.
- Click Import CSV / Import JSON.
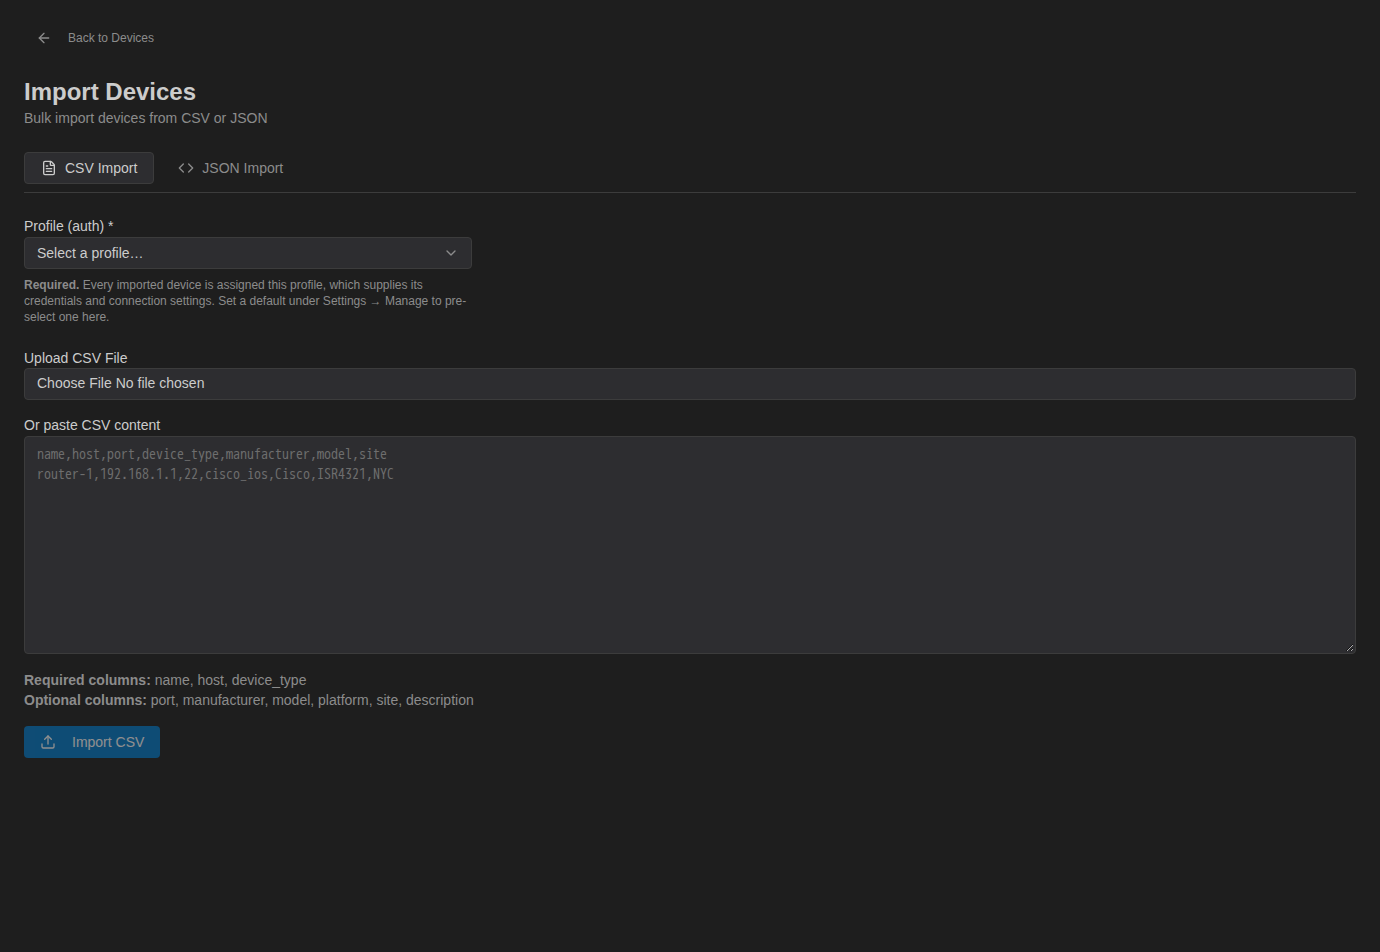
Required columns are name, host and device_type. Optional columns are manufacturer, model, platform, site and description. The header row must use these exact names. The connection port comes from the profile.
name,host,device_type,manufacturer,model,site
core-rtr-01,10.90.0.11,cisco_xe,Cisco,ASR1002-HX,Austin HQ
dist-sw-01,10.90.0.13,cisco_xe,Cisco,C9500-48Y4C,Austin HQ
edge-fw-01,10.90.0.30,paloalto_panos,Palo Alto,PA-3220,Austin HQ
JSON uses the same fields as an array of objects:
[
  { "name": "core-rtr-01", "host": "10.90.0.11", "device_type": "cisco_xe", "site": "Austin HQ" },
  { "name": "spine-01", "host": "10.90.1.1", "device_type": "arista_eos", "manufacturer": "Arista" }
]
When the import finishes, the Import Result panel shows how many devices were imported and failed, lists each error as “Row N: name – error”, and offers View Imported Devices. A row fails if a device with the same name already exists; import does not update existing devices.
Manage Discovered Devices Enterprise
Devices the NetStacks Crawler discovers are listed under Discovery → Discovered. To bring them under management:
- Tick the devices (or use Manage all N matching to take everything that matches your search).
- Click Manage and choose a Profile (auth / credentials) (the default profile is pre-selected if one is set).
- Click Manage N. Devices that are already managed are skipped.
You can also open a single discovered device and click Manage this device on its Manage tab (this uses the default profile described below). See Bulk Operations for screenshots.
Default Profile for New Devices Enterprise
Under Settings → Crawler & Discovery, the Device manage / unmanage section has Default Profile ID — the profile automatically assigned to newly managed or imported devices when you don't pick one. Setting it pre-selects that profile on the Import page and is required for NetBox syncs and for the single-device Manage this device button.
Troubleshooting
| Message | Fix |
|---|---|
| Devices require a profile / Imports require a profile | Choose a profile on the form, or set the Default Profile ID under Settings → Crawler & Discovery. |
| Device with this name already exists | Names are unique per organization. Rename the row, or edit the existing device instead. |
| CSV parse error | Check the header row uses exactly name,host,device_type (plus any optional columns) and that every row has the same number of fields. |
| JSON must be an array of devices | Wrap the objects in [ ]. |
| Standalone import skipped rows | The profile named in the file doesn't exist locally. Create it under Settings → Profiles and import again. |