
Device Inventory
How NetStacks keeps track of your network devices: local sessions in the standalone Terminal, and the central Managed Devices inventory on the NetStacks Controller.
Two Kinds of Inventory
Where your devices live depends on how you run NetStacks:
- Standalone Terminal (personal mode) — each device is a session stored in the Terminal's local database. You create sessions yourself (or import them from CSV, JSON, SecureCRT or NetBox), organise them in folders, and each session uses one of your local credential profiles. The left sidebar is titled Sessions.
- NetStacks Controller (enterprise) — devices live in the Controller's central Managed Devices inventory, shared by everyone in the organization. Administrators add them in the admin console (manually, from CSV/JSON, from NetBox, or by managing devices the discovery crawler found). Every managed device is assigned a profile that supplies its credentials.
When the Terminal is connected to a Controller (enterprise mode, including the browser terminal at /terminal/), the sidebar is titled Devices and lists the Controller's inventory instead of local sessions. See Devices in the Terminal for that view.
| Capability | Standalone Terminal | Controller |
|---|---|---|
| Where devices are stored | Local sessions on your machine | Central Managed Devices inventory |
| How you add devices | New Session, Quick Connect, CSV/JSON, SecureCRT, NetBox | Add Device, CSV/JSON import, NetBox sync, manage discovered devices |
| Credentials | Local credential profiles in your vault | Controller profiles (secrets stay on the Controller) |
| Config backups, history and diff | — | Yes |
| Discovery and topology | Yes | Yes (plus the NetStacks Crawler) |
Managed Devices (Controller) Enterprise
In the Controller admin console, open Inventory → Managed Devices(route /devices). The badge next to Inventory in the sidebar shows the device count. The page lists every device under Controller management — the devices you can back up, automate and connect to.
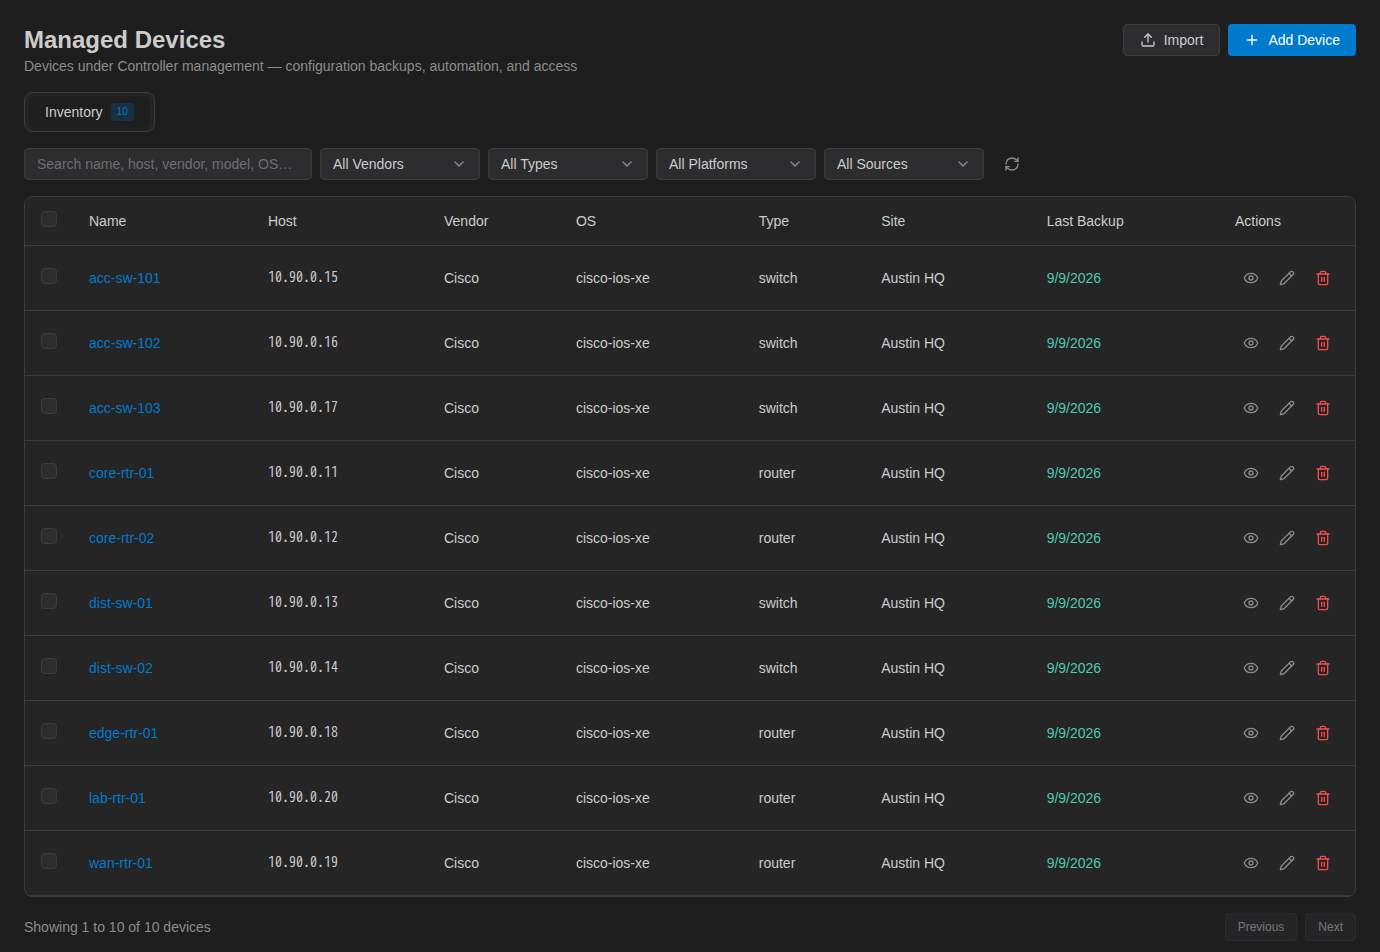
The header has two buttons: Import (CSV or JSON) and Add Device. Both are covered in Adding Devices.
Searching and Filtering Enterprise
The filter bar above the table narrows the list on the server, so it works across every page of results:
- Search (Search name, host, vendor, model, OS…) — matches any part of the name, host, vendor, model, platform or device type.
- All Vendors, All Types, All Platforms — options are built from the values present in your inventory.
- All Sources — Manual, Crawler (Discovered), NetBox, CSV Import, JSON Import.
- The refresh button reloads the list.
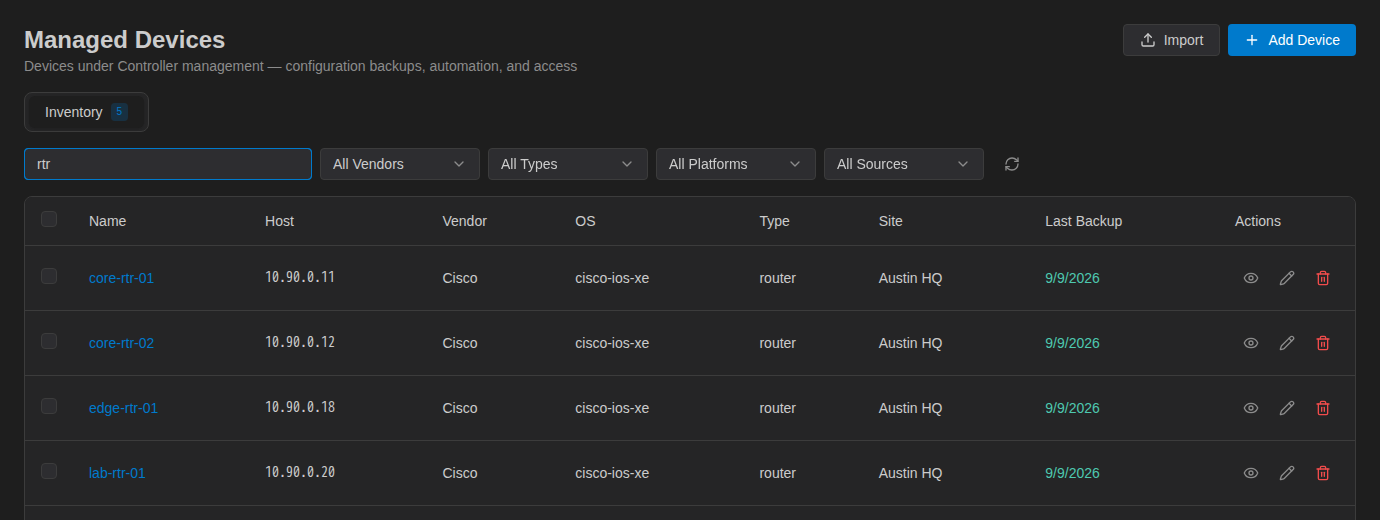
Results are paged 50 at a time (“Showing X to Y of N devices” with Previous/Next). Ticking rows opens the bulk actions bar — see Bulk Operations.
List Columns and Row Actions Enterprise
| Column | What it shows |
|---|---|
| Name | Device name (unique within the organization). Click it to open the device detail page. |
| Host | Management IP address or hostname used to connect. |
| Vendor | Manufacturer. |
| OS | Platform (for example cisco-ios-xe), set by NetBox, the crawler or Bulk Edit. |
| Type | Device type (for example router, switch, cisco_ios). |
| Site | Site label. |
| Last Backup | When the last config backup was stored, or Never. A note appears if the most recent attempt failed. |
| Actions | View device (eye), Edit device (pencil — opens the device's Manage tab), Unmanage device (trash). |
Unmanage removes the device from the Controller and deletes all of its stored config backups. If the device came from the crawler or NetBox it stays there and can be managed again later. See Unmanaging devices.
The Device Detail Page Enterprise
Clicking a device opens its detail page at /devices/<ip>. The page is keyed by the device's IP address and combines what the NetStacks Crawler (the Controller's discovery engine) knows about the device with the Controller's own config backups and management settings.
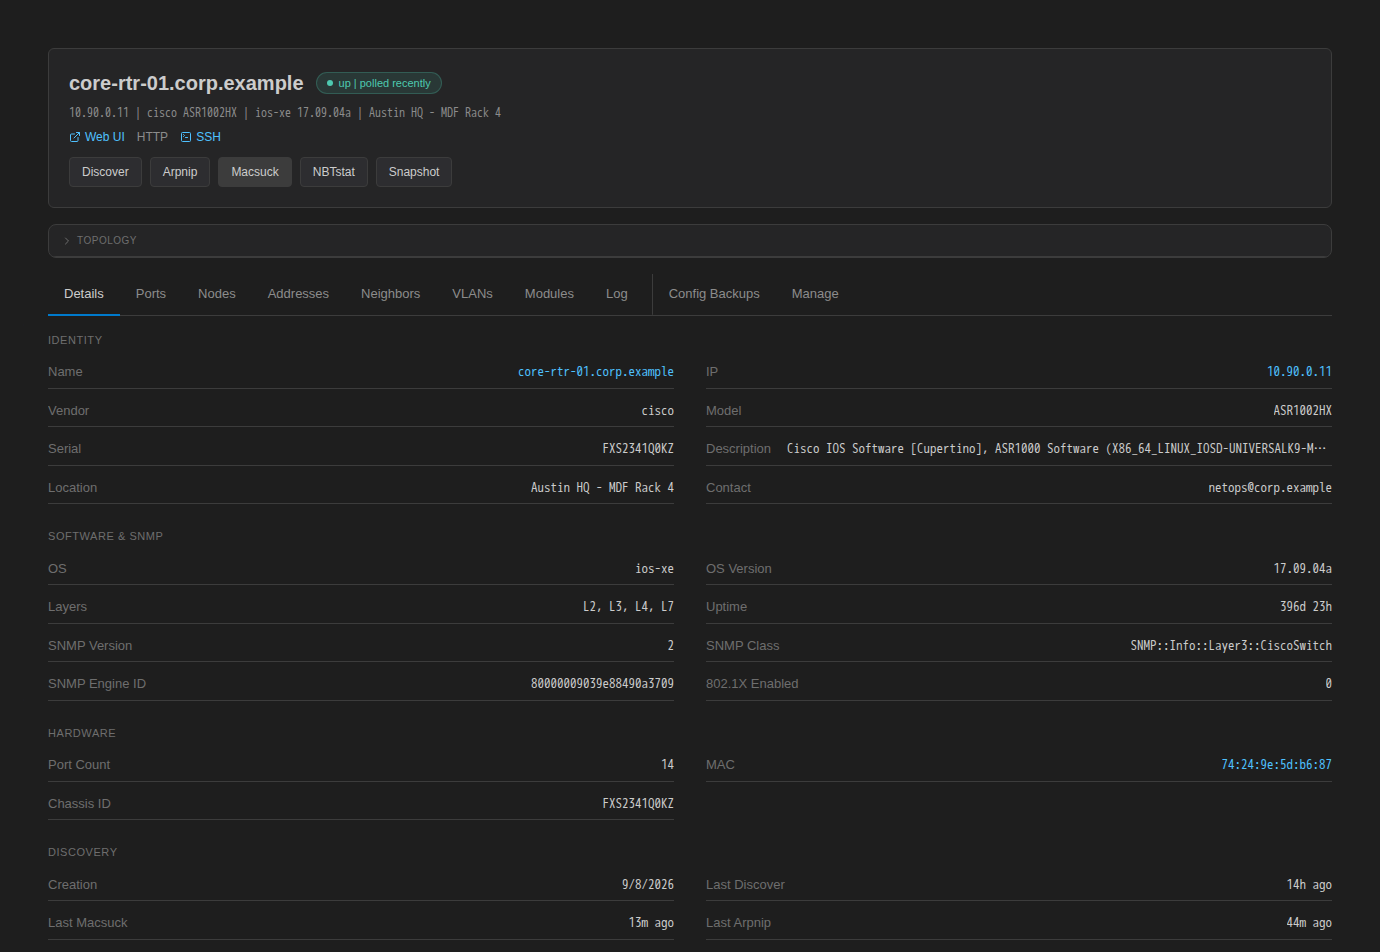
The header shows:
- The device name (DNS name when known), IP, vendor and model, OS and version, and location.
- Quick links: Web UI, HTTP and SSH (opens an
ssh://link in your local SSH client). - Crawler action buttons: Discover, Arpnip, Macsuck, NBTstat, Snapshot. Each queues a crawler job for this device (re-discover, collect the ARP table, collect the MAC table, NetBIOS scan, crawler snapshot) and confirms with “Queued <action> as job #N”. These need the
devices.managepermission. - A collapsible Topology strip that maps the device and lets you add its neighbours (see discovery maps).
Snapshot in the header queues a crawler snapshot job. Configuration backups are taken from the Config Backups tab or from Config Snapshots.
Detail Tabs Enterprise
| Tab | Contents |
|---|---|
| Details | Identity (name, IP, vendor, model, serial, description, location, contact), Software & SNMP (OS, version, layers, uptime, SNMP version), Hardware (port count, MAC, chassis ID), Discovery timestamps. |
| Ports | Every interface with status, speed, VLAN, neighbour and description. Use Columns to show PoE, admin status, duplex, MTU, MAC, STP and more. The row menu offers port actions such as renaming the description, toggling admin status, changing the VLAN and cycling PoE (these require devices.manage). |
| Nodes | MAC addresses learned on the device: MAC, VLAN, port, first and last seen. |
| Addresses | IP addresses on the device's interfaces, with DNS name and prefix. |
| Neighbors | LLDP/CDP neighbours: local port, neighbour, remote port, vendor, model, OS. |
| VLANs | VLAN ID, name and member ports. |
| Modules | Chassis module tree (line cards, PSUs, transceivers) with FRU badges. |
| Log | Port change log: when, user, port, action, reason, notes. |
| Config Backups | Pull and browse stored configurations and compare versions. See Config History & Diff. |
| Manage | For a discovered device that is not managed yet, the Manage this device button. For a managed device, the edit form (name, host, protocol, device type, site, profile, tags, metadata, description) and an Unmanage button. |
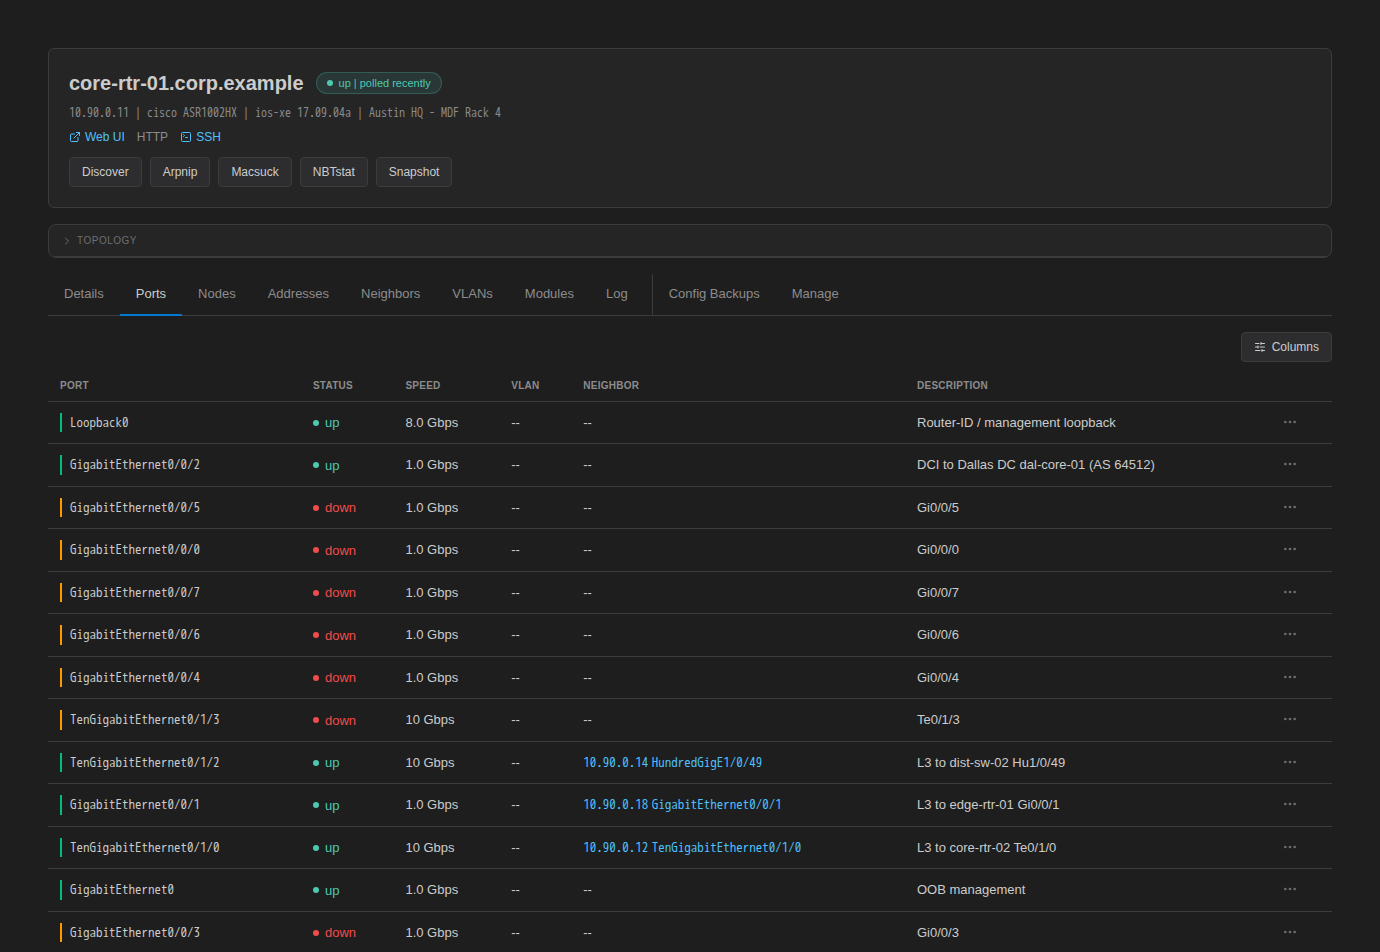
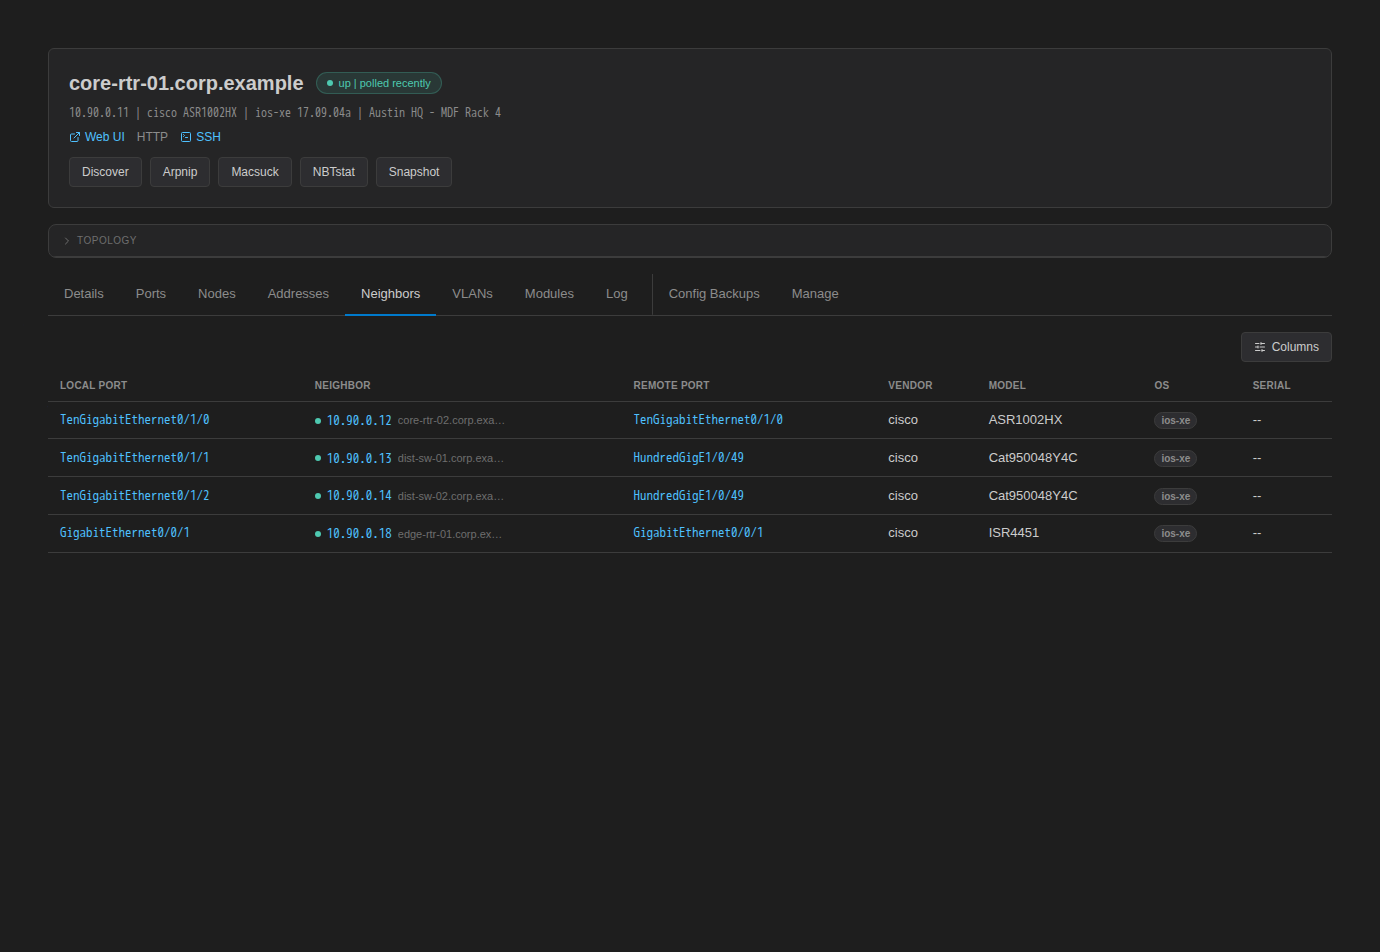
The first eight tabs show data collected by the crawler over SNMP. If a device has never been discovered by the crawler those tabs stay empty, but the Config Backups and Manage tabs still work for managed devices.
Sites Enterprise
Inventory → Sites (/sites) holds named network locations for the organization. Each site has a Name, Location, optional Parent site and Description. Click Add site to create one; use the row icons to edit or delete.
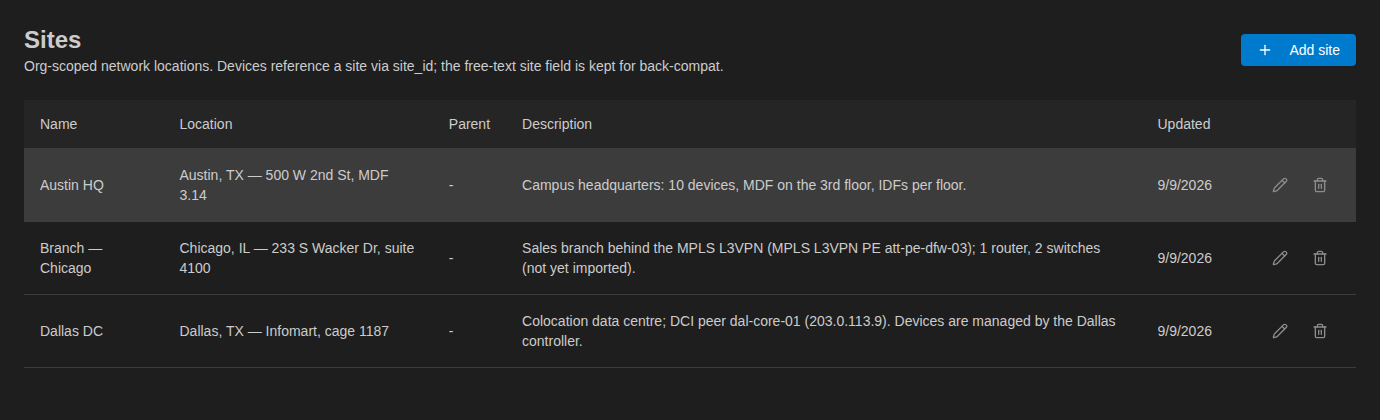
Assign a site to a device with the Site field on the Add Device form, the Manage tab, or Bulk Edit. Sites are also created automatically from NetBox site names when you sync from NetBox. Deleting a site unlinks it from its devices but leaves the devices in place.
There are no separate device groups. Use sites for locations and the free-form Tags field on each device for ad-hoc grouping.
Who Can See the Inventory Enterprise
The Inventory, Discovery and Config Automation sections of the admin console require the devices.access permission. Crawler actions that change something (queuing jobs, port actions) require devices.manage. In the Terminal, the Devices sidebar appears for users with sessions.connect; whether a user can actually connect to a device depends on the profiles they have access to. Roles and permissions are managed under Roles & Permissions.