
Network Discovery
Find devices and their neighbours with LLDP/CDP over SNMP v2c, CLI and nmap from the Terminal, and run continuous fleet discovery with the NetStacks Crawler on the Controller.
Overview
NetStacks has two kinds of discovery:
| Neighbour discovery | NetStacks Crawler | |
|---|---|---|
| Available in | Standalone Terminal and Controller | Controller only |
| What it does | Probes the devices you choose for LLDP/CDP neighbours and draws a topology | Continuously walks your network over SNMP: devices, ports, MAC and ARP tables, VLANs, modules, neighbours |
| Started by | You, from a topology or the Discover dialog | Crawler actions, schedules, imports or per-device jobs |
| Results | A topology (and, on the Controller, neighbour data for managed devices) | The Discovery section of the admin console; devices can then be managed |
Discovery never adds sessions to the standalone Terminal; it builds topologies. On the Controller, discovered devices join the inventory when you manage them.
Neighbour Discovery (Terminal and Controller)
The same discovery engine runs in the Terminal's local agent (standalone) and on the Controller (enterprise). In enterprise mode the Terminal sends discovery requests to the Controller, so probes come from the Controller's network position.
Discovery Methods
| Method | What it does | Needs |
|---|---|---|
| SNMP | Walks LLDP-MIB and CDP-MIB for neighbour tables | SNMP v2c community strings on the device's profile |
| CLI | Runs show cdp neighbors detail and show lldp neighbors detail over SSH and parses the output (Cisco, Arista and Juniper formats) | SSH credentials on the profile |
| nmap | Fingerprints the host and its top 100 ports (OS and service detection) | nmap installed on the machine running discovery (the Terminal's computer, or the Controller) |
Discovered IPs are also looked up in your NetBox, Netdisco (NetStacks Crawler) and LibreNMS integrations when they are configured, to name and classify neighbours.
Discovery uses SNMP v2c. Add community strings to your profile (standalone: SNMP Community Strings in the profile editor, tried in order; Controller: an SNMP secret on the profile). See SNMP Credentials.
Discover a Topology in the Terminal
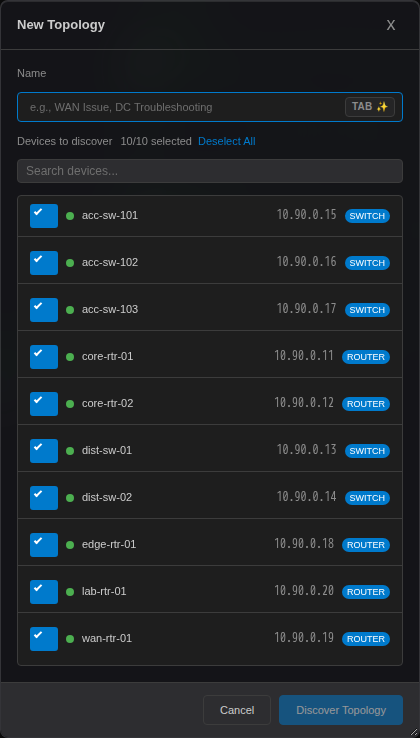
- Open the Network Topology sidebar and click New Topology (the + button).
- Enter a Name.
- Choose what to discover:
- Standalone: Active sessions to discover — the devices you have open in terminal tabs (open the tabs first).
- Enterprise: Devices to discover — pick from the Controller inventory, with search and Deselect All.
- Click Discover Topology.
Other ways to start discovery in the Terminal:
- Right-click a terminal tab that belongs to a tab group and choose Discover Topology, or use Create Group & Discover Topology (standalone).
- In the Groups sub-tab, right-click a group and choose Run topology discovery (standalone).
- On a topology, right-click a device and choose Add to Discovery, or use Enrich → Discover neighbors (1 hop).
- On a traceroute topology, click Discover to look up neighbours of each hop.
Progress appears in the Topology Discovery window. When it finishes, the devices and the links between them are drawn on the topology. See Network Topology.
Discover from the Admin Console Enterprise
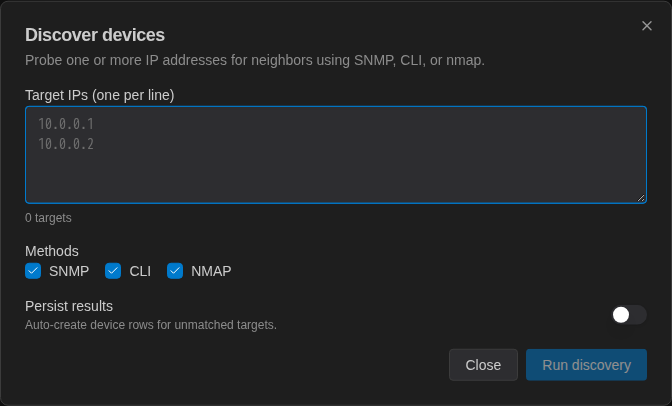
On Inventory → Topologies, click Discover to open Discover devices:
- Enter Target IPs (one per line).
- Tick the Methods to use: SNMP, CLI, NMAP (NMAP is unavailable if nmap isn't installed on the Controller).
- Turn on Persist results to auto-create device rows for targets that are not in the inventory yet.
- Click Run discovery. The results table lists each target with the method used and its neighbours.
Neighbour results for managed devices are saved on the Controller. Devices created with Persist results get the default profile from Settings → Crawler & Discovery.
NetStacks Crawler (Controller) Enterprise
The NetStacks Crawler is the Controller's discovery and SNMP collection engine, built on Netdisco. It runs as its own service alongside the Controller and keeps an up-to-date picture of the network: devices, interfaces, neighbours (LLDP/CDP), MAC addresses (macsuck), ARP entries (arpnip), VLANs, modules and NetBIOS names. Everything is under the admin console's Discovery section and Settings → Crawler & Discovery.
Discovered devices are separate from the managed inventory. A device is managed when it also exists in Managed Devices with the same IP; managing it adds credentials, config backups and automation.
Give the Crawler SNMP Access Enterprise
The crawler takes its SNMP community from a Controller profile. Until one is assigned, the Discovery pages show No profile is assigned to discovery with a link to fix it.
- Create (or pick) a profile with an SNMP community secret under Access & Secrets → Profiles.
- Open Settings → Crawler & Discovery → SNMP.
- Choose the Profile. Leave Push as read-write community off unless you need port actions (admin status, VLAN, PoE) from the device page.
- Click Apply to crawler.
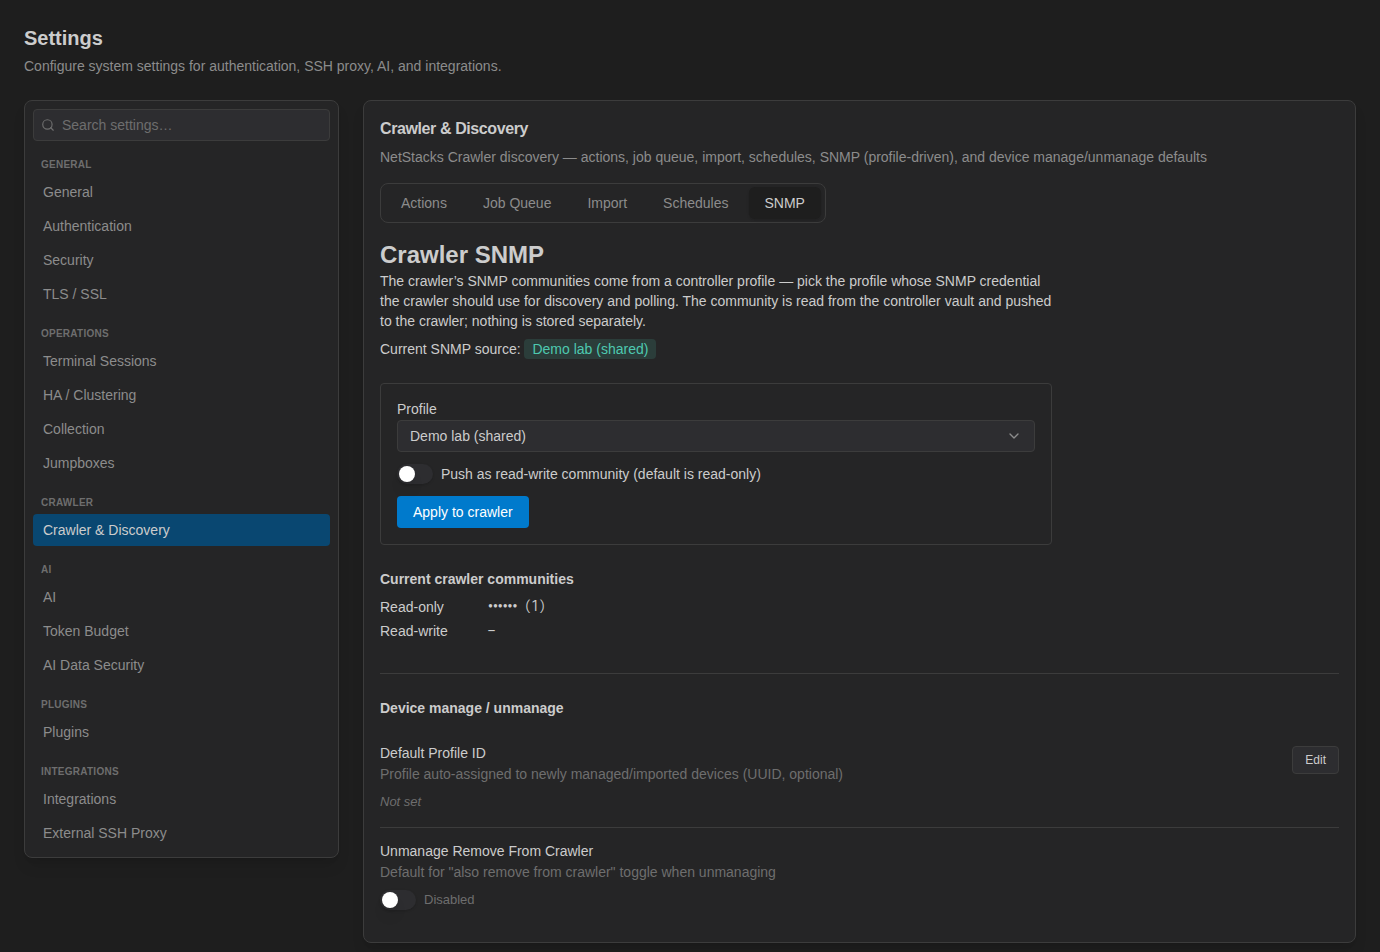
The community is read from the Controller vault and pushed to the crawler; Current crawler communities shows what is set (masked). The crawler uses SNMP community strings; SNMPv3 credentials are not supported.
Add Devices to Discovery Enterprise
There is no seed-list form; devices enter the crawler in these ways:
- Ping sweep under Settings → Crawler & Discovery → Actions, with a CIDR such as
10.0.0.0/24. - Import — a one-time pull of IPs from NetBox or another JSON API (see NetBox Integration).
- Discover on a device's detail page.
Discovery Overview Enterprise
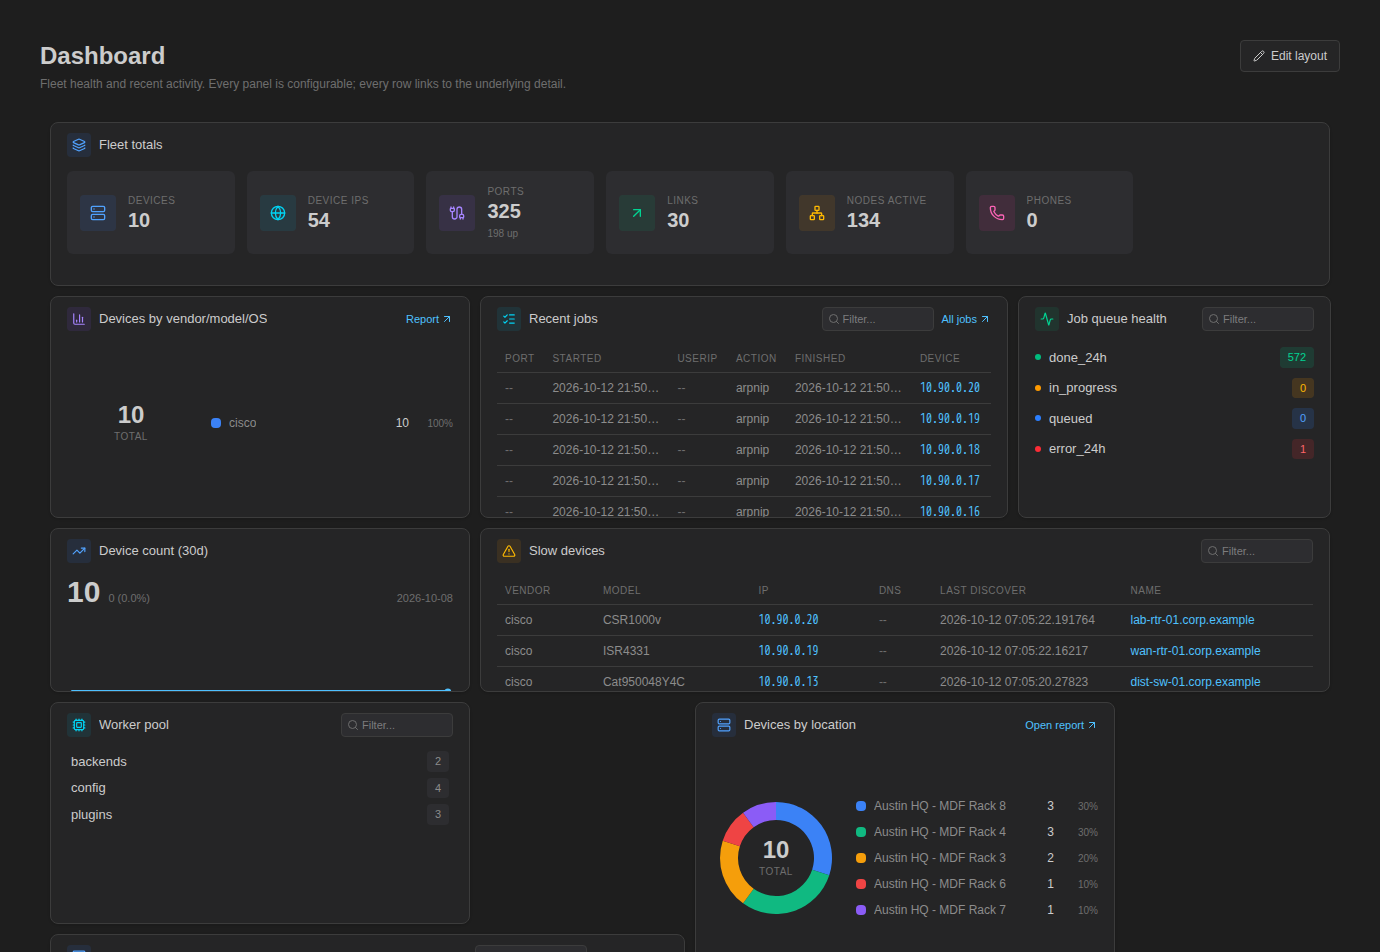
Discovery → Overview is a configurable dashboard: fleet totals (devices, device IPs, ports, links, active nodes, phones), devices by vendor/model/OS, recent jobs, job queue health, device count over 30 days, slow devices, worker pool and devices by location. Click Edit layout to rearrange or rename panels.
Discovered Devices Enterprise
Discovery → Discovered (page title Crawler Devices) lists every device the crawler knows, with IP, Name / DNS, Vendor, Model, OS and Status (Discovered, or Managed with a link to the managed device). Search by IP, name or vendor; select devices to Manage or Unmanage them (see Bulk Operations).
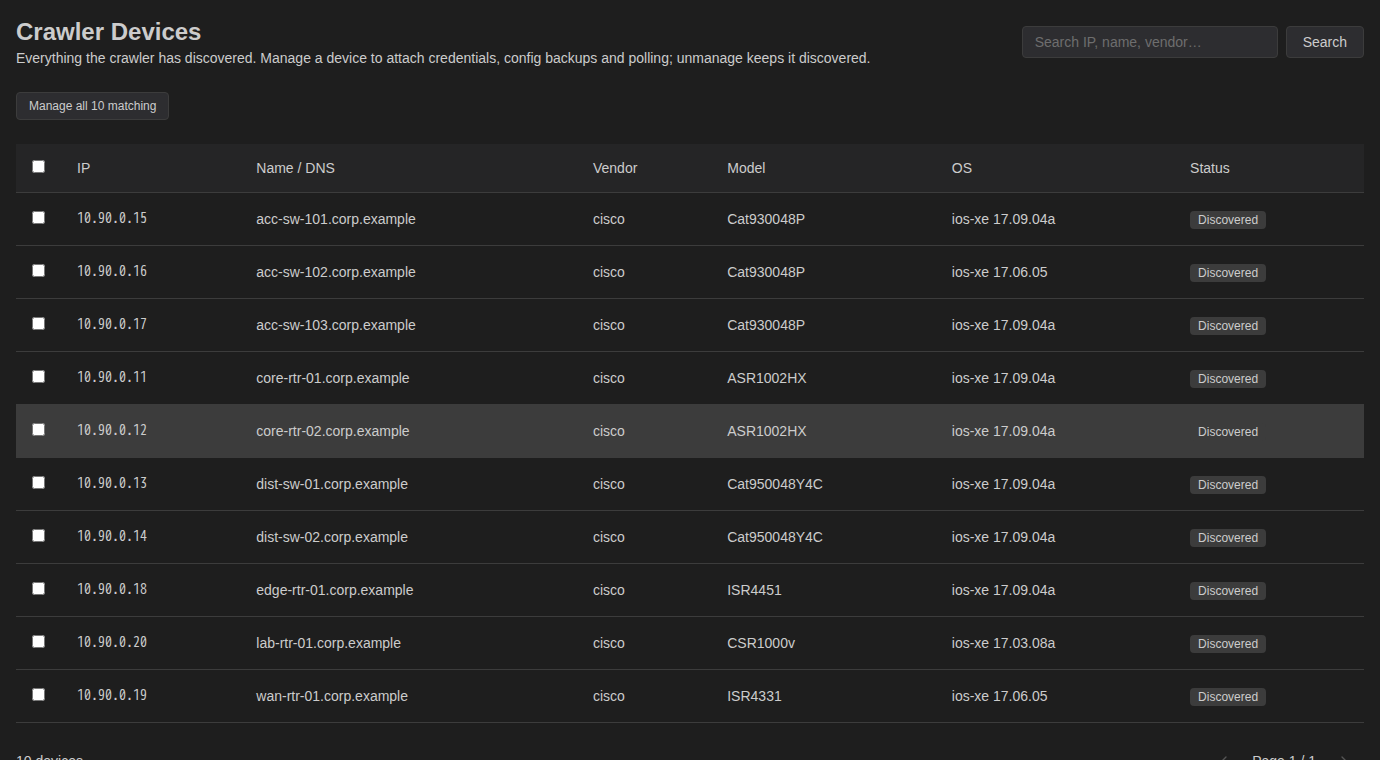
Click a device to open its detail page with Ports, Nodes, Addresses, Neighbors, VLANs, Modules and Log tabs (see Device Inventory).
Inventory and Reports Enterprise
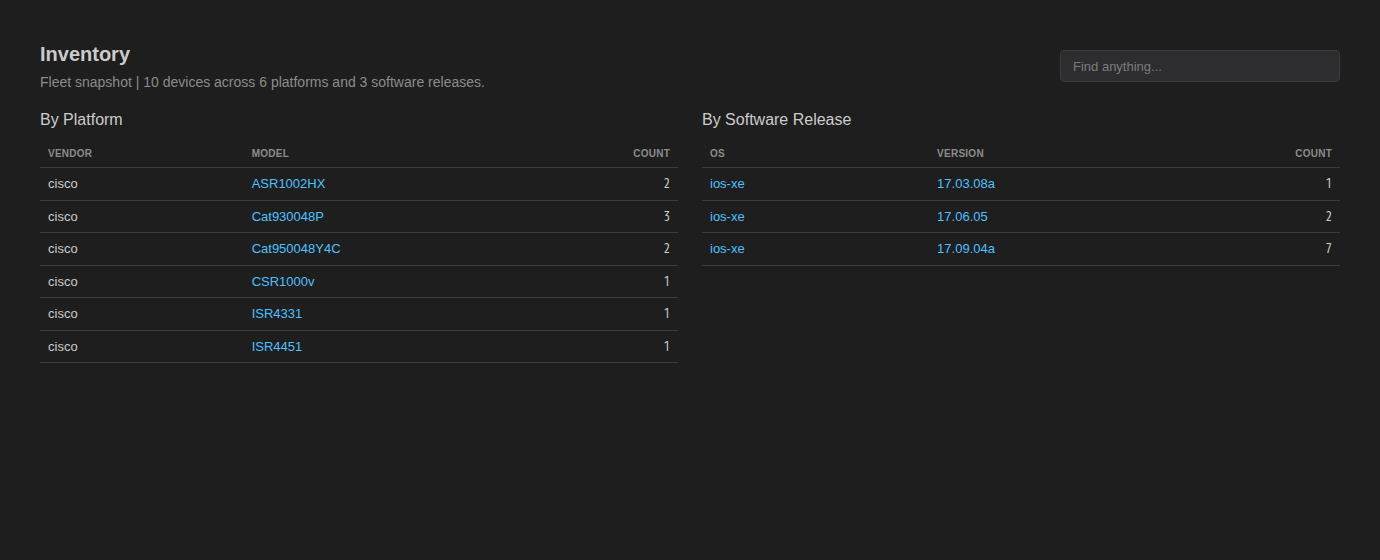
Discovery → Inventory summarises the fleet By Platform (vendor, model, count) and By Software Release (OS, version, count) — handy for spotting devices on old code.
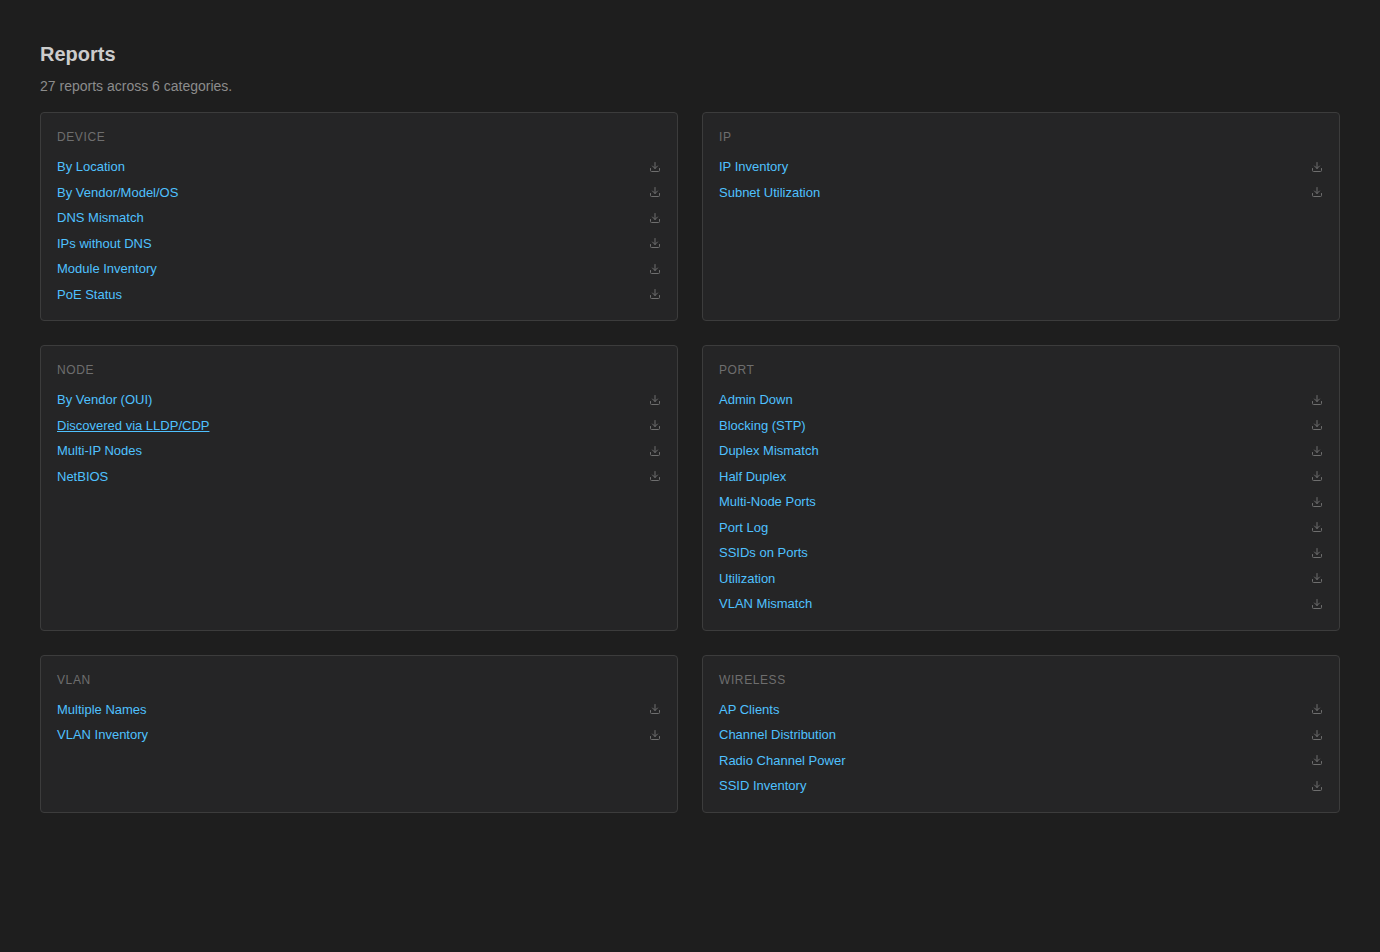
Discovery → Reports groups ready-made reports by category: Device (by location, by vendor/model/OS, DNS mismatch, module inventory, PoE status and more), IP, Node, Port (admin down, duplex mismatch, STP blocking, VLAN mismatch, utilisation and more), VLAN and Wireless. Each report can be downloaded.
Traceroute Resolver Enterprise
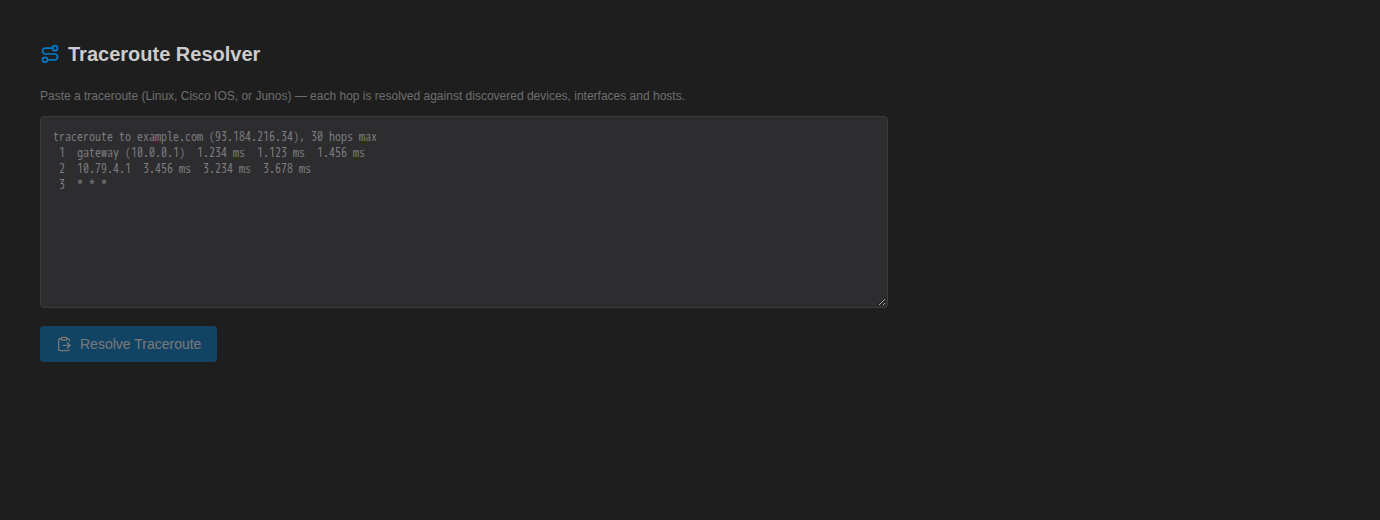
Discovery → Traceroute resolves each hop of a pasted traceroute (Linux, Cisco IOS or Junos format) against discovered devices, interfaces and hosts, and can turn the path into a discovery map.
Actions and Job Queue Enterprise
Settings → Crawler & Discovery has these tabs:
- Actions — run fleet-wide jobs: Discover all, MAC walk, ARP walk, NBT walk, Expire stale, Ping sweep (CIDR), Load MIBs and Restart workers, plus a list of recent jobs.
- Job Queue — every job with its status, timestamps and log; filter by status, Refresh, cancel individual jobs or Cancel queued jobs. The list refreshes every 5 seconds.
- Import — one-time IP import from an external API.
- Schedules — cron expressions (5-field) per crawler action; changes apply within a minute.
- SNMP — the discovery profile (above).
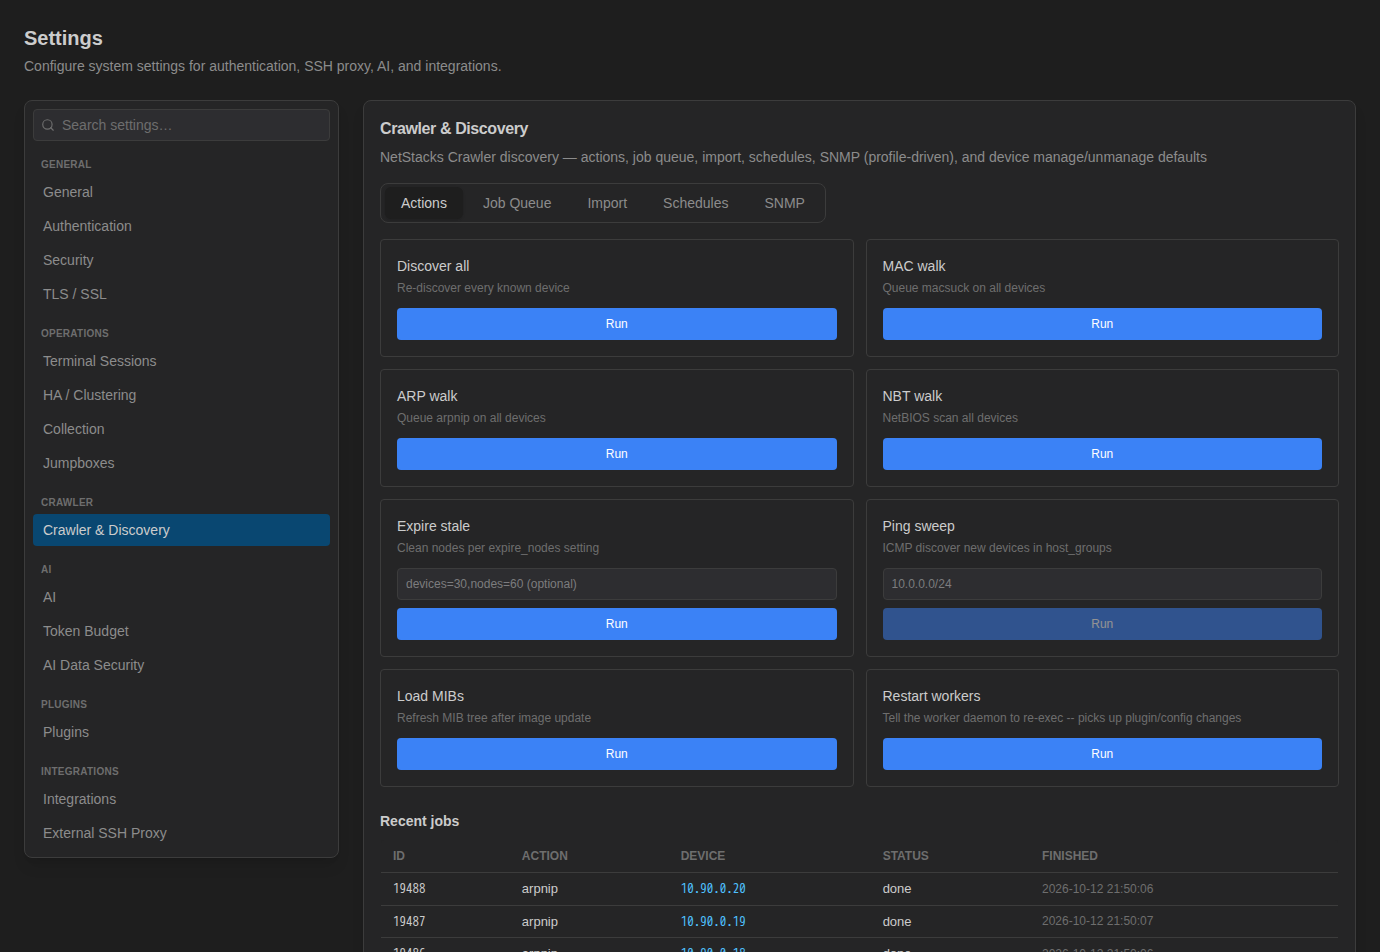
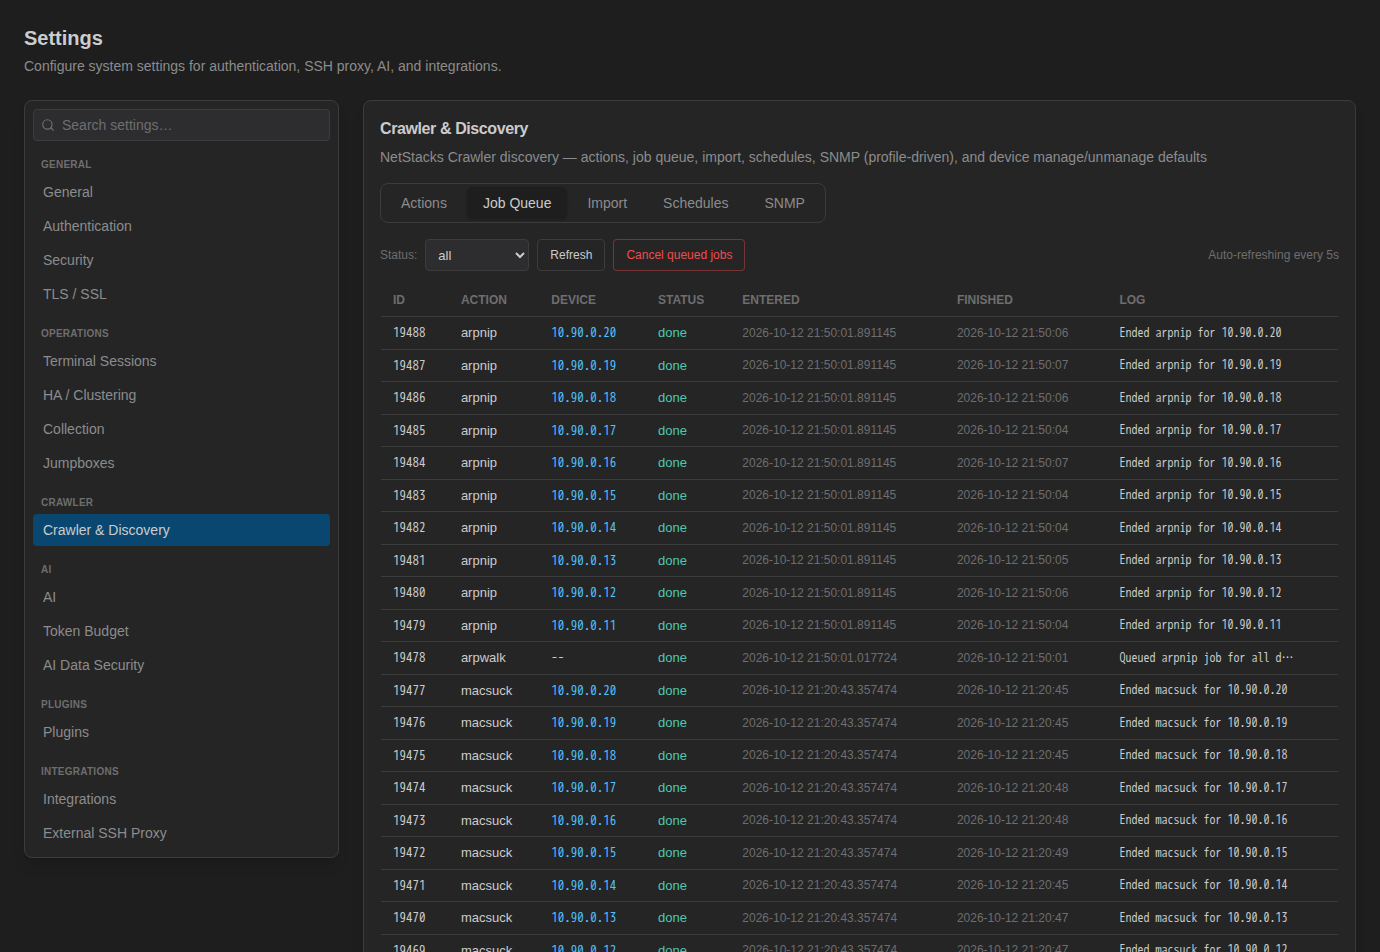
Below the tabs, Device manage / unmanage holds the Default Profile ID for newly managed devices and the default for Also remove from crawler inventory. Crawler actions and jobs need the devices.manage permission.
Troubleshooting
| Problem | What to check |
|---|---|
| No neighbours found | LLDP or CDP must be enabled on the devices, and the profile needs a working SNMP community (SNMP method) or SSH login (CLI method). |
| Standalone New Topology lists no devices | “No active sessions” — open terminal tabs to the devices first. |
| NMAP method greyed out | nmap is not installed where discovery runs. |
| Crawler shows “No profile is assigned to discovery” | Assign a profile with an SNMP community under Settings → Crawler & Discovery → SNMP. |
| Crawler finds nothing new | Run a Ping sweep of the management subnet, or Import IPs, then check the Job Queue for errors. |