
AI Agents
Run AI agents as background tasks: define agents with their own system prompt, give them a task, and review the result. Covers the Terminal Agents panel and Controller agents.
Overview
An agent is a reusable AI worker with its own name, description and system prompt. Unlike the AI assistant panel, an agent works in the background: you give it a task, it reasons and uses tools step by step (a ReAct — reason + act — loop), and you review its result when it finishes.
- Terminal Agents panel — available in both modes. In standalone mode, agents run on the local NetStacks agent on your machine. In enterprise mode, the panel shows your Controller's agents and recent runs.
- Controller agents (enterprise) — managed in the admin console under AI & Agents → Agents, with an execution history for the whole organization.
The Terminal Agents Panel
Click Agents in the activity bar on the left. The panel shows your agents as coloured icons at the top, a connection indicator, and the list of tasks below with their status (Completed, Failed and so on), duration and age. Clear Completed removes finished, failed and cancelled tasks. Tasks persist across app restarts.
While runs are active, the status bar shows an N agent(s) chip; click it to open the panel.
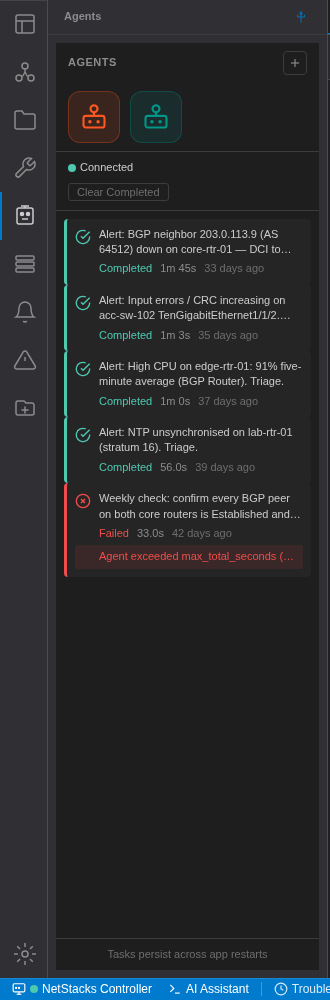
Create an Agent
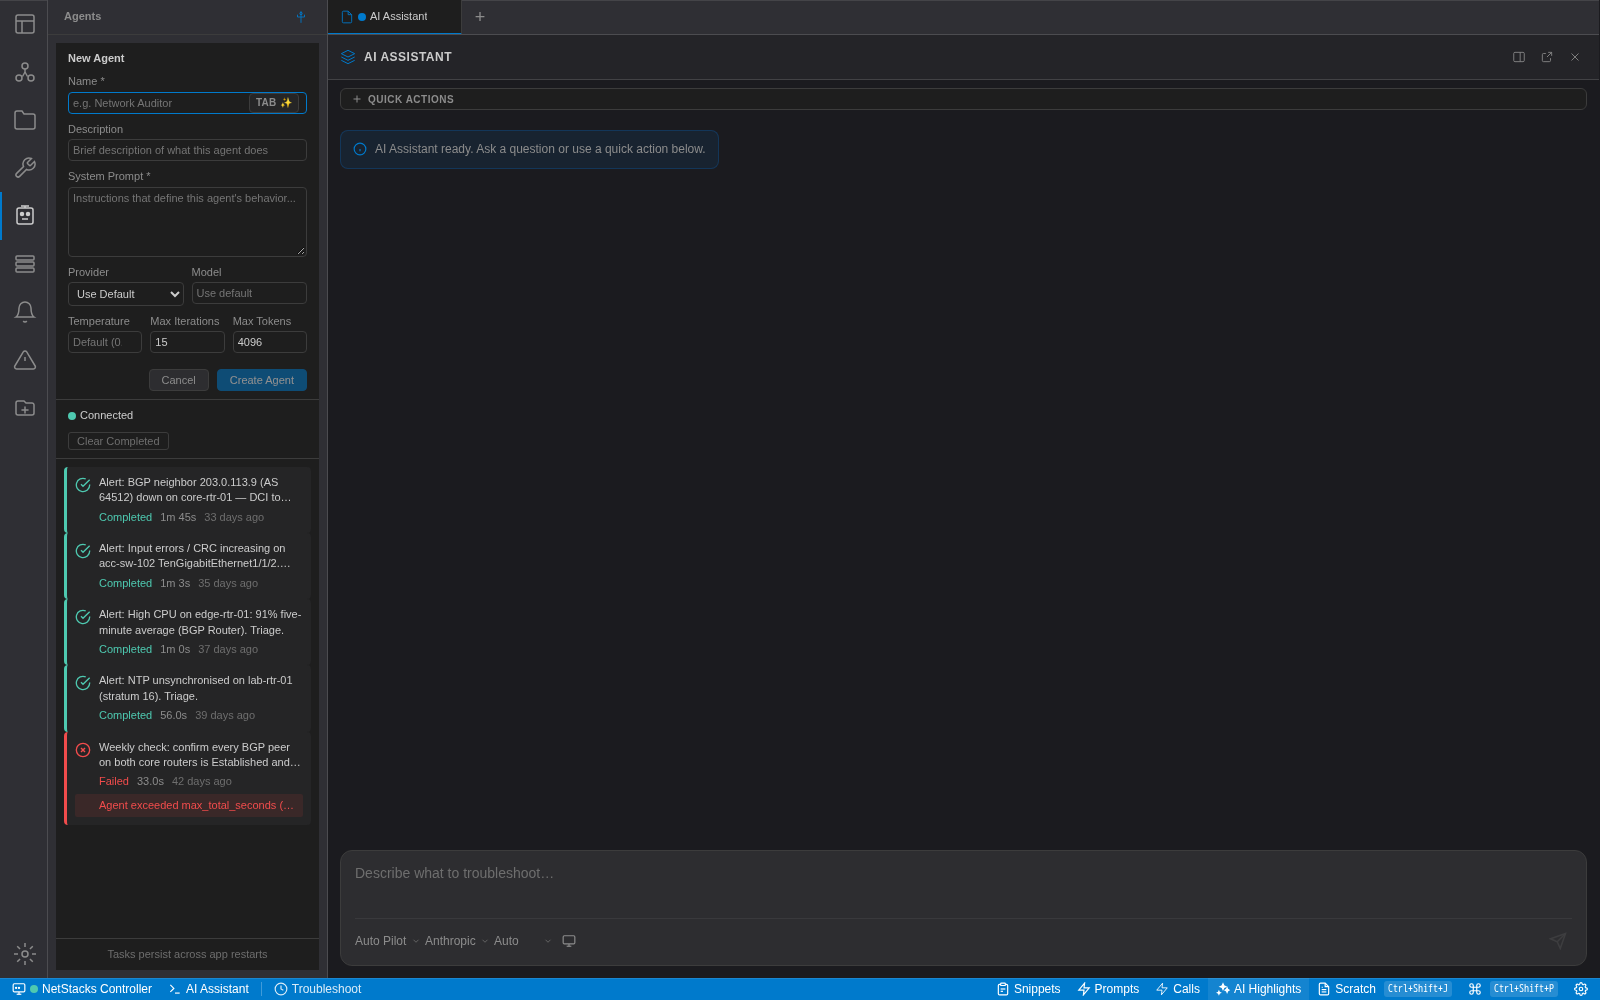
- Click the + button (“Create new agent”) next to AGENTS.
- Fill in Name (e.g. Network Auditor), an optional Description, and the System Prompt — the instructions that define how this agent behaves. Press Tab in an empty field to have the AI suggest a value.
- Optionally pick a Provider (Use Default, Anthropic, OpenAI, OpenRouter, Ollama, LiteLLM) and Model, and set Temperature, Max Iterations and Max Tokens.
- Click Create Agent.
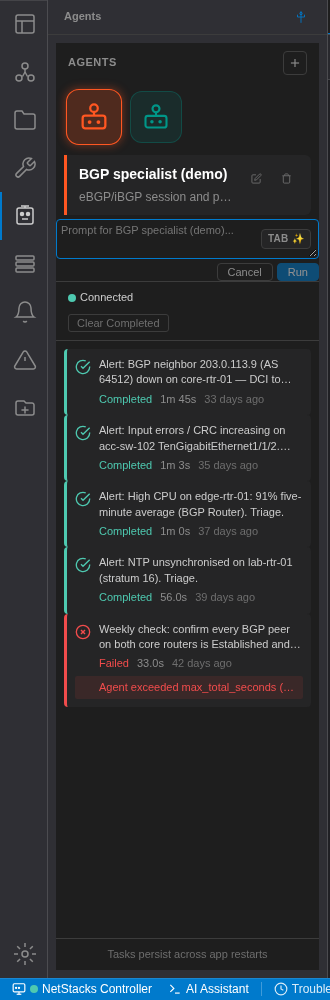
Select an agent icon to see its edit and delete buttons.
Run an Agent
- Click the agent's icon. A prompt box appears: “Prompt for <name>...”.
- Describe the task, for example “Check BGP neighbors on core-rtr-01 and summarize any that are not Established.”
- Click Run. The task appears in the list and updates as it progresses.
Follow a Run
Click a task to open it in a run tab. The tab shows:
- The transcript of the agent's steps and its final result.
- An answer box (“Type your answer…”) when the agent stops to ask you a question — background agents are told to ask rather than guess.
- Any documents the agent saved during the run; click one to open it.
- Continue this run as a chat to carry the conversation into the AI assistant.
Promote a Chat to a Background Task
In the AI assistant panel, the Promote to background task header button opens the Promote to Background Task dialog. Choose Latest Message, With Context or Custom, review the Task Prompt, and start it. The task then runs in the Agents panel while you keep chatting.
How Standalone Agents Work
In standalone mode, background agents run inside the local NetStacks agent:
- Defaults: up to 15 iterations, 4096 max tokens per response, temperature 0.7.
- Up to 3 tasks run at the same time; more wait in the queue.
- Agents can query your saved devices, run SSH commands, save documents, plan and analyze MOPs, ask you questions, and delegate to other agents.
- SSH commands from agents pass through the read-only command filter: only show/display-style commands are allowed. See Safety & AI Configuration Mode.
- Everything sent to the AI provider goes through sanitization first.
Approving Changes
In standalone mode, tools that change things — writing, editing or patching files, and any MCP tool — need your approval on every call. The task pauses and shows the tool and its arguments with Approve and Reject buttons. If nobody answers within 10 minutes the call is rejected automatically.
Sub-Agent Delegation
A standalone agent can hand part of its work to another agent you have defined (a specialist). The child runs as its own task and reports back to the parent. Limits keep this bounded: delegation can go at most 3 levels deep, and a task can have at most 5 children.
In the task list, use Show sub-agents / Hide sub-agents to expand a parent task. The run tab includes a workflow graph of the delegation tree with zoom controls — “Drag to move · double-click to open as a tab”.
Agent Defaults and Prompts
Settings → AI → AI AGENTS sets the defaults used by agents that don't override them: Model override (optional), Temperature, Max Tokens and Max Iterations.
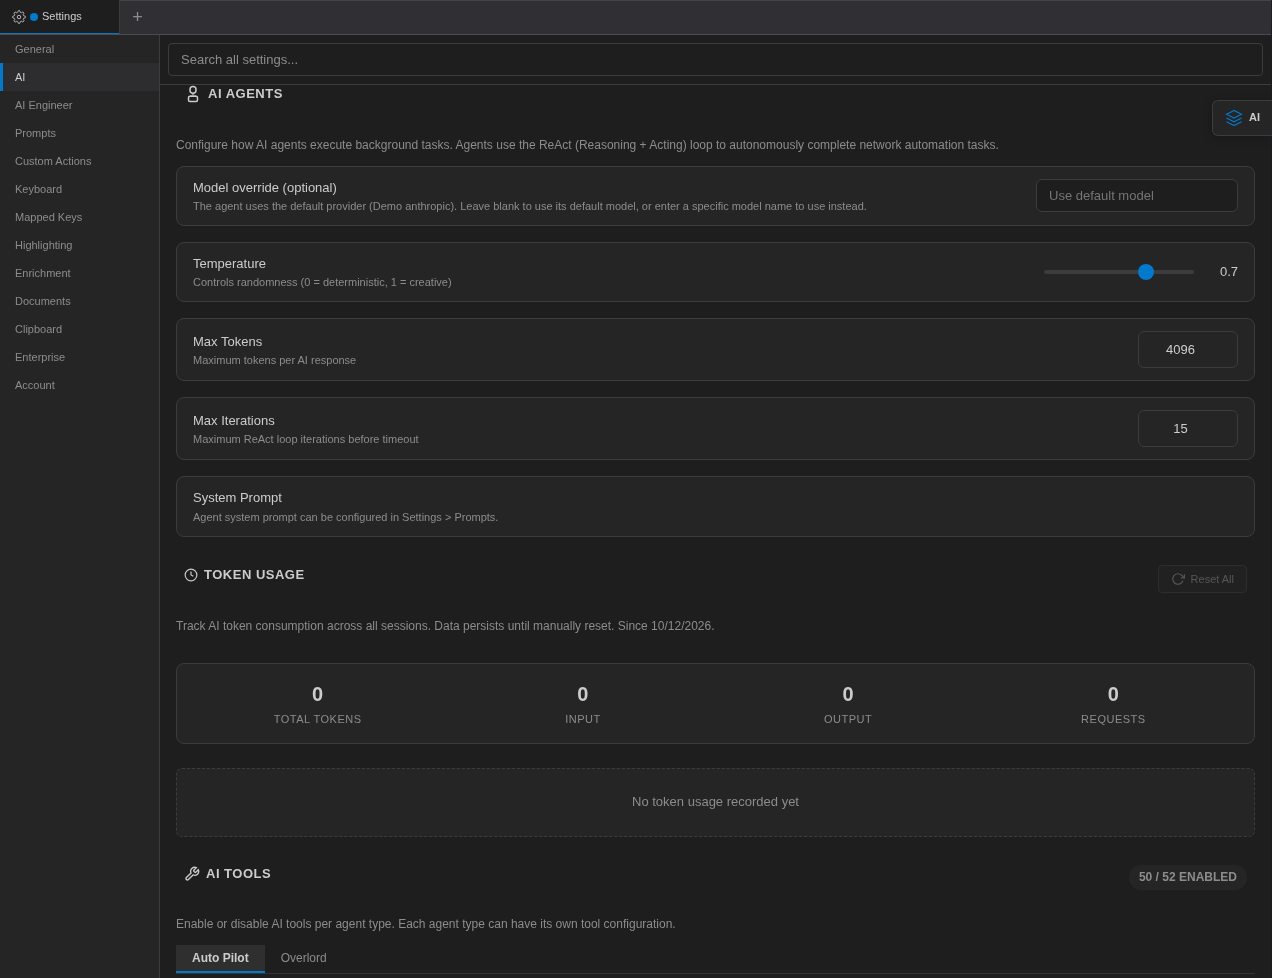
The base prompts live in Settings → Prompts: Default Agent (used when no custom agent is selected) and Agent Operating Guide (appended to every agent). See Quick Prompts & System Prompts.
Controller Agents Enterprise
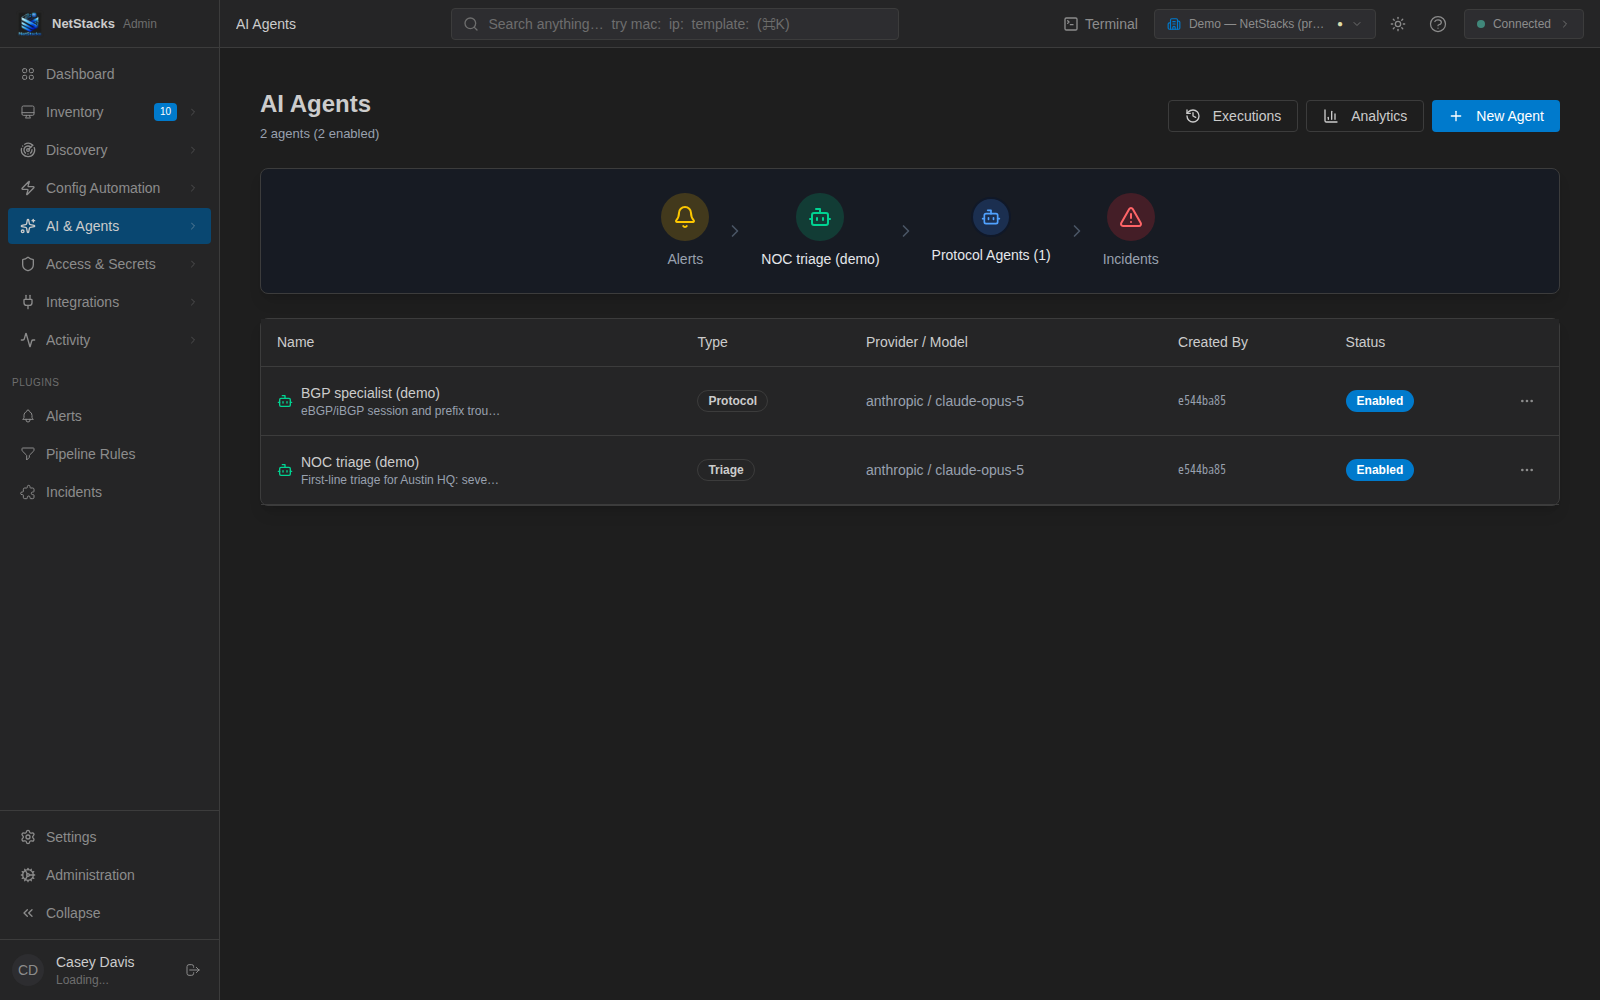
In the admin console, open AI & Agents → Agents (/ai/agents). The header shows how many agents exist and are enabled, with Executions, Analytics and New Agent buttons. (Analytics requires the Alerts plugin.)
The diagram at the top is a visual summary of your agents by type — Alerts, your triage agent, protocol agents and Incidents. The table lists each agent's Name, Type, Provider / Model, Created By and Status; the … menu offers Run, Edit, Disable/Enable and Delete.
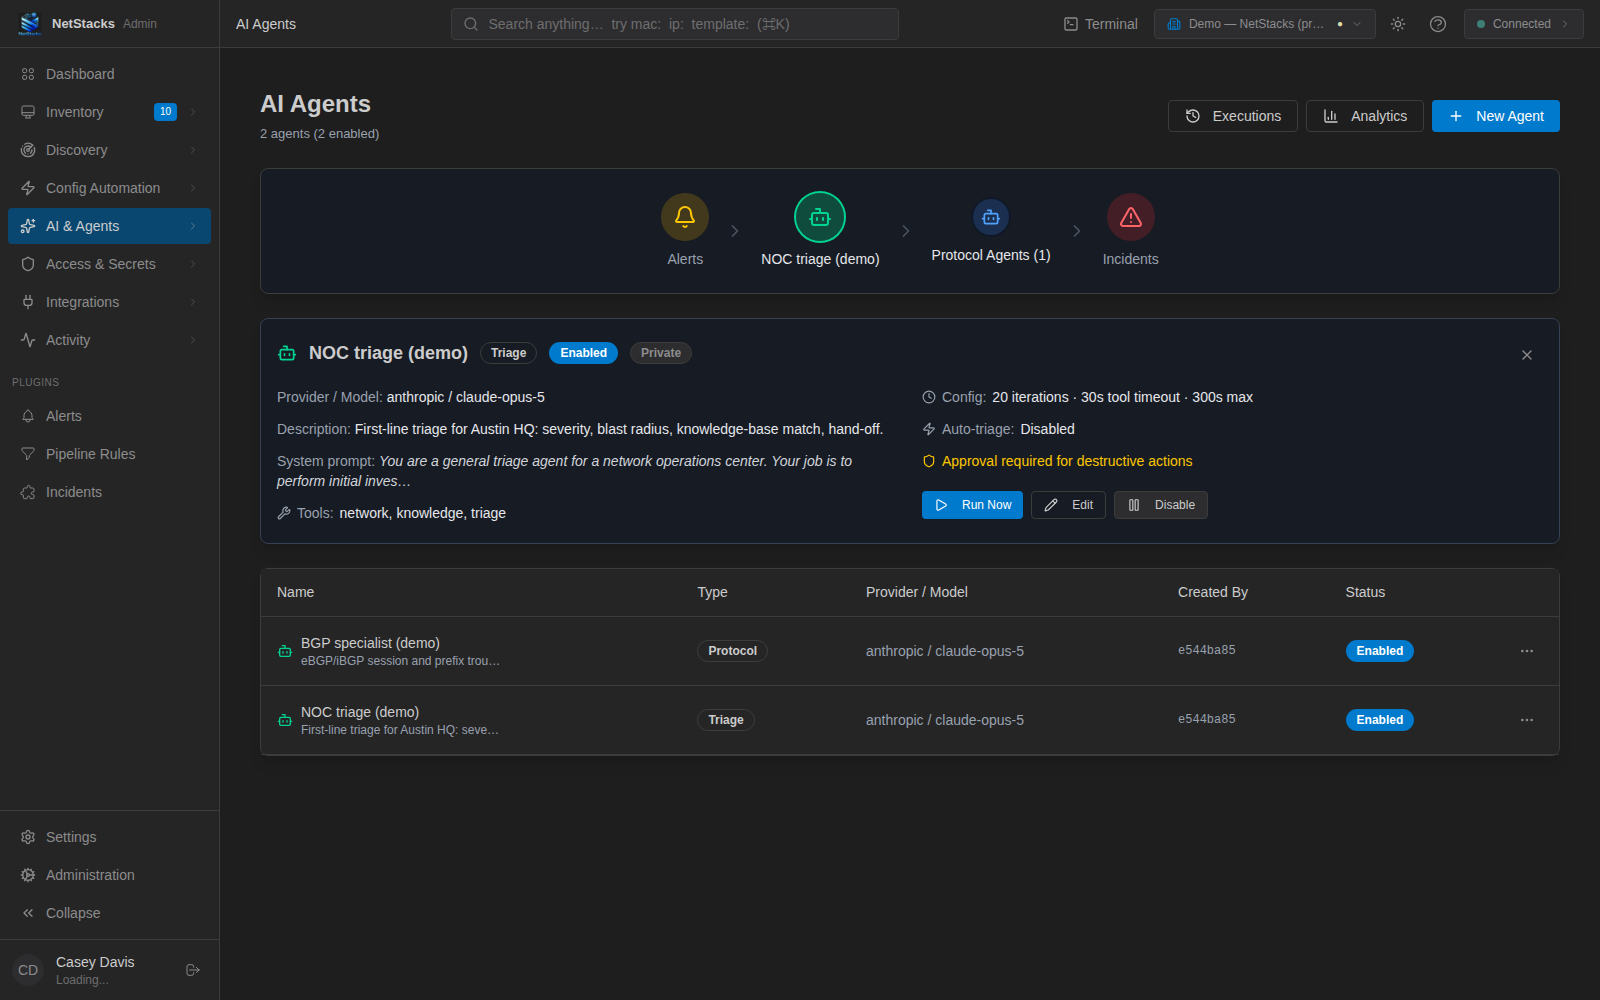
Click an agent in the diagram to open its detail panel: description, start of the system prompt, configuration limits, auto-triage state, and Run Now, Edit and Disable buttons.
Create a Controller Agent Enterprise
- Click New Agent.
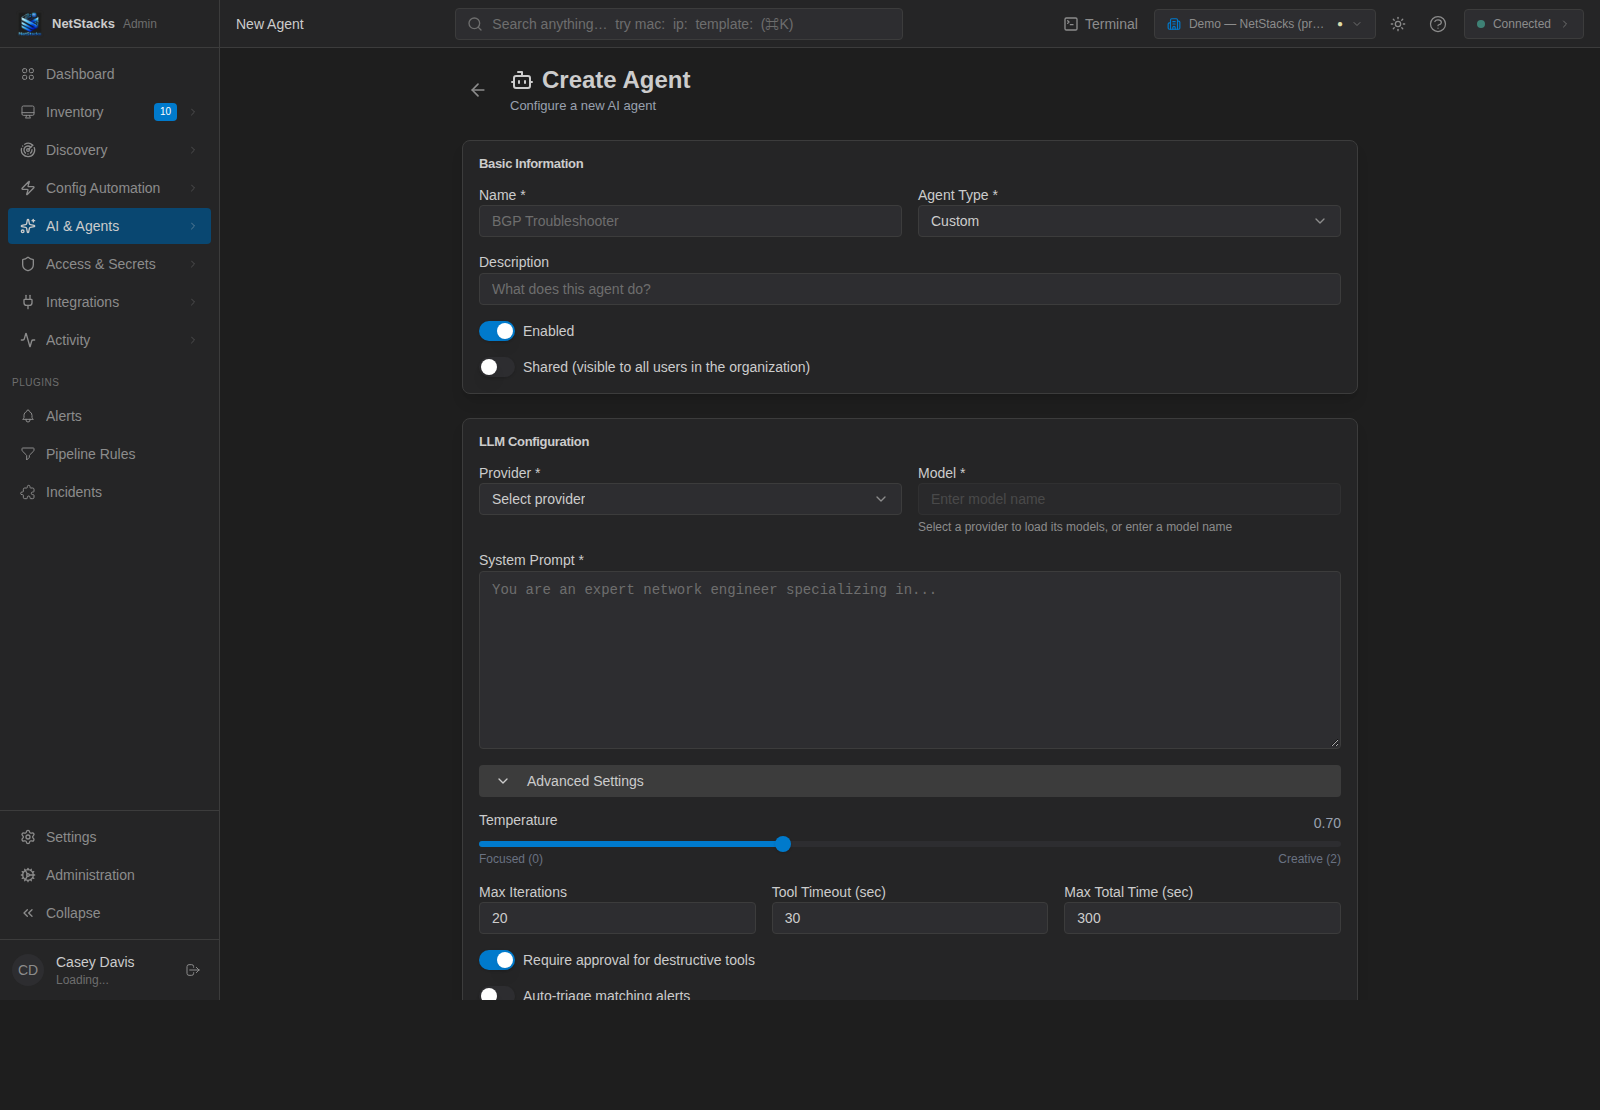
- Basic Information: Name, Agent Type (Triage, Protocol-Specific or Custom; Protocol-Specific adds a Protocol field such as bgp), Description, Enabled, and Shared (visible to all users in the organization).
- LLM Configuration: Provider, Model and the System Prompt that defines the agent's expertise and behaviour.
- Advanced Settings: Temperature (0–2, from Focused to Creative), Max Iterations, Tool Timeout (sec), Max Total Time (sec)and Auto-triage matching alerts.
- Click Create Agent.
Run an Agent Enterprise
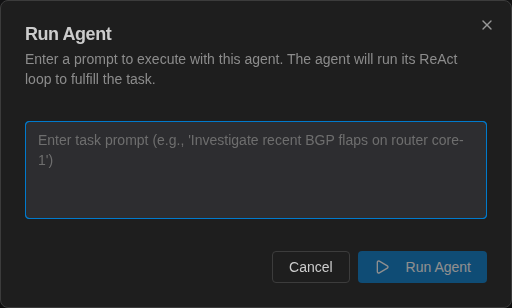
Click Run Now (or Run in the row menu). In the Run Agentdialog, enter the task — for example “Investigate recent BGP flaps on router core-1” — and click Run Agent. The agent runs its reasoning loop on your prompt using its system prompt, within its iteration and time limits. The result appears in Execution History.
Execution History Enterprise
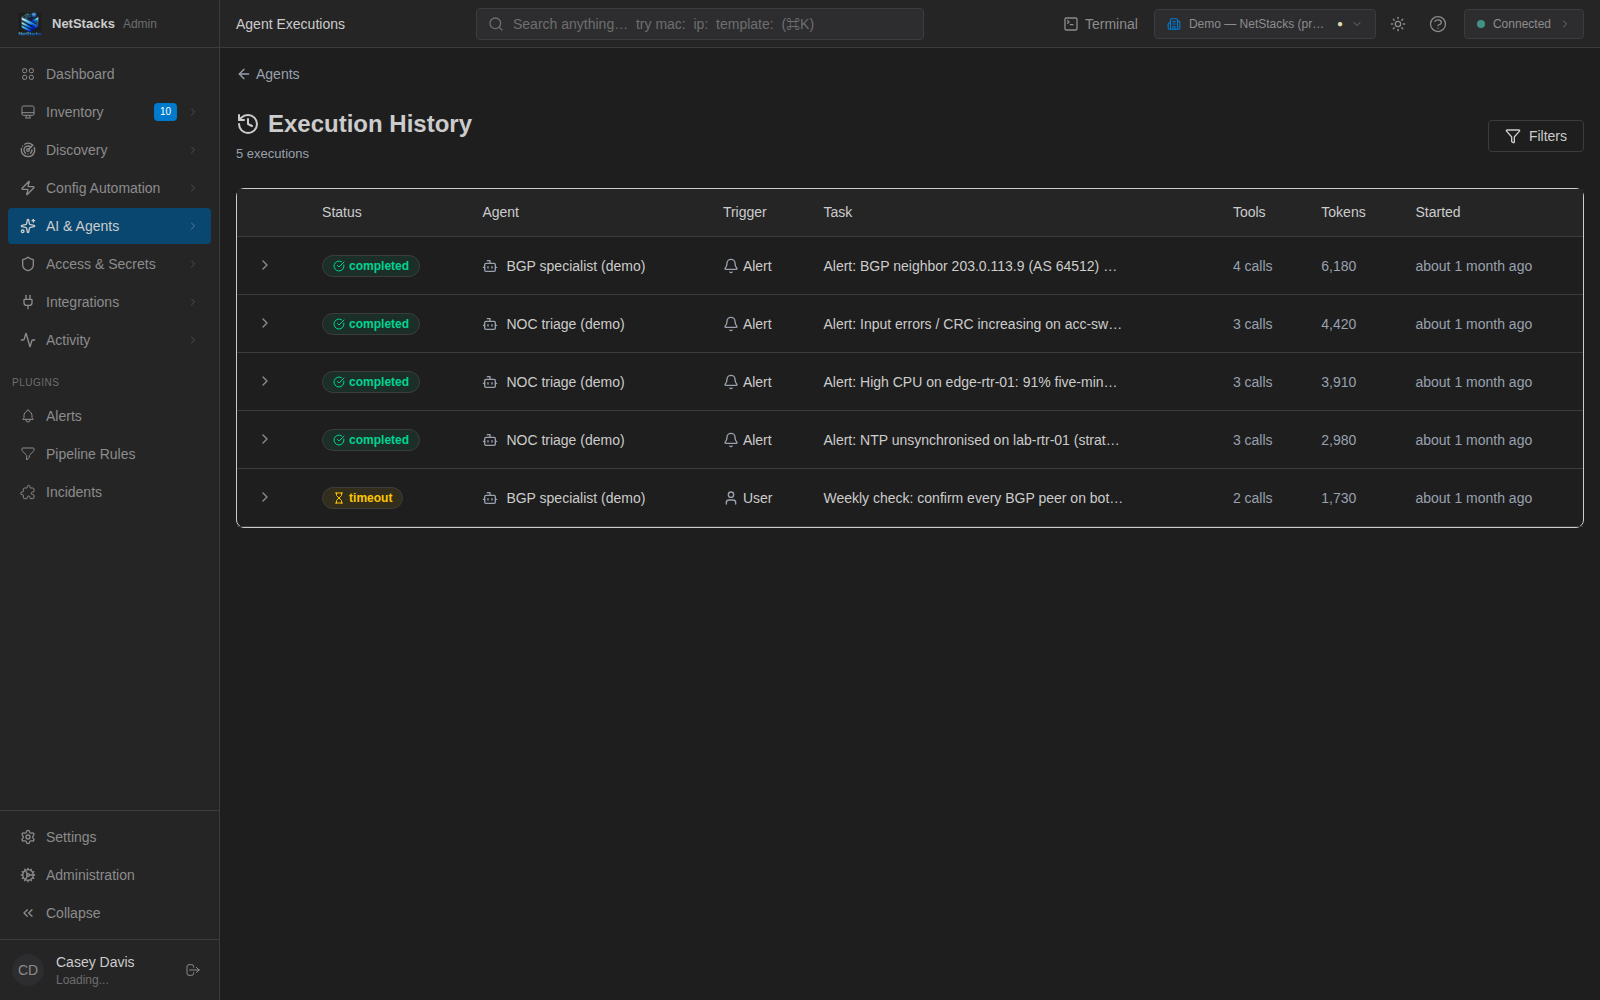
Click Executions on the Agents page (/ai/agents/executions). Each run shows Status, Agent, Trigger (User, Alert or Scheduled), Task, Tools (number of tool calls), Tokens and Started.
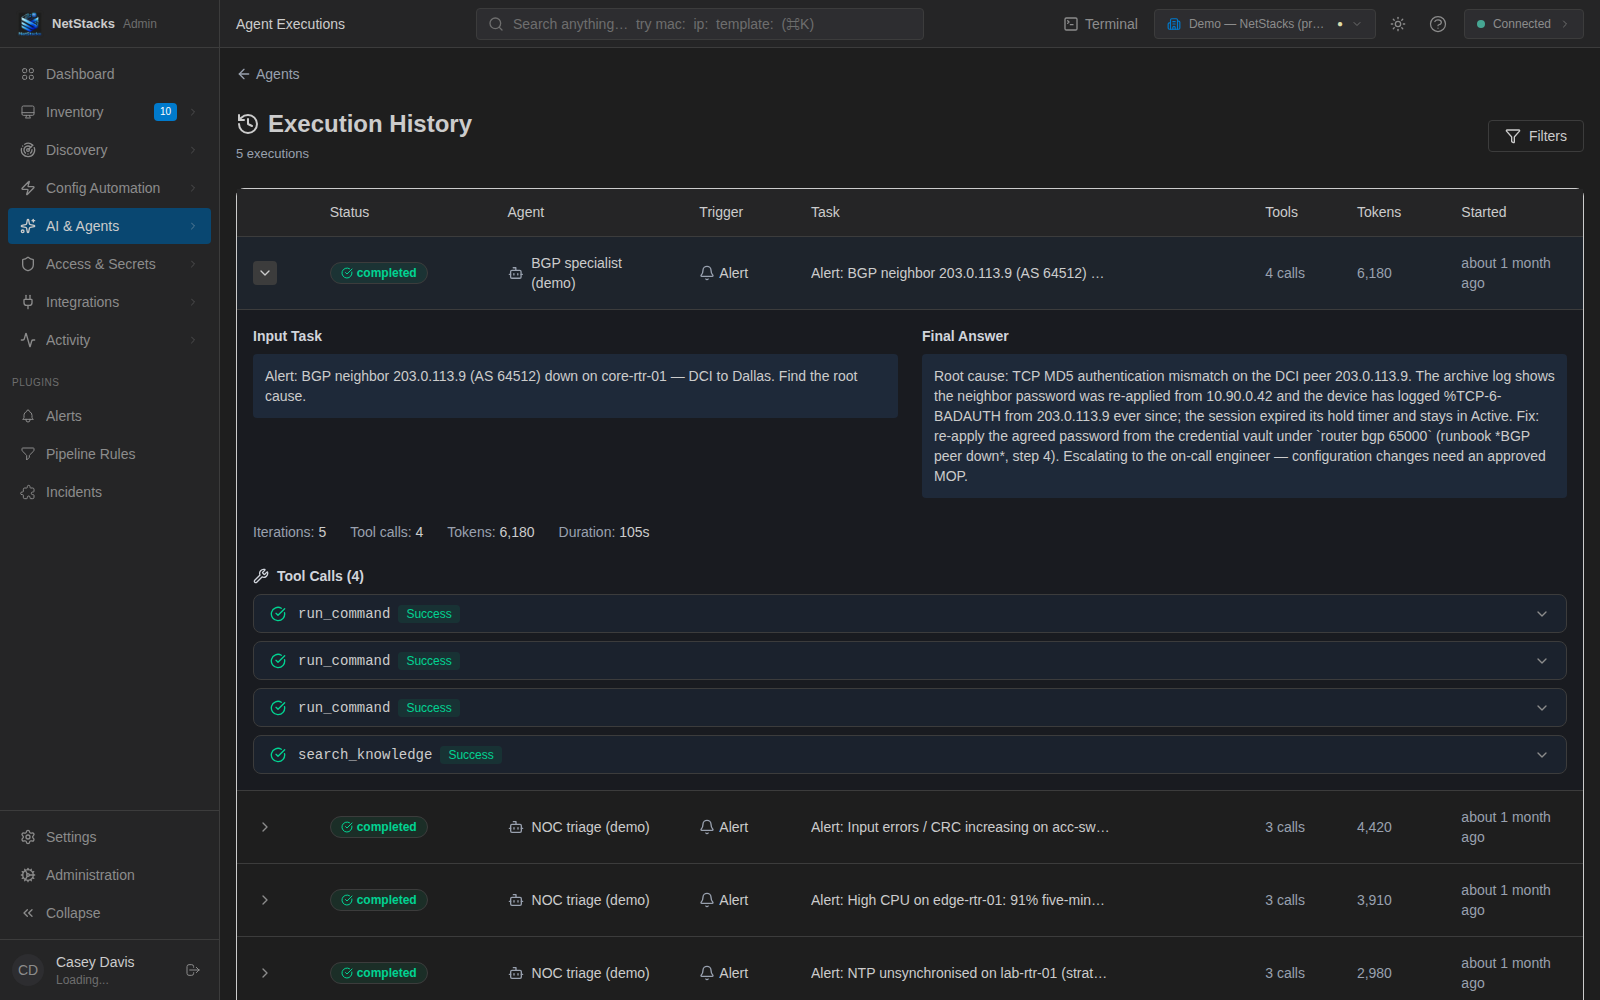
Expand a row to read the Input Task and Final Answer, the iteration, tool call, token and duration counts, and the list of Tool Calls with their outcome.
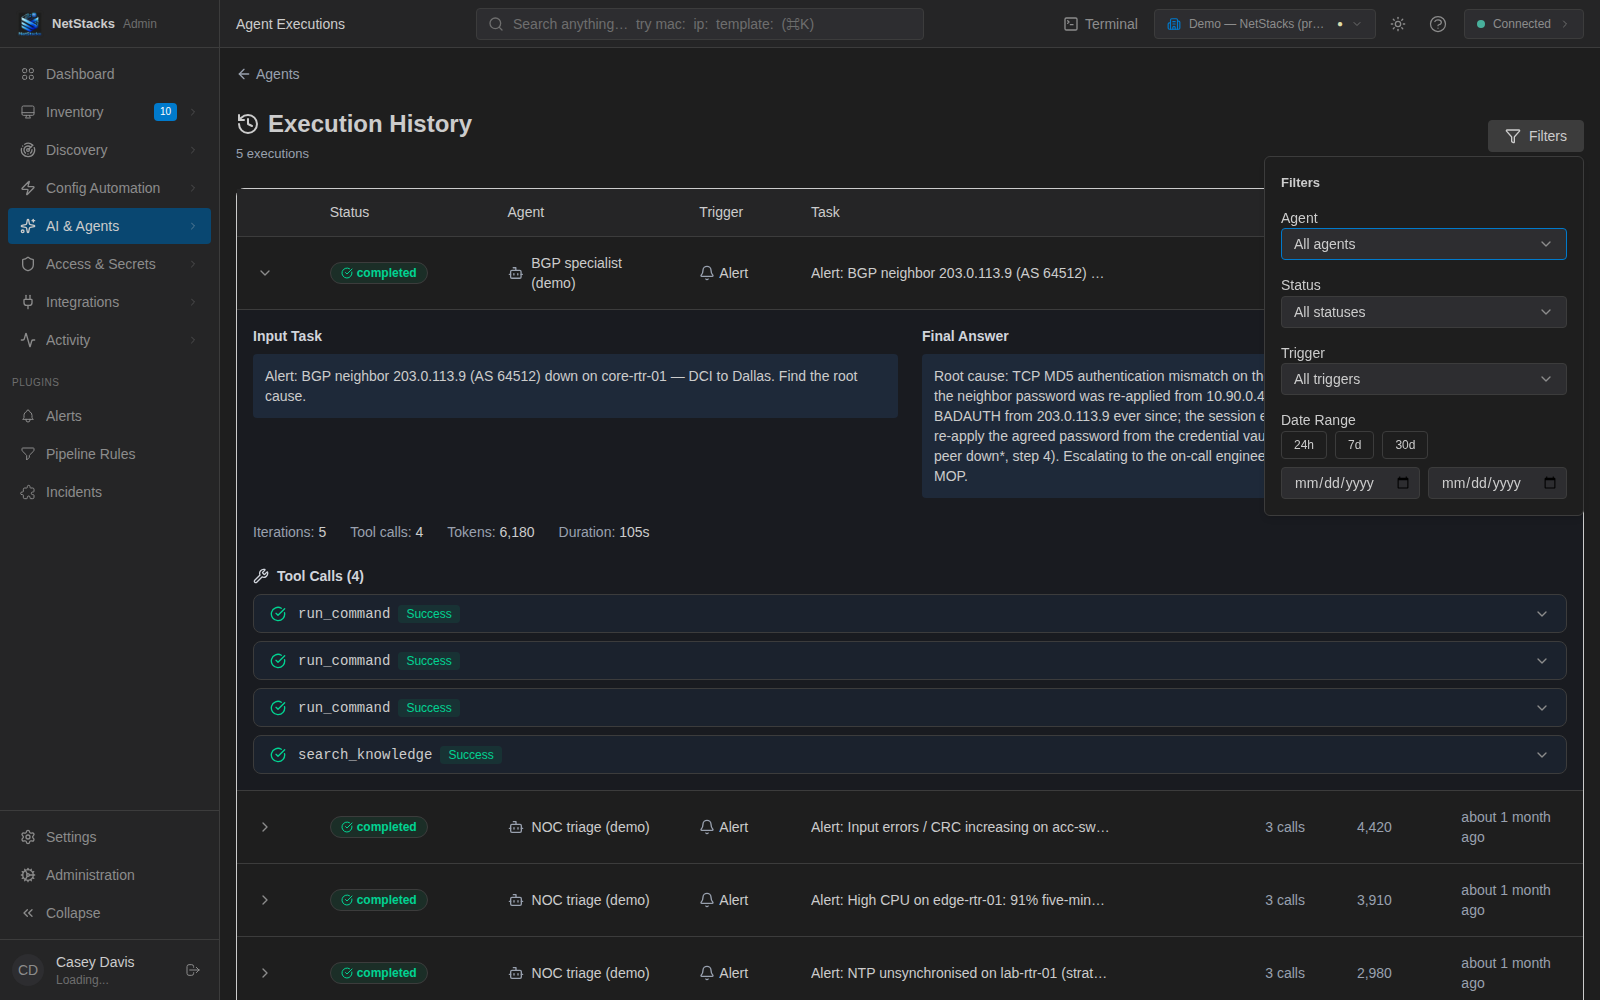
Filters narrows the list by Agent, Status, Trigger and Date Range (24h, 7d, 30d or custom dates).
Alert-Triggered Runs Enterprise
With the Alerts plugin installed, enabled agents that have Auto-triage matching alerts turned on can be started automatically when alerts arrive. The run receives the alert details as its task and is listed in Execution History with the trigger Alert. See Alert Pipeline.
Scheduled Agent Prompts Enterprise
To run an AI prompt on a schedule, use the Agent Task type in Scheduled Tasks. See Scheduled Tasks.